EasyManua.ls Logo

Metra Electronics 99-3012G User Manual

Metra Electronics 99-3012G
16 pages
To Next Page IconTo Next Page
Page #1 background imageLoading...
Page #1 background image
APPLICATIONS
METRA. The World’s best kits.
metraonline.com1-800-221-0932
© COPYRIGHT 2004-2013 METRA ELECTRONICS CORPORATION
REV. 2/20/2014 INST99-3012G
CAUTION: Metra recommends disconnecting the
negative battery terminal before beginning any
installation. All accessories, switches, and especially
air bag indicator lights must be plugged in before
reconnecting the battery or cycling the ignition.
NOTE: Refer to the instructions included with the
aftermarket radio.
INSTALLATION INSTRUCTIONS FOR PART 99-3012G
• ISODINheadunitprovisionwithpocket
• DDINheadunitprovisions
• InterfaceincludedretainsfactoryOnStar,Bluetooth,
andallwarningchimes
• Providesa12-voltaccessorypowerandVSS,
parkingbrake,andreversesignals
• Painted Gray to match factory finish
•A)Radiotrimpanel•B)Radiobrackets•C)Pocket•D)(4)#8x3/8”Phillipstruss-headscrews
•E)Panelclips•F)Interface•G)16-pinharness•H)4-pinto4-pinresistorpad
•I)22-pinto44-pinharness
KIT FEATURES
KIT COMPONENTS
Chevy Sonic 2012-up
99-3012G
B EC DA F
G H
I
WIRING & ANTENNA CONNECTIONS(soldseparately)
WiringHarness:
•Interfaceincluded
AntennaAdapter:
•40-EU55multi-useantennaadapter
•Panelremovaltool•Phillipsscrewdriver
•Socketwrench
TOOLS REQUIRED
Question and Answer IconNeed help?

Do you have a question about the Metra Electronics 99-3012G and is the answer not in the manual?

Metra Electronics 99-3012G Specifications

General IconGeneral
TypeDash Kit
ColorGray
DIN MountingYes
ISO MountingYes
MaterialPlastic
Product TypeDash Kit
Compatible WithAftermarket radio

Summary

Dash Disassembly

Remove Radio Trim Panel

Unsnap and remove the panel surrounding the radio and vents.

Remove A/C Vents

Unclip and remove the factory A/C vents from the radio trim panel.

Remove Radio

Remove four 7mm screws to detach the radio from the dash.

Kit Assembly

ISO DIN Head Unit Installation

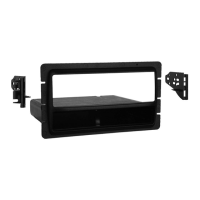
Install ISO DIN head unit with pocket and connect wiring.

Double DIN Head Unit Installation

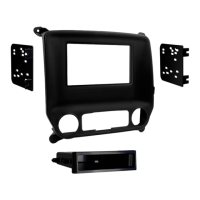
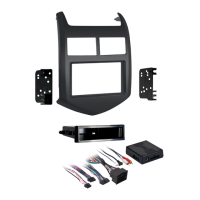
Install Double DIN head unit into housing brackets and connect wiring.

Axxess Interface Installation

Interface Features and Components

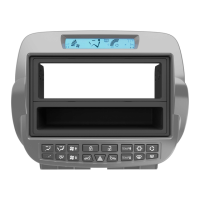
Details interface features, components, and required tools for installation.

Connecting the 16-pin Harness

Connects the 16-pin harness wires to the aftermarket radio for power and signals.

Connecting the 44-way Harness

Connects the 44-way harness wires to the aftermarket radio for audio, ground, and AUX.

Vehicle-Specific Wiring

Instructions for connecting the interface based on vehicle amplification type.

Interface Programming and Adjustments

Covers interface programming, chime, audio, and OnStar volume adjustments.

Vehicle Customization with Optional LCD

Customizing Vehicle Settings

Guide to using the optional LCD to adjust vehicle features such as language settings.

Related product manuals