99-3012G
Axxess Interface
Installation
From the 16-pin harness:
• ConnecttheRedwirestotheignition/accessory
wireoftheaftermarketradio
• ConnecttheOrange/Whitewiretothe
illuminationwireoftheaftermarketradio.Ifthe
aftermarketradiohasnoilluminationwire,tapeoff
theOrange/Whitewire.
• ConnecttheBlue/Whitewiretotheampturnon
wireoftheaftermarketradio.
• ConnecttheBrownwiretothemutewireofthe
aftermarketradio.Iftheaftermarketradiodoesnot
haveaMutewire,tapeuptheBrownwire.
• ConnecttheWhitewiretotheleftfrontpositive
speakeroutputoftheaftermarketradio
• ConnecttheWhite/Blackwiretotheleftfront
negativespeakeroutputoftheaftermarketradio
• ConnecttheGraywiretotherightfrontpositive
speakeroutputoftheaftermarketradio
• ConnecttheGray/Blackwiretotherightfront
negativespeakeroutputoftheaftermarketradio
• TheVioletwireisnotusedintheapplication
• TheViolet/Blackwireisnotusedintheapplication
• TheGreenwireisnotusedintheapplication
4
•Cuttingtool•Crimpingtool•Tape•Connectors
(butt-connectors,bellcaps,etc.)
TOOLS REQUIRED
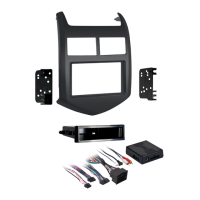
•4-pinto4-pinresistorpadharness•16-pinwith
strippedleads•22-pinto44-pinCamaroHarness
•18-pinto10-pinHVACHarness
INTERFACE COMPONENTS
FEATURES
• Providesaccessory(12-volt10-amp)
• RetainsR.A.P.(RetainedAccessoryPower)
• Usedinamplifiedornon-amplifiedsystems
• Retainsallwarningchimes
• ProvidesNAVoutputs(parkingbrake,reverse,
mute,andV.S.S.)
• RetainsOnStar/OEBluetooth
• AdjustablevolumeforchimesandOnStar
• Highlevelspeakerinput
• Micro“B”USBupdatable
• Retainsbalanceandfade
Installing the Interface
• TheGreen/Blackwireisnotusedinthisapplication.
Thefollowingwiresarefortheaftermarketradiosthat
havenavigationbuiltin:
• ConnecttheLight Greenwiretotheparkingbrake
wireoftheaftermarketnavigationradio.
• ConnecttheBlue/PinkwiretotheVSSorspeed
sensewireoftheaftermarketnavigationradio.
• ConnecttheGreen/Purplewiretothereversewire
oftheaftermarketnavigationradio.
From the 44-way harness:
• ConnecttheBlackwiretothegroundwireofthe
aftermarketradio.
• ConnecttheRCA’stotheAUXinontheaftermarket
radio(ifequipped).
Note: This will allow you to retain the 3.5 AUX JACK
in the console.
• ConnecttheYellowwiretothe12-voltconstantwire
oftheaftermarketradio.
• Ifthevehicleisamplifieddisconnectthe4-pin
harnesslocatedbetweenthe44-wayand22-way
connectorandconnectthesupplied4-pinto4-pin
resistorpad.
 Loading...