EasyManua.ls Logo

Metra Electronics 99-5717 User Manual

Metra Electronics 99-5717
2 pages
To Next Page IconTo Next Page
Page #1 background imageLoading...
Page #1 background image
KIT COMPONENTS
KIT FEATURES
ISO-DIN
head unit
provisions
Incorporates
Incorporated
factory climate
controls into
installation
APPLICATIONS
CAR PAGE
FORD
Taurus 2004-2007..................................................1-3
MERCURY
Sable 2004-2007.....................................................1-3
TOOLS REQUIRED
Torx-head screwdriver
86-5618 - Head unit
removal keys
99-5717
INSTALLATION
INSTRUCTIONS
Open the trunk, remove (4) pop-clips from the driver's side trunk liner and remove the liner.
(see
Fig. A). Locate the factory tuner on the wall of the trunk and disconnect the speaker and
antenna plugs (it is NOT necessary to remove the tuner). (see Fig. B). Plug the 70-5715 into
the unit speaker plug and the antenna extension lead into the unit antenna plug. Slide the
extension harness through the space in the back seat between the seat back and seat bottom.
Unclip the rocker trim, tuck the extension harness under the carpet and stretch the harness to
the back of the dash. (Replace the rocker trim when completed). Splice the speaker leads on
the extension harness into the rear of the aftermarket head unit. Plug the factory wiring
harnesses into the switch connectors (previously mounted in step #2) and audio connectors
on the back of the Integrated Mounting Kit.
5
(located under
the rear deck)
Re-connect the battery terminal and test the unit, climate controls and rear defroster for proper
operation. Snap the Integrated Mounting Kit assembly into the sub-dash.
6
Fig. A
Fig. B
3
ISO Faceplate
ISO Brackets
(2) #8 x 3/8"
Phillips Pan-head Screws
Integrated
Mounting Kit
1-800-221-0932 www.metraonline.com
© COPYRIGHT 2001 METRA ELECTRONICS CORPORATION
rev. 03/08/07 INST99-5717
Extension
Passenger Air Bag
On/Off Light
Question and Answer IconNeed help?

Do you have a question about the Metra Electronics 99-5717 and is the answer not in the manual?

Metra Electronics 99-5717 Specifications

General IconGeneral
ColorBlack
MaterialPlastic
Installation TypeDash Kit
ISO DDIN Radio ProvisionYes
Painted to match factory colorYes
FunctionAllows for the installation of an aftermarket radio

Summary

Preparation and Trunk Connections

Trunk Liner and Tuner Disconnection

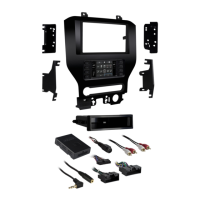
Remove trunk liner, disconnect speaker and antenna plugs from factory tuner.

Extension Harness Routing

Route extension harness through seat back, under carpet to the dash.

Factory Wiring Splice

Splice speaker leads from extension harness into aftermarket head unit.

Final Connections

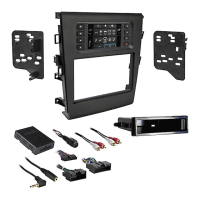
Connect factory harnesses to switch connectors and audio connectors.

Final Testing and Mounting

Reconnect battery, test controls, and mount the Integrated Mounting Kit.

Dash Panel Removal and Climate Control Transfer

Disconnect Battery and Remove Dash Panel

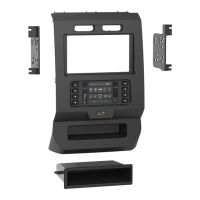
Disconnect battery and pull factory radio/climate control panel from dash.

Disconnect Panel Connectors

Disconnect audio, blower, vacuum, and other connectors from the panel.

Remove Factory Mounting Clips

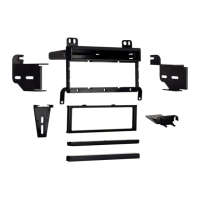
Remove torx-head screws securing clips to factory panel.

Attach Clips to Mounting Kit

Mount factory clips to the Integrated Mounting Kit using torx-head screws.

Remove Climate Control Dials and Switches

Pull climate control dials off, remove temp/fan switches and climate switch.

Mount Switches and Dials to Kit

Mount switches to kit, insert dials onto posts, and secure.

Head Unit Installation

ISO Head Unit Installation

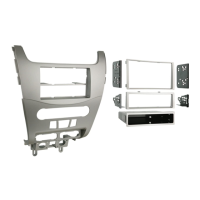
Snap ISO Faceplate, attach ISO Brackets, slide head unit, and mount.

DIN Head Unit Installation

Slide DIN cage into kit, bend tabs, slide head unit into cage, and secure.

Related product manuals