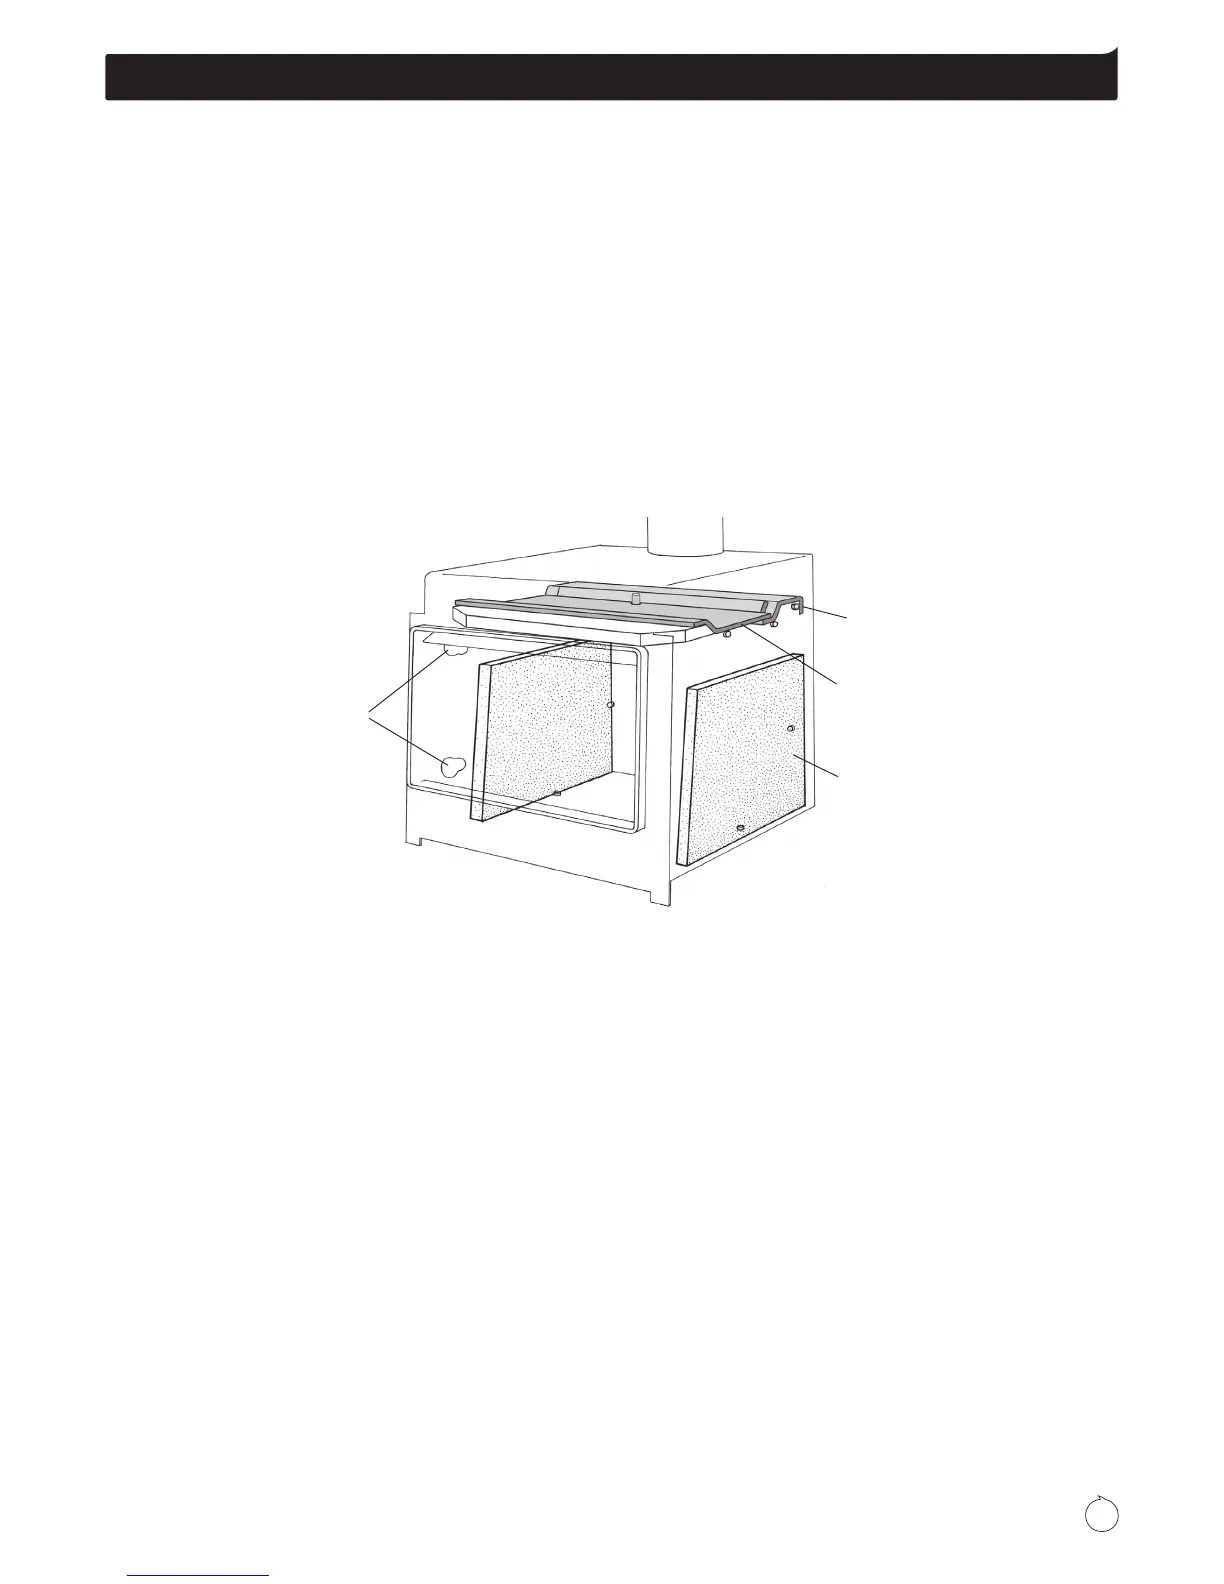
5
Diagram 3
Wetback
connections
Side brick
(X2)
Rear top
baffle
Front top
baffle
Prior to installing your Metro replace insert into a replace
cavity, it is important that certain clearances and other
requirements are complied with as detailed below :-
Fireplace Cavity
The chimney must be swept. Also: -
- Check for cracks and general overall condition. If repairs
are necessary, they must be carried out by a suitably
qualied person.
- Check the cavity dimensions to ensure the replace insert
will t. It is usually necessary to remove the re bricks from
the lower replace cavity.
- The base of the replace cavity on which the Metro
replace insert will rest must be level. If it is not, it should be
levelled using mortar.
- If an ash removal door exists in the base of the replace
cavity it should be sealed shut to prevent air entering the
cavity.
- If a timber or combustible mantelshelf exists above the
replace opening, it should be a minimum distance of
460mm above the top of the Metro’s fascia.
If less than the above minimum specied, a deector or heat
shield will be required to be tted under the mantelshelf or to
the top of the fascia.
Pre-Installation