SECTION 3 - M. FRAME, ADJ. RING, TRAMP REL. & CLRNG JACK ASSY
3-24
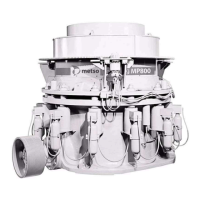
MP SERIES CONE CRUSHER TECHNICAL REFERENCE MANUAL
The gauging assembly consists of an
adapter, bleeder valve, tank valve and
pressure gauge which are attached as one
unit directly to the gas valve stem on the
accumulator. When attached to the
accumulator, the gauging assembly enables
gas pre-charge to be checked. The charging
assembly is only used when charging the
accumulators; pressure readings can be
taken and excess pressure bled off with just
the gauging assembly.
6. Remove the 3 m (10 ft.) hose from the
gauging assembly at the swivel connector.
Turn the T-handle on the adapter open
(counter clockwise) until the handle can no
longer be turned. The bleeder valve screw
must be closed (turn clockwise).
7. Thread the adapter onto the accumulator’s
gas valve stem. Tighten the adapter hand
tight and then tighten an additional quarter
turn to compress the sealing washer in the
adapter to prevent gas leakage.
8. Turn the T-handle on the adapter closed
(turn clockwise) until the shaft inside the
adapter fully depresses the valve core in the
gas valve stem on the accumulator.
Then slowly open (turn counter clockwise)
the bleeder valve screw until the nitrogen
gas begins to escape. Allow all of the gas to
escape to the atmosphere. When the pressure
gauge on the adapter reads zero (0) pressure,
the accumulator is considered empty.
Remove the gauging assembly from the
accumulator.
9. Reinstall the washer and valve cap on the
gas valve stem. Reinstall the valve guard on
the bottom of the accumulator.
10. Due to the physical size and weight of the
accumulator it is necessary to remove the
tramp release cylinder and accumulator as
an assembly. Refer to Tramp Release
Cylinder and Accumulator Removal earlier
in this section.
11. After removing the tramp release cylinder
and accumulator, lay the assembly in a
horizontal position on a flat surface.
12. Remove the hex nuts, lock washers and cap
screws from the clamp segment around the
accumulator body and remove the clamp
segment from the accumulator bracket.
13. Remove the hex head cap screws from the
accumulator flange and separate the
accumulator from the release cylinder, being
careful not to damage the flange.
14. Clean the hex head cap screws and tapped
holes in the release cylinder boss with
Loctite Safety Solvent 75559, alcohol or
acetone.
15. Install a new O-ring in the flange groove of
the replacement accumulator.
16. Position the replacement accumulator on the
flat surface, apply Loctite 271 to the cap
screws and install the accumulator on the
tramp release cylinder. Tighten the cap
screws to 470 Nm (345 ft-lb).
17. Install the clamp segment and attaching
hardware.
18. After the accumulator is installed, the tramp
release cylinder can be remounted on the
Crusher. Refer to Tramp Release Cylinder
and Accumulator Installation earlier in this
section.
19. Pre-charge the replacement accumulator
with nitrogen. Refer to Checking
Pre-Charge Pressure and Charging the
Accumulator (Tramp Release System) in
Section 12 for instructions on pre-charging
the accumulator.
NOTICE
Do not over tighten the gauging assembly
adapter. Excess torque can twist off the
valve stem and/or distort the copper sealing
washer in the adapter causing leakage.
 Loading...