(5)
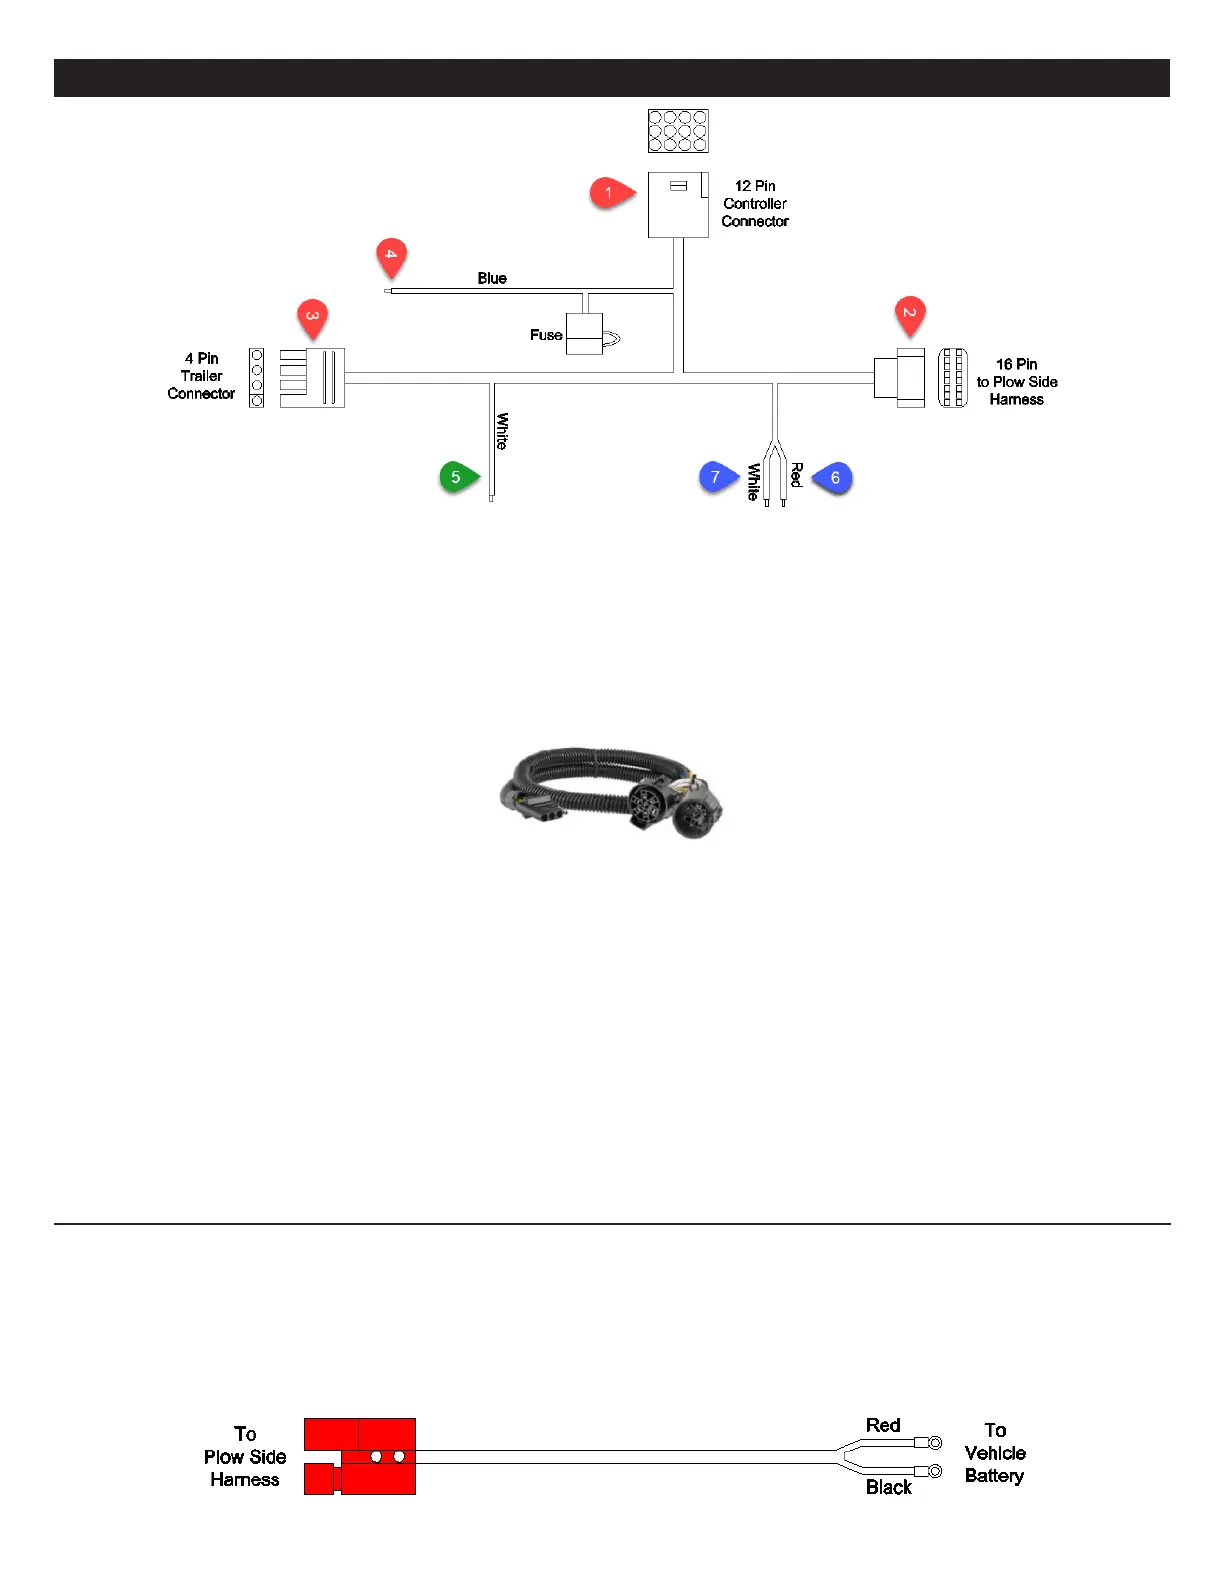
Wiring Harnesses & Controller
Vehicle Side HarnessVehicle Side Harness
1) Route the 12 pin connector into vehicle’s cab and plug into controller.
2) Route the 16 pin connector to the front of the vehicle and plug into the plow side harness.
3) Route the 4 pin connector to rear of vehicle and plug into vehicle’s trailer harness using the trailer adapter harness (50).
Use cable ties to ensure the harness is secured to the vehicle’s frame.
4) The BLUE wire will connect to the vehicle’s keyed accessory circuit. This is to ensure the plow turns on and o with the ve-
hicle’s ignition.
The following step is for 2015 & later GM vehicles with an alternator relay...The following step is for 2015 & later GM vehicles with an alternator relay...
5) The WHITE wire will connect to 2015 & Later GM vehicles with alternator relay. See Meyer Products Service Bulletin SB252.
The following two steps are optional and may be enforced by local law which requires your vehicle lights to be o while your plow The following two steps are optional and may be enforced by local law which requires your vehicle lights to be o while your plow
lights are on and vice versa...lights are on and vice versa...
6) Connect the RED to the HIGH beam function.
7) Connect the WHITE to the LOW beam function.
Power HarnessPower Harness
1) Route through the vehicle’s grille.
2) Connect the terminals to the vehicle’s battery. Red to Positive and Black to Negative.
Trailer Adapter Harness