(6)
Plow Assembly & Adjustments
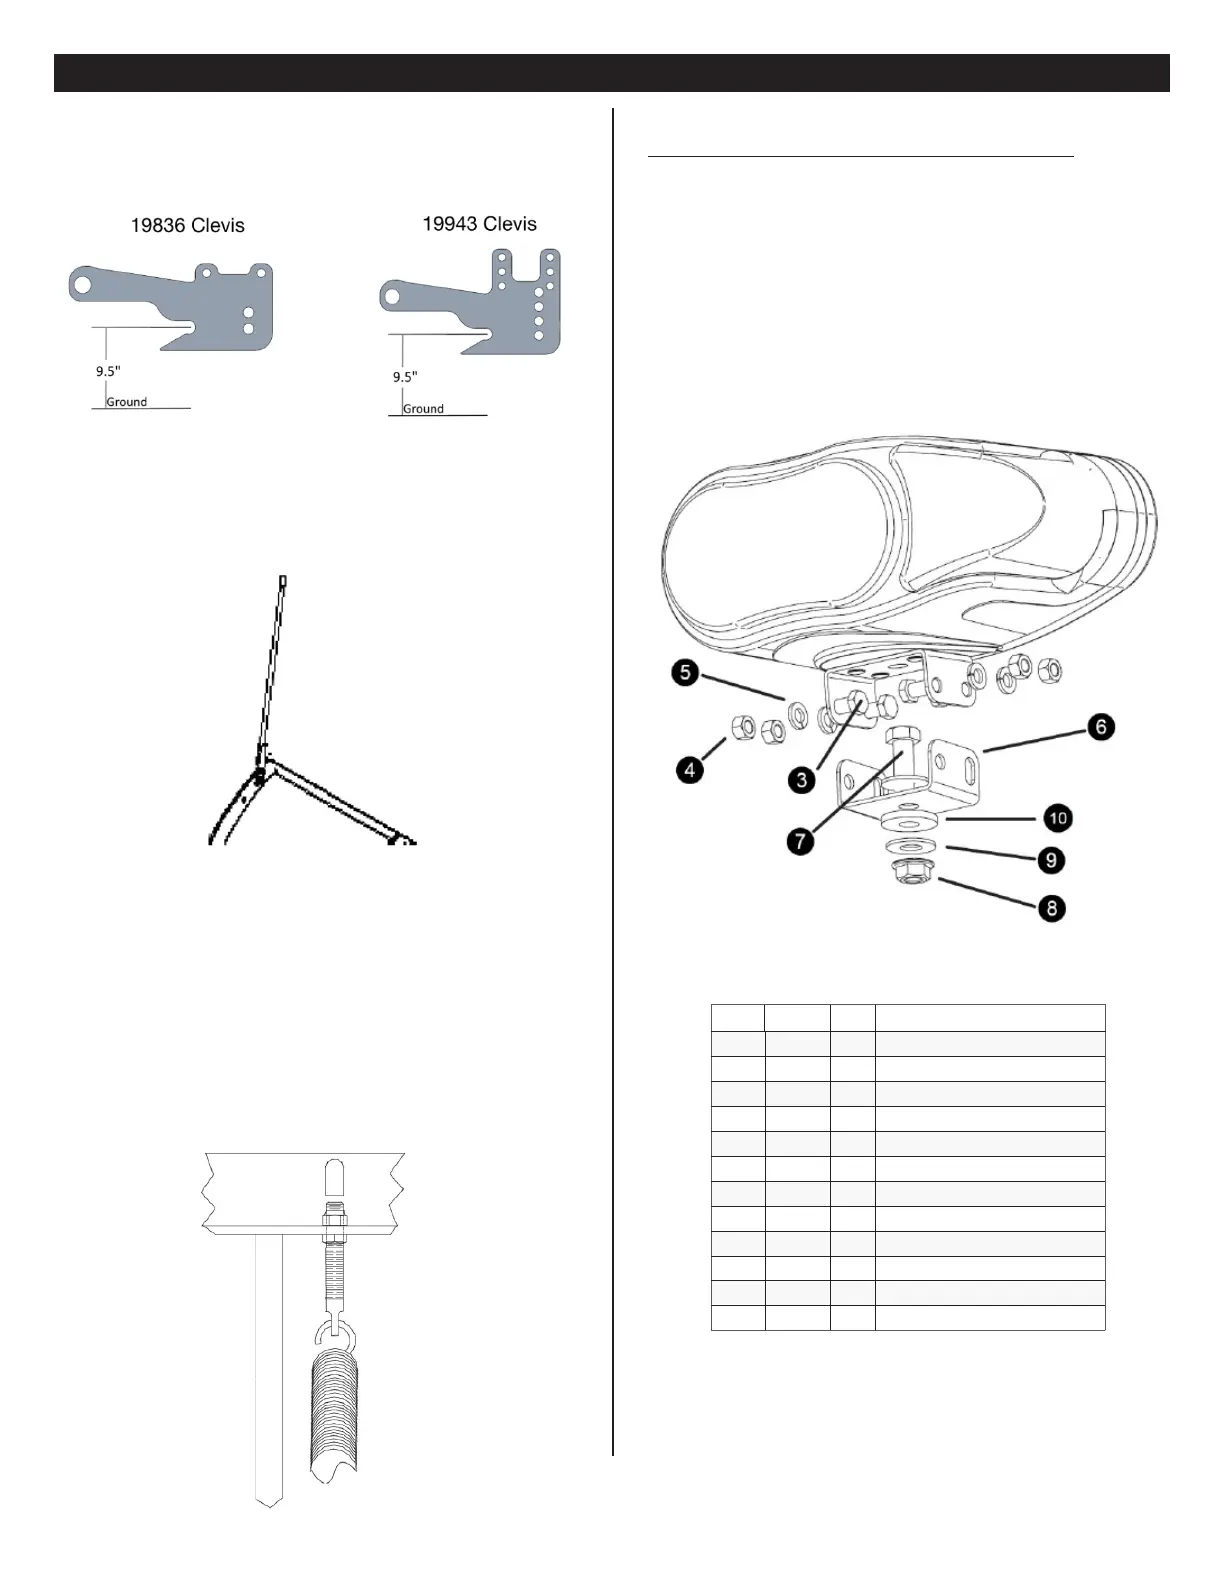
Nite Saber LED LightsNite Saber LED Lights
See seperate Nite Saber LED instructions for further information.
Mount the lights as shown below.
Connect both male ends from the snow plow light to the female ends on
the Plow Side Harness. Ensure all wiring harnesses are secured against the
lift frame.
Check snow plow lights and blinkers to ensure proper operation. If operat-
ing in reverse (i.e. driver side blinking instead of passenger side), reverse the
harness connections.
Note: All electrical connections should have both ends coated with a dielec-
tric grease (Meyer Part # 15632) prior to nal installation. This will ensure a
good connection and help in preventing corrosion.
Nite Saber LED Parts List
Item Part QTY Description
1 23067 1 Nite Saber LED Kit
- 23066 1 • Passenger Side LED
- 23065 1 • Driver Side LED
2 08126 1 • Hardware Bag
3 ----- 8 • • Hex Bolt 3/8” x 3/4”, SS
4 ----- 8 • • Hex Nut 3/8”, SS
5 ----- 8 • • Lock Washer 3/8”, SS
6 ----- 2 • • Metal Bracket, Bottom
7 ----- 2 • • Bolt 1/2”- 13 x 1 1/12”, SS
8 ----- 2 • • Hex Lock Nut 1/2” - 13, SS
9 ----- 4 • • Flat Washer 1/2”, SS
10 ----- 2 •• Neoprene Grommet 1/2”
Parts indented are included in the carton, bag, or assembly
under which they are indented.
Plow MarkersPlow Markers
Attach Plow Markers (21) to moldboard using 5/16-18 x 1” Bolt (22), 5/16”
Flatwasher (24) and 5/16-18 Locknut (23).
Trip Spring AdjustmentTrip Spring Adjustment
Attach Eye Bolts to Moldboard and Trip Springs to Pivot Bar, making
certain locknuts are positioned as shown below.
Make certain each Eye Bolt is in a vertical position as shown below so that
the Eye Bolt and Trip Spring hinge properly when the Moldboard trips.
Note: Proper tension is attained when the Trip Spring coils just begin to
seperate and then tightening top locknut four additional turns. Tighten
bottom locknut to secure Eye Boilt in positiion.
Install Eye Bolt Caps over exposed threads.
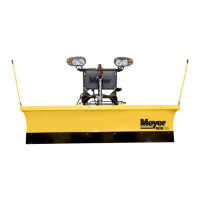
Clevis HeightClevis Height
Clevis height for the 19836 (41090) and 19943 (41190) clevis should be
9.5” to the ground.