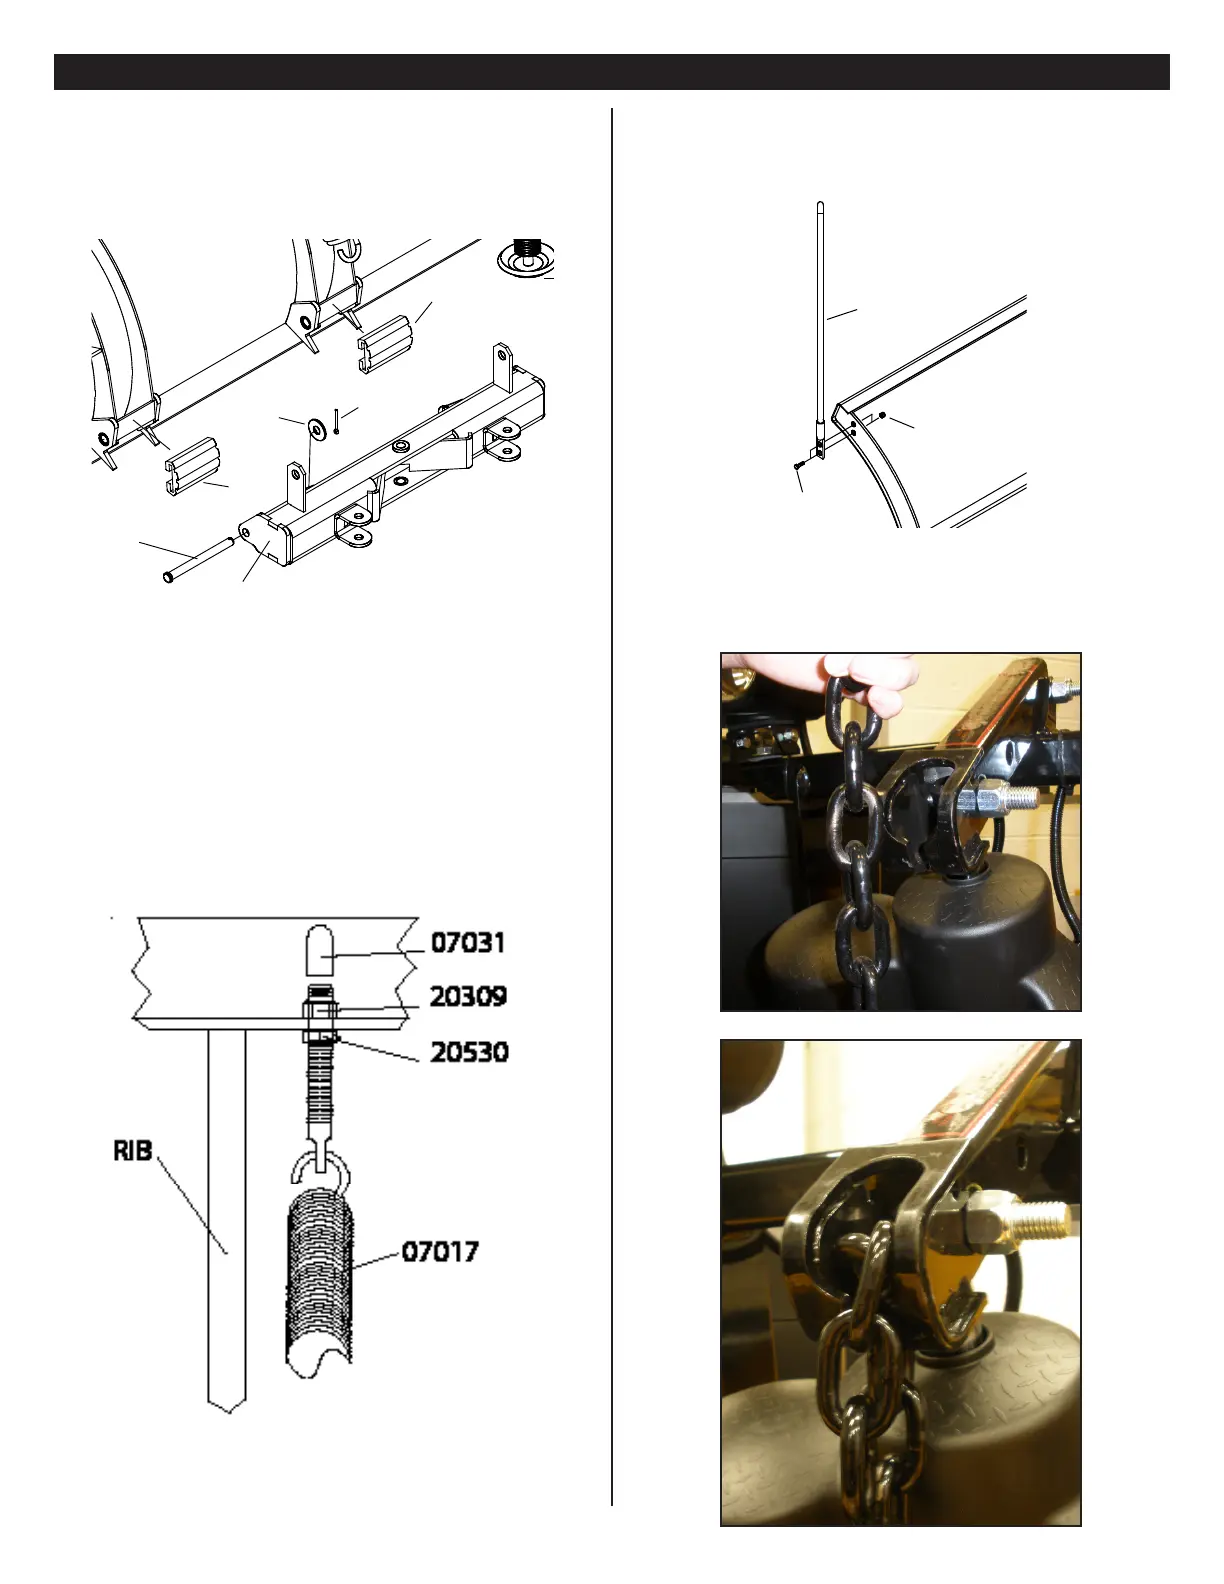
Attaching Plow to EZ Build Assembly
A. Liberally coat Pivot Pins (55) with Coolube Multi-Purpose Premium Grease Part No.
15181.
B. Place Trip Bumpers (53) onto back of Moldboard (The Trip Bumpers (53) are
NOT used on the DP 7’-6” Moldboard). Attach Pivot Bar (5) to Moldboard
with Pivot Pins (54), 5/8” atwashers (51) and insert Cotter Pins (52).
C. Attach Eye Bolts (50) to Moldboard and Trip Springs (32) to Pivot Bar (5),
making certain locknuts are positioned as shown below.
D. Make certain each Eye Bolt (50) is in a vertical position as shown below so
that the Eye Bolt (50) and Trip Spring (32) hinge properly when moldboard
trips.
Note: Proper tension is attained when Trip Spring (32) coils just begin to separate
and then tightening top locknut four additional turns. Tighten bottom Locknut
(20530) to secure Eyebolt in position. Install Eyebolt caps (07031) over exposed
threads.
E. Attach Plow Markers (39) to moldboard using 5/16-18 x 1” Bolt (40), 5/16”
Flatwasher (42) and 5/16-18 Locknut (441)
F. Attach the Lift Chain to the Lift Arm (4) through the two hooks on the lift arm. Adjust
the lift chain at the lift arm so that there are 2-3 links of slack. This ensures that
the plow blade will lift fully and be able to follow the ground contour while plowing.
(5)
52
51
54
53
53
52
56
57
58
59
60
61
62
5
50
51
54
53
53
39
41


 To Next Page