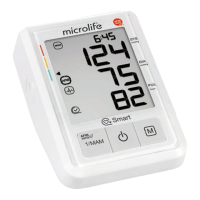
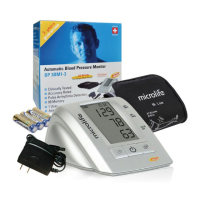
2BP B3 Comfort PC
EN
7. PC-Link Functions
8. Error Messages
9. Safety, Care, Accuracy Test and Disposal
• Safety and protection
• Device care
• Cleaning the cuff
• Accuracy test
•Disposal
10. Guarantee
11. Technical Specifications
Guarantee Card (see Back Cover)
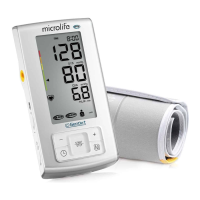
1. Using the Device for the First Time
Inserting the batteries
After you have unpacked your device, first insert the batteries. The
battery compartment
9
is on the bottom of the device. Insert the
batteries (4 x 1.5 V, size AA), thereby observing the indicated polarity.
Setting the date and time
1. After the new batteries are fitted, the year number flashes in the
display. You can set the year by pressing the M-button 3. To
confirm and then set the month, press the MAM button 4.
2. Press the M-button to set the month. Press the MAM button to
confirm and then set the day.
3. Follow the instructions above to set the day, hour and minutes.
4. Once you have set the minutes and pressed the MAM button,
the date and time are set and the time is displayed.
5. If you want to change the date and time, press and hold the
MAM button for approx. 3 seconds until the year number starts
to flash. Now you can enter the new values as described above.
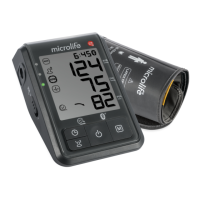
Selecting the correct cuff
Microlife offers different cuff sizes. Select the cuff size to match the
circumference of your upper arms (measured by close fitting in the
centre of the upper arm).
Only use Microlife cuffs.
Contact your local Microlife Service if the enclosed cuff AT does
not fit.
Connect the cuff to the device by inserting the cuff connector AK
into the cuff socket 6 as far as it will go.
If you buy a spare Microlife cuff, please remove the cuff
connector AK from the cuff tube AL from the cuff supplied
with the original device and insert this cuff connector into
the tube of the spare cuff (valid for all cuff sizes).
Selecting the user
This device allows to store the results for 2 individual users.
Select the intended user (user 1 or user 2 BN) by pressing the
user button 5.
Before each measurement, ensure that the correct user is
selected.
Selecting standard or MAM mode
Before each measurement, select standard (single measurement)
or MAM mode (automatic double measurement). In MAM mode,
2 measurements are automatically taken in succession and the
result is then automatically analysed and displayed. Because the
blood pressure constantly fluctuates, a result obtained in this way
is more reliable than when a single measurement is performed.
There is a break of 15 seconds between the measurements.
A
count down indicates the remaining time.
The individual results are not di splayed. Your blood pressure will
only be displayed after all measurements are taken.
Do not rem ove the cuff between measurements.
If one of the individual measurement was questiona ble, an
additional measurement is automatically taken.
2. Checklist for Taking a Reliable Measurement
Avoid activity, eating or smoking immediately before the
measurement.
Sit down on a back-supported chair and relax for 5 minutes.
Keep the feet flat on the floor and do not cross your legs.
Always measure on the same arm (normally left). It is recom-
mended that doctors perform double arm measurements on a
Cuff size for circumference of upper arm
S 17 - 22 cm
M 22 - 32 cm
M - L 22 - 42 cm
L 32 - 42 cm
L - XL 32 - 52 cm
To select MAM mode, press the MAM button 4 until the
MAM-symbol AP
appears on the display. To change to standard
mode (single measurement), press the MAM-button again,
until the MAM-symbol disappears.
The bottom, right hand section of the display shows a 1 or 2 to
indicated which of the 2 measurements is currently being taken.

 Loading...