Inserting a card (Macintosh)
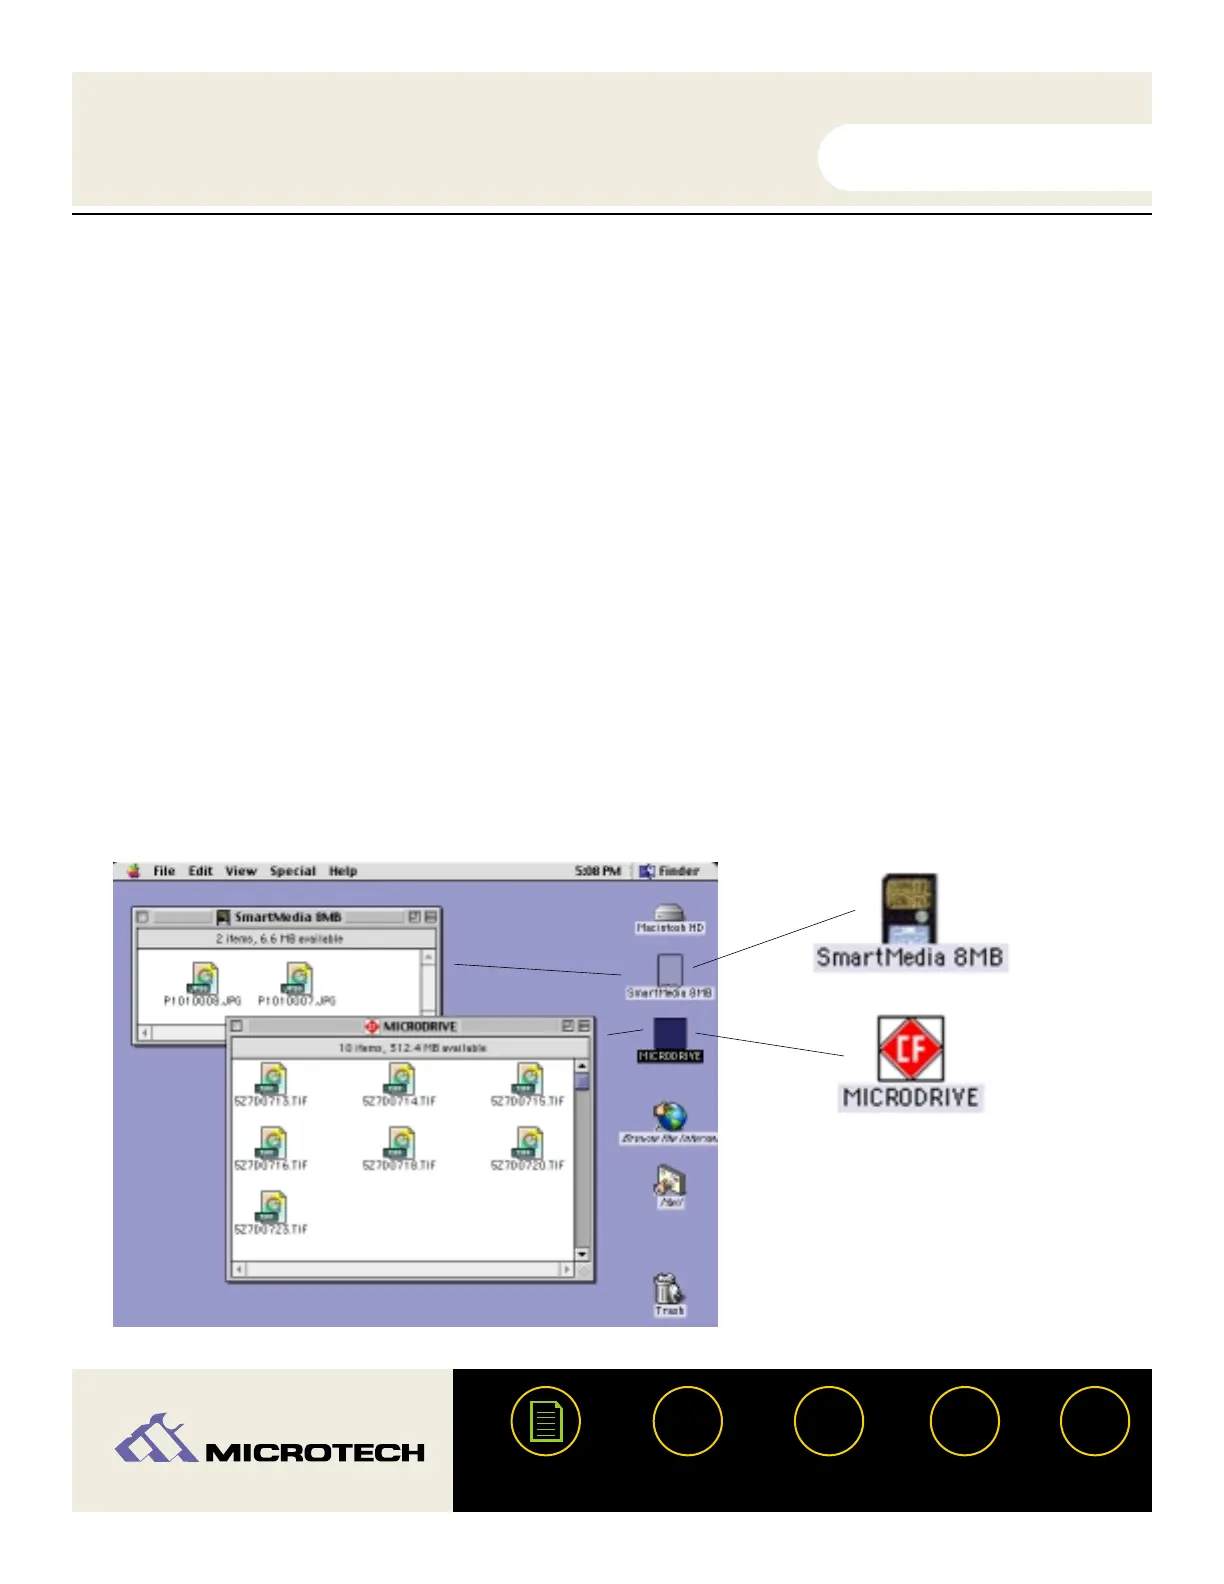
After a card is inserted on a Macintosh computer, a distinct icon will appear on the Mac OS
desktop. This is the “mounted” state, which enables read and write operations for the digital
film card. If both a CompactFlash as well as a SmartMedia card are inserted, icons will appear
for each (see below right). The time required between card insertion and mounting depends on
the type and brand of card. Usually, a card can be mounted and accessed within a few seconds.
When a card is mounted, it can be used in the same fashion as a floppy or other type of remov-
able disk. Double-click the icon to open it's respective file window. Notice the screen shot
below, the SmartMedia 8MB card contains two JPEG images taken on a digital camera.
Likewise, the IBM 340 MB microdrive contains 10 high resolution TIF images taken on a profes-
sional digital camera. The images stored on these cards can be dragged, copied, opened, edited,
deleted, and so forth.
IMPORTANT: Be sure you have installed the USB CameraMate drivers prior to attempting to
operate the USB CameraMate. Also be sure the Apple File Exchange control panel is set to load
in your system folder - you can activate it using the Apple Extensions Manager control panel.
USER'S
MANUAL
USER'S
MANUAL
USB CameraMate
?
HELP
CONTACT
NEXTBACK
CONTENTS
24
SmartMedia icon
CompactFlash icon
(example shown: IBM
340 MB microdrive)
Files contained within a card can be accessed by
double-clicking on its respective icon.