4
English
Deutsch
Français
Italiano
Nederlands
Español
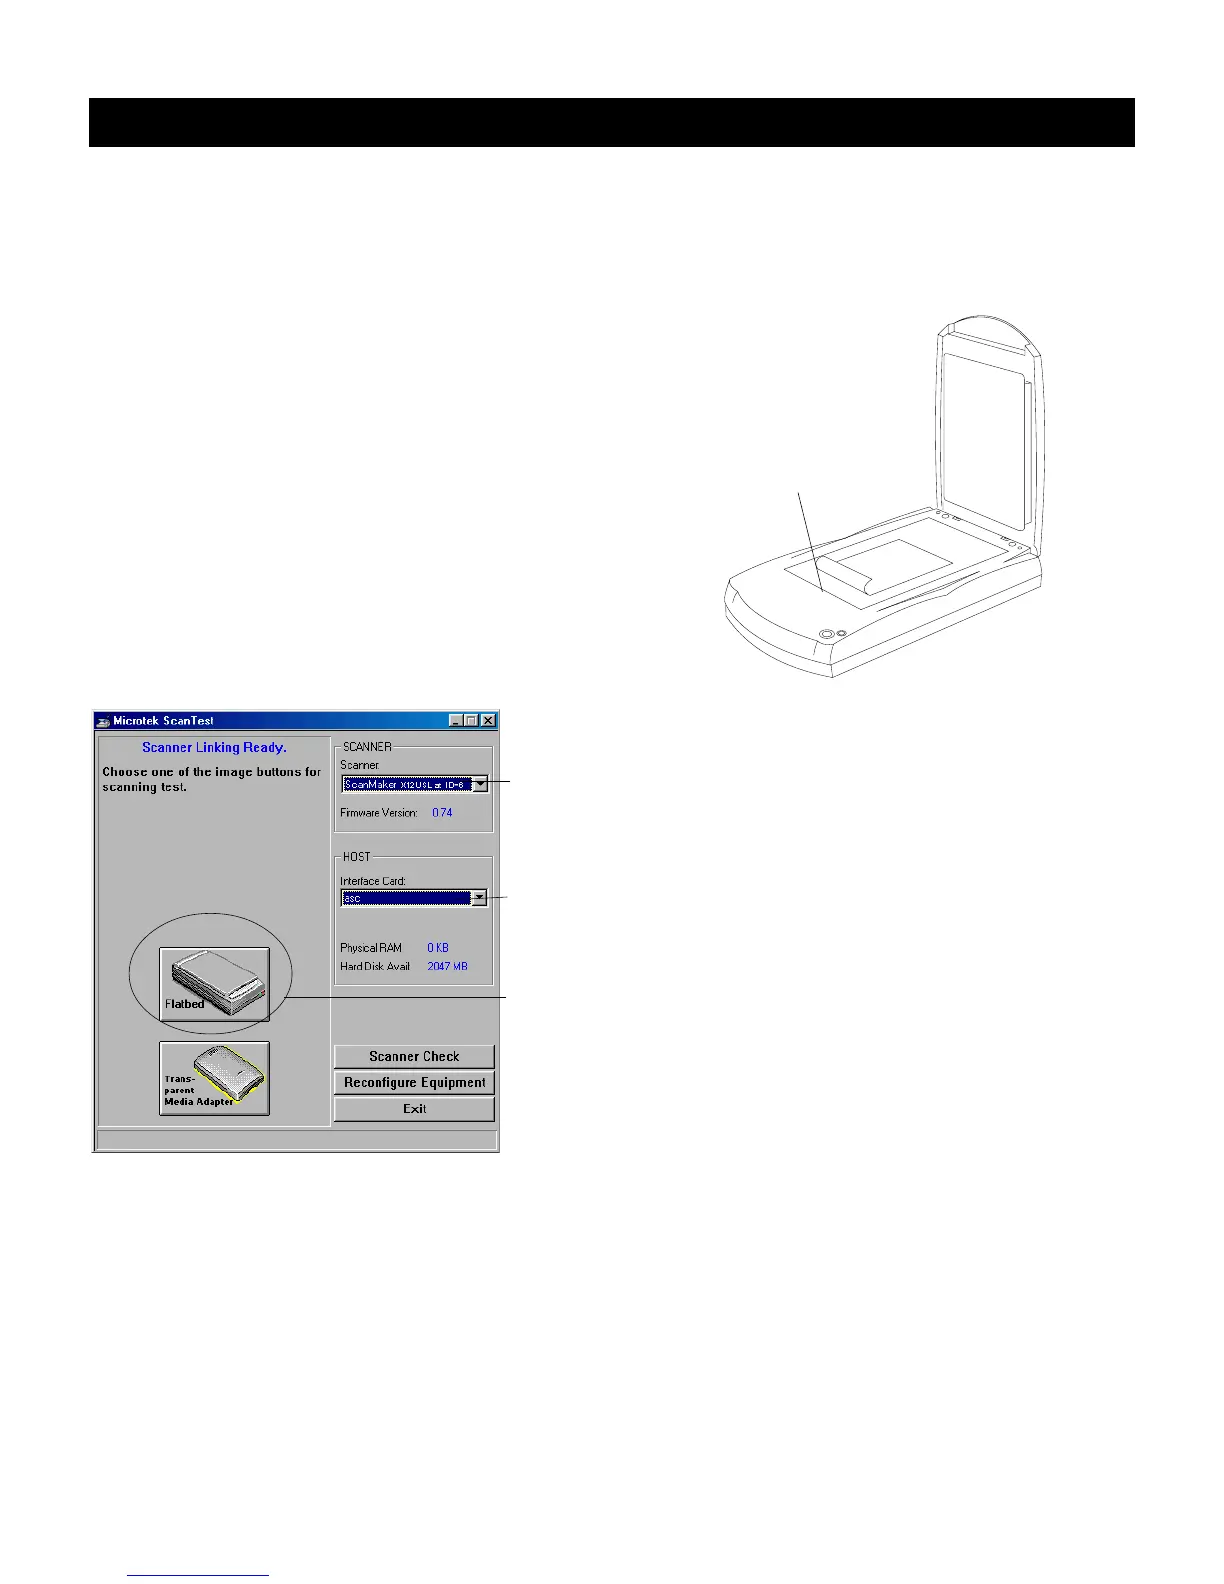
Click the
“Flatbed”
button to
preview
Detected
scanner
4.Test your scanner
Note: Steps 1 and 2 are for Windows 98 and Windows 95
only, not for Windows NT 4.0.
1. In Windows, click Start, Settings, and select
Control Panel. Double-click the System icon
in Control Panel, then select Device Manager
from the top.
2. Double-click Imaging Device or Microtek
Scanners. Verify that your scanner is listed here.
Click “OK” to close all dialog boxes.
3. In Windows, go to “Start, Programs, Microtek
ScanWizard 5 for Windows”, and select
Scanner Test. When started successfully, the
screen below appears.
Top of document faces
front of the scanner.
SCSI Installation on the PC
A
Detected
Interface
4. Place your document face down on the scanner
glass, and click on the Flatbed button in the
Microtek ScanTest window.
5. A preview of your image will be displayed in the
Microtek ScanTest window. Click OK, and exit
Microtek ScanTest; you are now ready to scan.
If you encounter problems with the scan test, see
the digital file SCSI_Troubleshootingpc.pdf in the
Techinfo folder on your Microtek CD-ROM.