3
English
DeutschFrançais
Italiano
Nederlands
Español
SCSI Installation on the PC
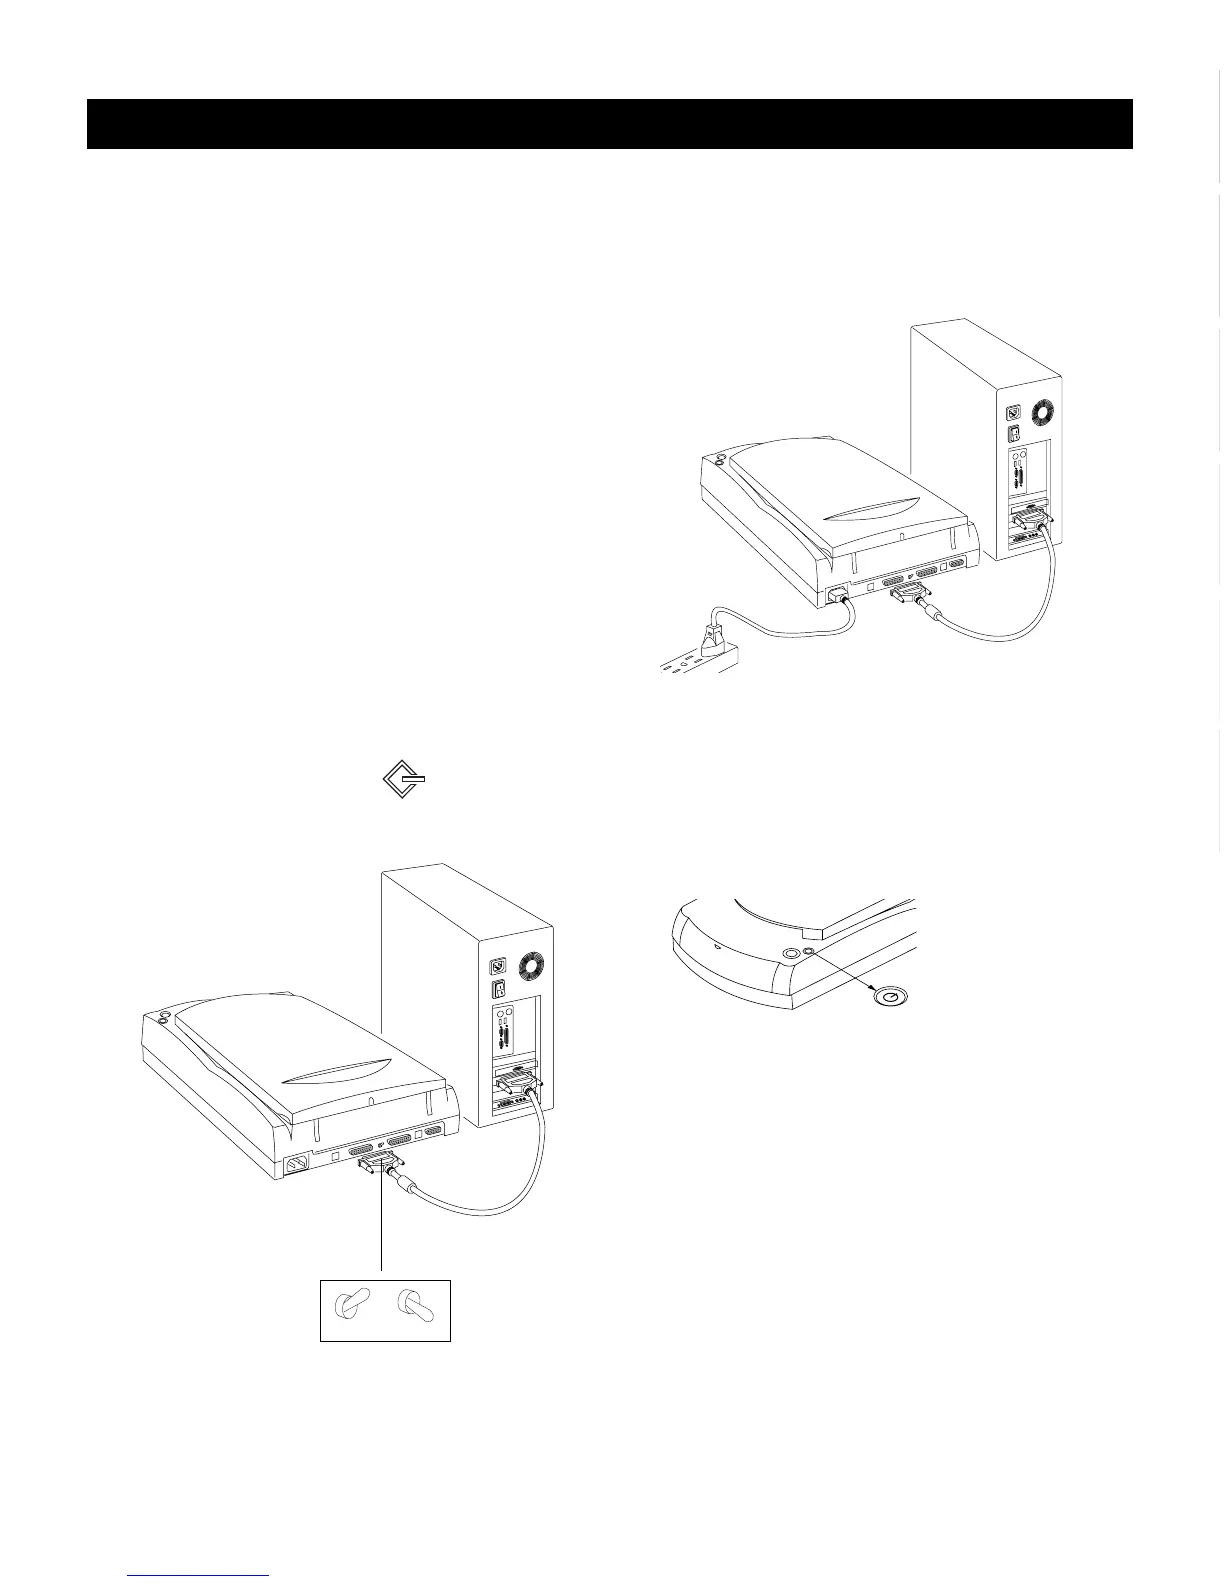
3.Connect scanner
1. Turn off your computer.
Note: Before performing the next step, you must have
an ASPI-compliant SCSI interface card already
installed in your computer and working properly. If
you need help in setting up the ASPI-compliant SCSI
interface card in your computer, please view the
digital file SCSI_card_PC.pdf in the SCSI Card
Installation Guide folder on your Microtek CD-
ROM.
2. Connect the SCSI cable from one of the
scanner’s SCSI ports to the SCSI interface card
on the back of your computer. Then set the
terminator switch to the “ON” position.
Important: Make sure you connect to the SCSI
card on the back of your computer — not to the
parallel printer port. The SCSI port may be
indicated by this symbol:
ON OFF
3. Plug the power cord into the back of the
scanner, and plug the other end into a wall
outlet or power source.
Power button
Press the scanner’s
power button to turn
the scanner on/off.
4. Press the scanner’s power button; this will turn
on the scanner. The green light on the front of
the scanner will blink for a few seconds and
then stay on solid.
Terminator
Switch
5. Turn on your computer. The system will find
your scanner automatically.