This document is a quick reference guide for Midea High Wall split systems installations, covering system data, wiring, controller installation, Wi-Fi setup, multi-function board details, commissioning, and common installation faults.
System Data (Pipe and Cable Sizes/Charging)
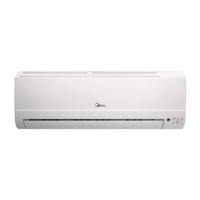
This section provides crucial technical specifications for various Midea High Wall split system models (09, 12, 18, 24).
-
Piping Information:
- Liquid Line: 1/4 inch for models 09, 12, 18; 3/8 inch for model 24.
- Gas Line: 3/8 inch for models 09, 12; 1/2 inch for model 18; 5/8 inch for model 24.
- Drain Line: 16 mm for all models.
- Max Length: 25 meters for models 09, 12; 30 meters for model 18; 50 meters for model 24.
- Max Height: 10 meters for models 09, 12; 20 meters for model 18; 25 meters for model 24.
-
Electrical Wiring Information:
- Mains Outdoor: 3x1.5mm² for models 09, 12, 18; 3x2.5mm² for model 24.
- Interconnecting/Indoor Power: 5x1.5mm² for models 09, 12, 18; 5x2.5mm² for model 24.
- Note: When using the 4-core wiring method, the interconnecting cable for size 24 systems can be downsized to 1.5mm².
-
Power Supply Information:
- Outdoor: 1/16 Ph/A for all models.
- Indoor: Powered from the Outdoor Unit.
-
Refrigerant Charging Information:
- Refrigerant Type: R32 for all models.
- Pre-Charge: 0.5 Kg for models 09, 12; 1.0 Kg for model 18; 1.6 Kg for model 24.
- Charged to: 5 meters for all models.
- Additional: 12 g/m for models 09, 12, 18; 24 g/m for model 24.
Easy Wiring Guides
The manual provides two main wiring methods: 5-core and 4-core.
-
5-Core Method:
- Interconnecting Power Supply: Must be locally isolated with a 5amp switch fuse spur to protect the indoor PCB.
- 'W' and 'S' Connections: Must not be switched (crimp straight through).
- 'W' Function: Is a switched live and powers the condenser using the energy efficiency relay.
-
4-Core Method:
- Interconnecting Power Supply: Must be locally isolated with a 5amp switch fuse spur to protect the indoor PCB.
- 'S' Connection: Must not be switched (crimp straight through).
- 'W' Connection Modification: Move the spade connection of 'W' at the condensing unit to the spare way on 1(L). This bypasses the 1W standby relay and powers the condenser directly from the mains supply, reverting the system to 5W standby power usage.
Wi-Fi and KJR29B Controller Installation
This section details the installation of the Wi-Fi adapter and the KJR29B hard-wired controller.
- Accessing Connections:
- Lift up the fascia of the indoor unit.
- Remove the screw holding the display board in place.
- Ease the display board from its fascia holdings; it will hang from the connection to the indoor PCB.
- KJR29B Controller (CN2): Uses an adapter cable to connect to the wall-mounted units.
- Wi-Fi Dongle (CN3): Plugs into the housing connected to CN3.
KJR29B Controller (One-to-One Installation)
- Cable: Comes with a 6m cable.
- Connections: One end of the jack is plugged in, the other is made off. The jack plugs into the fascia/display board. The other end is wired into the terminals.
- Terminal Functions:
- A & B: Comms (Brown/Blue and Red wires).
- C & D: 5v Power (Yellow and Black wires).
KJR29B Controller (One-to-Many Installation)
- Master Cable: KJR29B master cable can be supplied free of charge (with a terminal strip added to A&B).
- Master Unit Connection: Plugs into the unit closest to the controller.
- Slave Adapters: Can be ordered for additional units. These have the same jack plug as the master cable but only have connections for A&B.
- Daisy Chaining: A 2-core cable can be daisy-chained between A&Bs of slave units and connected to the A&B terminals at the master unit.
Wi-Fi Set Up
- App Download: Download the "Midea Air" app from Apple or Google Play store.
- Account Setup: Set up an account within the app.
- Add Unit: Click "Add Unit" in the app.
- Power Cycle: Switch the power off to the unit and restart it. This procedure must be completed within 8 minutes of power on.
- LED Button Activation: Press the LED button (usually circled in red on the remote) 7 times until the unit shows "AP" on the display.
- Follow App Instructions: Complete the setup by following the instructions provided in the app.
AG Series Multi-Function Board (MFB)
The MFB offers various control and diagnostic options.
- Versions and Functions of MFB:
- Central Controller Connection: Features XYE ports for a central controller.
- Remote On/Off: Dedicated terminals for remote on/off functionality.
- Fault Output: Provides a fault output signal.
- 2-Core Local Controller Connection: An alternative MFB version offers a port for a 2-wired non-polarity controller.
- Installation Choices:
- Internal Installation: The MFB can be installed in the back of the panel without additional holders or brackets.
- External Installation: Can be provided with extended 1m long cables for installation exterior to the fascia (e.g., ceiling void/trunking).
- Components:
- Adapter Plate Subassembly: Includes a Transfer PCB.
- 7-Wired Cable: 4-wired part connects to the main control PCB board; 3-wired part connects to the multi-function board.
- 2-Wired Cable: Connects to the main control PCB board.
- MFB Easy Wiring Guide:
- Multi-function board to Display board: Connected via a 3-wired cable.
- Multi-function board to Main control PCB board: Connected via a 2-wired cable.
- Display board to Main control PCB board: Connected via a 4-wired cable.
- Remote On-Off Control: Connects to the MFB.
- Central Controller (XYE): Connects to the MFB.
- Alarm Port Output: Connects to the MFB.
- Non-polar On-Off Controller: Connects to the MFB (for the 2-core local controller version).
Dip Switch Settings (MFB)
The MFB features dip switches to configure the ON-OFF port's behavior.
- Dip Switch 1 ON, Dip Switch 2 ON:
- ON-OFF Port Function: Works as an ON/OFF button.
- Connection: Connecting the port sends an 'OFF' signal to switch off the unit. Disconnecting sends an 'ON' signal to switch on the unit.
- Remote Control: Unit can be switched on/off with the remote controller.
- Unit's Operation: Restarts with auto mode, 24°C.
- Dip Switch 1 ON, Dip Switch 2 OFF:
- ON-OFF Port Function: Works as an ON/OFF button.
- Connection: Disconnecting the port sends an 'OFF' signal to switch off the unit. Connecting sends an 'ON' signal to switch on the unit.
- Remote Control: Unit can be switched on/off with the remote controller.
- Unit's Operation: Restarts with auto mode, 24°C.
- Dip Switch 1 OFF, Dip Switch 2 OFF:
- ON-OFF Port Function: When connected, the unit shows "CP" and won't work.
- Remote Control: Cannot control the unit with the remote controller.
- Disconnection: When disconnected, the unit works normally and can be controlled with the remote.
- Unit's Operation: Restarts with previous setting.
- Dip Switch 1 OFF, Dip Switch 2 ON:
- ON-OFF Port Function: When connected, the unit works normally and can be controlled with the remote.
- Disconnection: When disconnected, the unit shows "CP" and won't work.
- Remote Control: Cannot control the unit with the remote controller when disconnected.
- Unit's Operation: Restarts with previous setting.
Commissioning
This section covers essential commissioning procedures.
Common Installation Faults
This section provides troubleshooting tips for common issues.
- E1 Fault (4-Core Method): Ensure the 'W' terminal has been switched to 1(L) at the condenser.
- No Display on Indoor Unit: Check the connection between the display board and the main PCB.
- Wi-Fi Dongle Won't Connect:
- Ensure the Wi-Fi signal is 2.4GHz (not 5GHz).
- Power down and restart the unit before attempting to connect (must be done within 8 minutes of power on).
- P1 Error: Ensure service valves are open.
- P4 Error:
- Ensure the coil is clear of debris.
- Check the connection between the compressor and the main PCB.
- Louvre Won't Fully Close: Switch off the unit via the mains power and restart. This resets the louvre position if it has been manually maneuvered out of sync.
- Low Heat Exchange Performance:
- Midea high wall split systems are pre-charged for 5m liquid length to protect the environment and prevent untrained persons from fitting equipment.
- Determine if the system requires additional refrigerant based on pipe length.
- App Won't Allow Two Users: Only one account can be registered as the primary system. The primary account must share the system with secondary accounts.
- Extra Cable (ABCDE) on Display Board: This cable is only required for connecting a KJR29B hardwired controller. It can be left in place or removed if not needed.
- AG System CP Fault:
- The multi-function board has gone open circuit.
- Replace the short or check with 3rd party controls for an open circuit.
- Louvre Motor Not Moving Smoothly:
- Check that the motor is secure via the fixing screw.
- Check the jack plug connection onto the main PCB.
- Look for anything interfering with the mechanical sway of the louvre.