Page 21
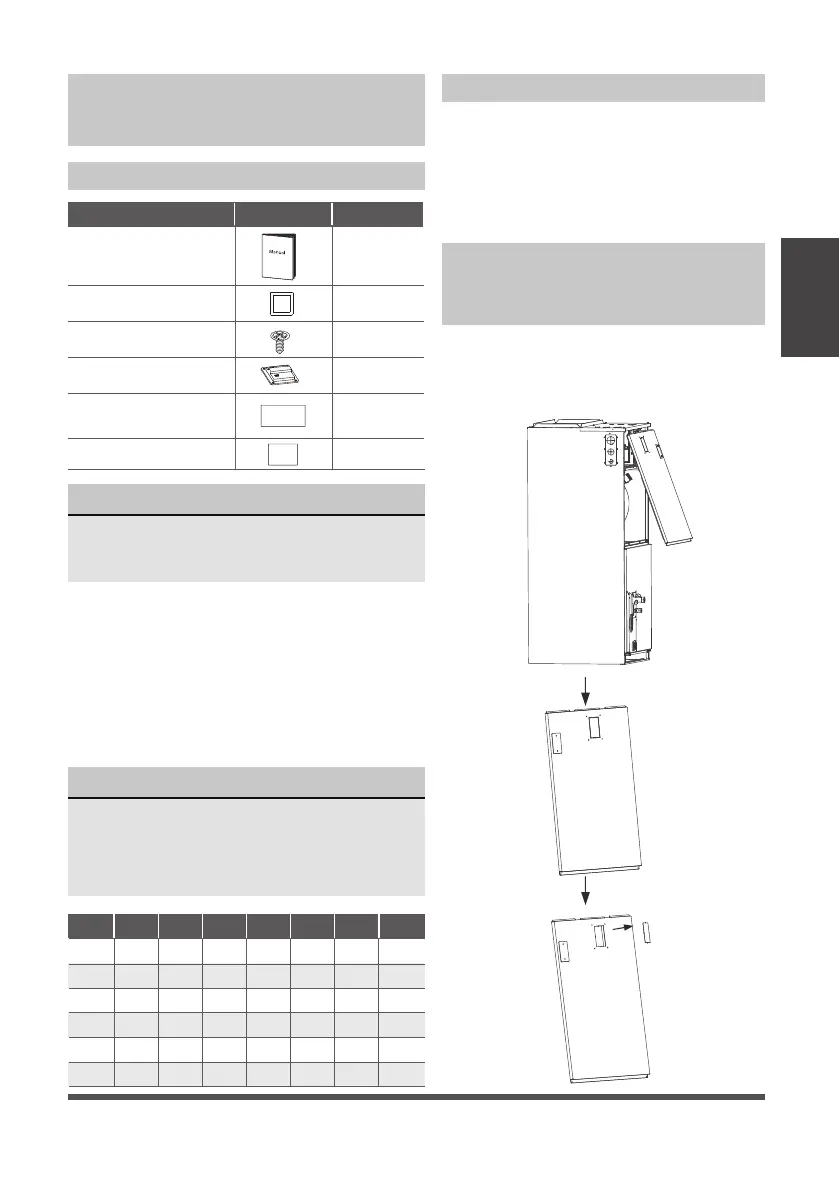
1. Remove the upper cover and use
appropriate tools to remove the
knock-out holes of the upper cover.
Installation of Electric Auxiliary
Heat Module (for some models)
(not supplied)
Electric Auxiliary Heat Module
Installation and Wiring
Operation
Accessories
Installation Requirements
NOTICE
Installation must be performed by an
licensed contractor. Please use necessary
protection when installing the unit.
NOTICE
Only use matched modules certified
for use with model. Please refer to the
Electric Auxiliary Heat Model specification
for additional details to ensure proper
selection and installation.
For installations requiring supplemental
heating, the optional Electric Auxiliary Heat
Module is available in sizes from 3kW to 25kW
to accommodate appropriate sizing given the
specific heat load and electrical requirements
of each installation. Please refer to the table
below for selection of available sizes of each
model, being sure to avoid improper matching.
Before installation, please confirm
the electric auxiliary heat module and
supplied accessories are complete and
free of any damage. Do not attempt to
install if damage is present.
Electric auxiliary heating
wiring diagram
Circuit breaker label
Name Shape Quantity
Owner’s and Installation
manual
1
Silicone breaker cover
1
1
1
1
Foam gasket
Screws
7
48K
- - YYYY-
---YYYY
60K
MODEL
(Btu/h)
18K
3kW
YYYY- - -
- YYYY- -
24K
5kW 8kW 10kW 15kW 20kW 25kW
30K
- YYYY- -
- YYYYY-
36K
Indoor Unit
Installation