This document is a user manual for the Midea Cooker Hood, model 60M21. It provides instructions for installation, operation, maintenance, and safety.
Function Description
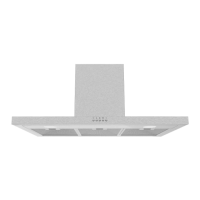
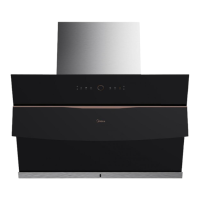
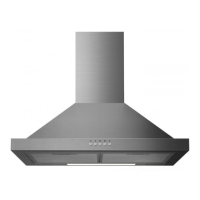
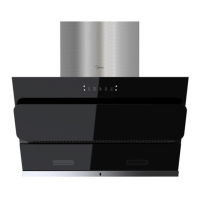
The Midea Cooker Hood is designed exclusively for domestic use to eliminate kitchen smells. It operates by extracting air, which can be either ducted externally or recirculated through activated charcoal filters. The hood features a motor with multiple speed settings and integrated lighting to illuminate the cooking area.
Important Technical Specifications
- Model: 60M21
- Voltage/Frequency: 220V-240V~/50Hz
- Rated Power: 293W
- Lighting Power: 1.5W × 2 (LED modules, separate ballast, DC 12V, Square/Diameter: 33.2mm x 120mm, DSS-1.5-S-33.2/120)
- Motor Input Power: 290W
- Diameter of Air Tube: 150mm
- Air Flow: 800m³/h
- Noise Level: <72dB(A)
- Minimum Installation Height: 650mm above the cooker top.
- Dimensions (approximate, varies by option):
- Option 1: Chimney A: 400+390 mm, B: 430 mm, Height: 465-800 mm, X: 430-800 mm
- Option 2: Chimney A: 500+490 mm, B: 530 mm, Height: 565-1000 mm, X: 530-1000 mm
- Option 3: Chimney A: 600+590 mm, B: 630 mm, Height: 665-1200 mm, X: 630-1200 mm
Usage Features
The cooker hood offers adjustable speed settings and lighting control:
- OFF MOTOR SWITCH (①): Stops the motor operation.
- LOW Speed Switch (☊): Runs the motor at a low speed.
- MEDIUM Speed Switch (☋): Runs the motor at a medium speed.
- HIGH Speed Switch (☌): Runs the motor at a high speed.
- ON/OFF LIGHTING SWITCH (☍): Turns the lights on or off.
Installation:
The manual provides detailed instructions for installation, including wall drilling and bracket fixing. Key steps involve:
- Marking points on the wall for horizontal lines A, B, and C, and a vertical reference line.
- Drilling holes and inserting wall plugs.
- Fixing the hood fixing bracket (20) and chimney fixing bracket (21) with screws (10).
- Attaching the exhaust pipe and connecting the chimney and hood body with screws (12).
- Hooking the hood body to bracket 20 and leveling it.
- Fixing the hood body to wall plugs (11) at points (3) after removing the filter.
- For ducted versions, connecting the hood to the chimney using a flexible or rigid pipe of Ø150 mm or Ø120 mm. A reducer flange (3) is used for a 120 mm air exhaust connection.
- Inserting the upper decorative chimney (2.2) into the lower decorative chimney (2.1) and connecting it to the chimney fixing bracket (21) with screws (12).
Safety Instructions:
- The appliance should only be operated by persons aged 8 years and above, and persons with reduced physical, sensory, or mental capabilities or lack of experience and knowledge, provided they have been given supervision or instruction.
- Children should be supervised and not allowed to play with the appliance.
- Cleaning and user maintenance should not be done by children without supervision.
- The appliance requires adequate ventilation if used simultaneously with other appliances burning gas or other fuels.
- Do not connect the extractor hood to exhaust ducts carrying combustion flumes.
- Never leave high naked flames under the hood.
- Adjust flame intensity to direct it onto the bottom of the pan only.
- Deep fat fryers must be continuously monitored.
- The extractor hood is designed for domestic use only.
- Modifications or alterations to the appliance are not allowed.
- In case of damage upon arrival, contact the retailer or dealer.
Maintenance Features
Cleaning and Maintenance:
- Grease Filters:
- Should be cleaned every 2 months, or more frequently for heavy usage.
- Can be washed in a dishwasher.
- Remove filters by pushing them downwards.
- Avoid bending filters.
- The color of the filter surface may change over time, but this does not affect efficiency.
- Ensure filters are mounted correctly with the handle facing outwards.
- Activated Charcoal Filter (Recirculation Version):
- These filters are not washable and cannot be regenerated.
- Must be replaced approximately every 4 months of operation, or more frequently with heavy usage.
- To replace: remove metal grease filters, remove saturated activated charcoal filter, fit new filters, then replace metal grease filters.
- General Cleaning:
- Switch off or unplug the appliance from the mains supply before maintenance.
- Clean the hood using a damp cloth and a neutral liquid detergent.
- Prohibit direct fire baking of the hood.
- Lighting Replacement (Completed by professionals):
- The entire light module needs to be replaced.
- Ensure the appliance is switched off at the mains or circuit breaker.
- Remove grease filter and two screws from the front plate.
- Disconnect the terminal of the LED light.
- Press LED light on the back of the front plate, take out the LED light.
- Replace with a commercially available LED lamp (max.1.5W).
- Connect the terminal of the LED light and light leads.
- Fasten the 2 screws on the front plate and reinstall the grease filter.
Troubleshooting:
The manual includes a troubleshooting guide for common issues:
- Light on, but motor does not work: Check blades, replace capacitor, replace motor, check internal wiring.
- Both light and motor do not work: Check if light is damaged, power cord is loose.
- Oil leakage: Check if outlet and air ventilation entrance are tightly sealed.
- Vibration: Check if blade is damaged, motor is tightly fastened, cooker hood is tightly fixed.
- Insufficient suction: Check distance between cooker hood and cooker top, too much ventilation from open doors/windows.
- The machine inclines: Check if fixing screws or hanging screws are tight enough.
Disposal and Recycling:
- The product complies with EU WEEE Directive (2012/19/EU).
- It should not be disposed of with other household wastes at the end of its service life.
- Used devices must be returned to official collection points for recycling electrical and electronic devices.
Data Protection Notice:
Midea ensures compliance with applicable data protection law and GDPR. Personal data may be transferred to recipients located outside the European Economic Area. For data protection inquiries, contact Midea DPO via MideaDPO@midea.com.