Page 15
NOTE
The top rail hardware and the
following Fig. E, Fig. F and Fig. G
are not applicable to the units over
10,000 Btu/h.
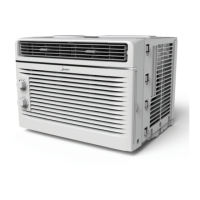
2. PREPARE AIR CONDITIONER
Before installing unit, the top rail must be assembled on the unit for models with a
capacity of less than 10,000Btu/h.
CAUTION
When handling unit, be careful to
avoid cuts from sharp metal edges
and aluminum fins on front and rear
coils.
Packaging
Top Rail
Fig. E
1. PREPARE THE WINDOW
Lower sash must open sufficiently to allow a clear vertical opening (see dimension
H in Table 1). Side louvers and the rear of the AC must have clear air space to allow
enough airflow through the condenser for heat removal. The rear of the unit must be
outdoors, not inside a building or garage.
NOTE
Save carton and these Installation Instructions for future reference. The carton is the
best way to store unit during winter, or when not in use.
A: Remove the air conditioner from the
carton and place on a flat surface.
B: Remove top rail from the bottom of the
packaging material as shown in Fig. E.
Installation
Instructions
Mounting Hardware
3/4’’ (or 1/2”)
Screws
(7)
Lock Frame
(For Wooden windows)
(2)
Sash Lock
(1)
Window sash
seal foam
(1)
Weather stripping
10”*3/4”*1/12”
(5)
Lock Frame
(For Vinyl-Clad windows)
(2)
3/8” Screws
(4)
Top Rail
(1)
R1 Insulation Hardware
(2)
Top Rail Hardware
 Loading...