Fig-19
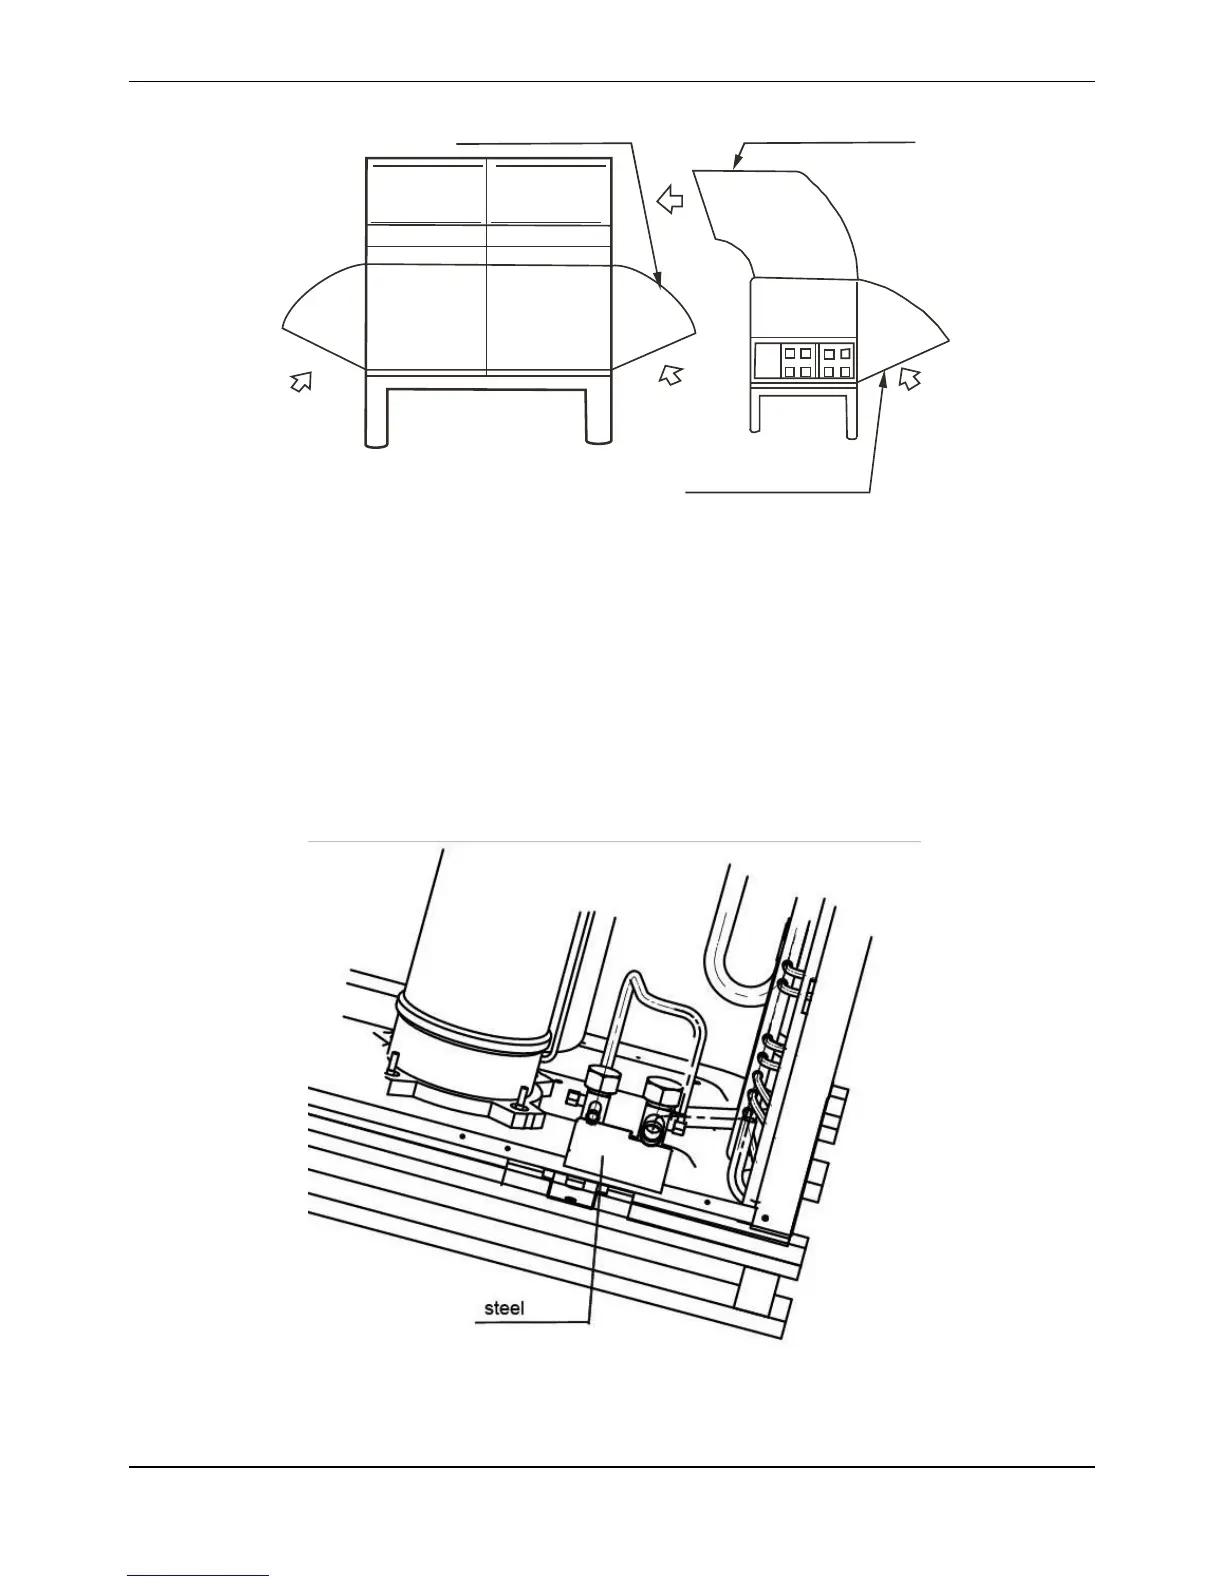
3.5 Installation of Refrigerant Pipe
The refrigerant pipe adapter is located inside the outdoor unit. When the pipe is connected from the front
side, the pipe can be let out through the right front board. (Fig-20 and Fig-21) So remove the left front board
first. (Three M5 screws)
The pipe can be connected from the front left lower side or the bottom notch of the outdoor unit.
When the pipe is connected from the front side, the pipe can be led out through the pipe & wire panel.
In case the pipe is connected from the bottom notch, install it leftward, rightward or backward after leading it
out.
When the pipe is led from the front, use a cover plate to seal the bottom notch in order to prevent intrusion
of dust or trash.
Fig-20
 Loading...