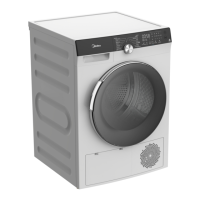
3. Preassemble a 4 inches (10.2cm) elbow to the next 4 inches (10.2cm)
duct section, and secure all joints with duct tape. Be sure that the
male end of the elbow faces AWAY from the dryer.
Insert the elbow/duct assembly through the side opening and press it
onto the adapter duct.
Secure in place with duct tape. Be sure that the male end of the duct
protrudes 1.5 inches (3.8cm) to connect the remaining ductwork.
Duct tape the knockout removed to the opening in the back of the dryer.
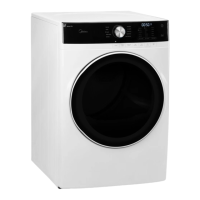
2. Press the tabs on the knockout and carefully remove the knockout for
the desired vent opening.
Press the adapter duct onto the blower housing of the dryer as shown.
Option 2: Bottom venting
1 ''
(3.8 cm)
Elbow
Duct
Tape
Knockout
Adapter
Duct
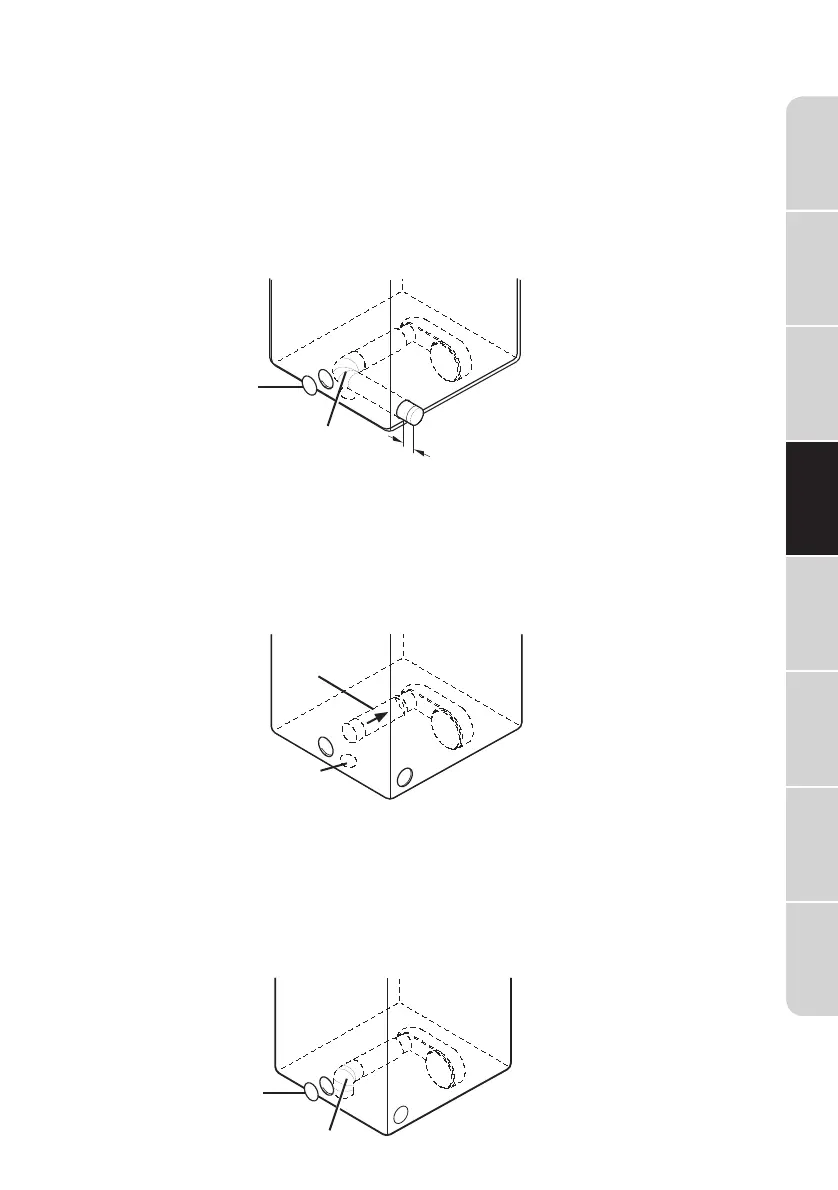
3. Insert the 4 inches (10.2cm) elbow through the rear opening and press
it onto the adapter duct.
Be sure that the male end of the elbow faces down through hole in the
bottom of the dryer.
Secure in place with duct tape.
Duct tape the knockout removed to the opening in the back of the dryer.
Duct
Tape
1/2
Elbow
31
Dryer
Safety
Operation
Requirements
Parts and
Features
Installation
Instructions
Dryer Use
Appendix
Dryer Care
Troubleshooting
 Loading...