Service manual
24
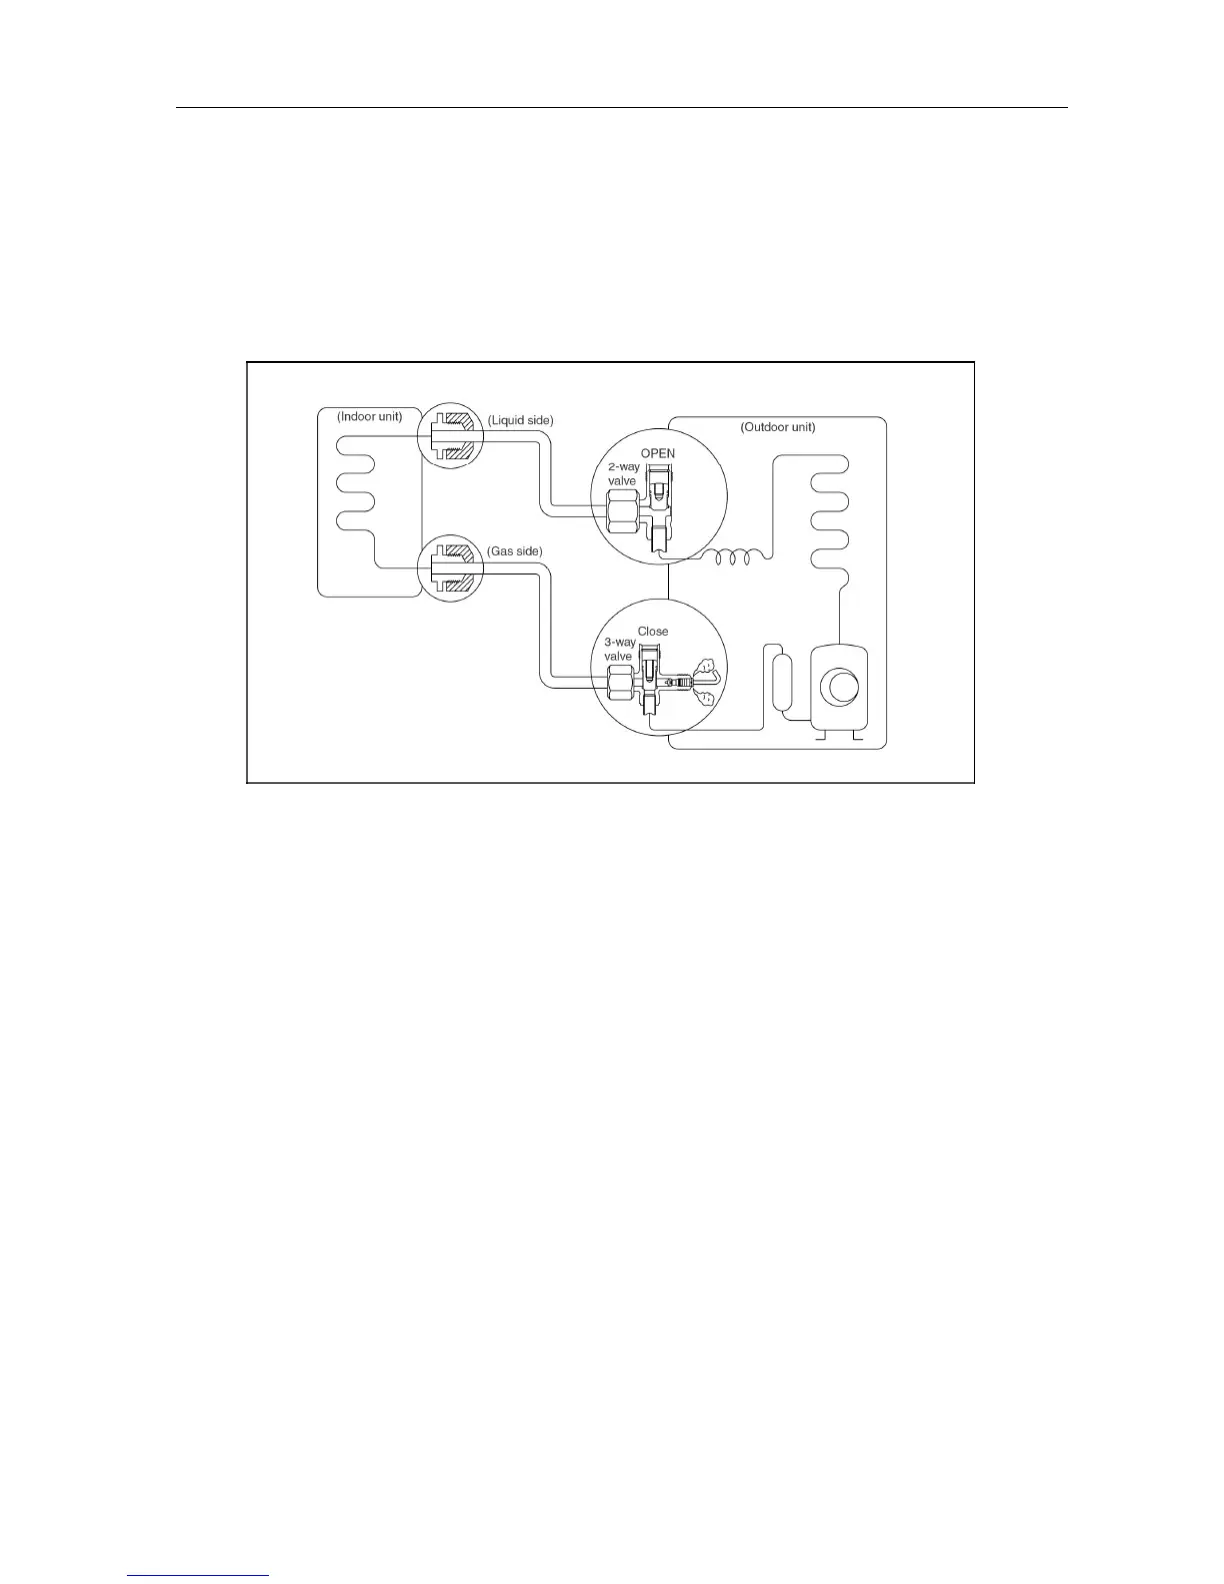
8.4 Air purging of the piping and indoor unit
Required tools:
Hexagonal wrench; adjustable wrench; torque wrenches, wrench to hold the joints and gas leak detector.
Note:
The air in the indoor unit and in the piping must be purged. If air remains in the refrigeration piping, it will
affect the compressor, reduce the cooling capacity, and could lead to a malfunction of unit.
Be sure, using a torque wrench to tighten the service port cap (after using the service port), so that it
prevents the gas leakage from the refrigeration cycle.
Procedure
1. Recheck the piping connections.
2. Open the valve stem of the 2-way valve
counterclockwise approximately 90’, wait
10 seconds, and then set it to closed
position.
Be sure to use a hexagonal wrench to operate
the valve stem
3. Check for gas leakage.
Check the flare connection for gas leakage
4. Purge the air from the system.
Set the 2-way valve to the open position and
remove the cap from the 3-way valve’s
service port.
Using the hexagonal wrench to press the
valve core pin, discharge for three seconds
and then wait for one minute.
5. Use torque wrench to tighten the service
port cap to a torque of 1.8 kg.m. (18n.m)
6. Set the 3-way valve to the opened
position.
7. Mounted the valve stem nuts to the 2-way
and 3-way valves.
8. Check for gas leakage.
At this time, especially check for gas leakage
from the 2-way and 3-way stem nuts, and
from the service port.
Caution:
If gas leakage is discovered in step (3) above,
take the following measures.
If the leaks stop when the piping connections are
tightened further, continue working from step (4).
If the gas leaks do not stop when the connections
are retightened, repair the location of the leak,
discharge all of the gas through the service port,
and then recharge with the specified amount of
gas from a gas cylinder.
 Loading...