- 14 -
7. ASSEMBLY INSTRUCTIONS FOR THE HANDLEBARS AND
FRONT SUPPORT WITH WHEELS
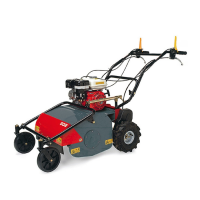
The flail mower is delivered with the handlebars and front support with wheels
disassembled. Remove the cardboard packaging or crate (to be disposed of in an
appropriate manner, in accordance with current regulations in force).
To assemble, proceed as follows :
Lift the handlebar and insert it in the support shown in Fig. 3 ref. B. Then feed the screw
stay (Fig. 3 ref. C) through the relative holes and secure it on both sides using the
screws and washers provided.
Position the support with front wheels and connect the height adjustment piece (Fig. 3
ref. D) using the screw and washer provided. Fix it to both sides of the bonnet as well
using the screws, washers and spacers provided, as shown in Fig. 3 ref. A.
Fix the safety bar ( Fig.3 ref. E ) to the special holes on the two front sides of the wheel
support using the screws, washers and nuts provided.
Before switching on ensure that the machine has been fully assembled correctly.
Figure 3 Figure 3a
WARNING
After assembling the handlebars, the foward control, roller movement and right wheel
release cables MUST be secured using the CLIP PROVIDED, as illustrated in
the Figure 3a. Tie the cables together so that they do not touch the exhaust pipe and
suffer heat damage.

 Loading...