Do you have a question about the Miele FNS 28463 E ed/cs and is the answer not in the manual?
Appliance is for domestic use in similar environments, not outdoor.
Guidelines for child safety around the appliance.
Information on coolant, flammability, and safety measures.
Guidelines for proper and safe operation of the appliance.
Maintenance and cleaning procedures for the appliance.
Handling and disposal instructions for the appliance.
Environmentally friendly disposal of packaging and appliance.
Energy saving tips related to appliance installation and maintenance.
Energy saving tips related to using the appliance.
Identification of key appliance parts with labels.
Explanation of symbols used for appliance controls and status.
Information on accessories included and available for purchase.
Unpacking, cleaning, and connecting the appliance.
Operating the touch display and managing power states.
Procedures for shutting down the appliance for extended periods.
Understanding and adjusting the appliance's temperature settings.
How to use the rapid freezing feature for optimal results.
Understanding and responding to temperature alarms.
How the door alarm works and how to manage it.
Overview of available settings and their default values.
How to use the minute minder for timing tasks.
Instructions for operating the ice cube maker.
How to prevent accidental operation or setting changes.
Guidelines for efficient food freezing.
Tips for proper storage of frozen items.
Techniques for freezing food at home and packaging it.
Recommended storage durations and thawing methods for food.
Tips for chilling drinks and operating the ice maker.
Explanation of the automatic defrosting system.
Safe cleaning agents and methods for the appliance.
Steps to prepare the appliance and remove parts for cleaning.
Methods for cleaning the appliance's interior and exterior.
Cleaning key components and restarting the appliance.
Resolving initial issues with power and cooling.
Diagnosing frequent compressor cycling and temperature problems.
Addressing internal moisture problems and door seal faults.
Interpreting error messages and status indicators on the display.
Resolving issues related to the temperature alarm.
Troubleshooting general faults and ice maker water supply problems.
Troubleshooting the ice maker not turning on or producing ice.
Troubleshooting issues with the appliance's interior lighting.
Identifying common operational sounds and their causes.
Procedures for seeking professional help and warranty details.
Guidelines and safety requirements for connecting to the water supply.
Step-by-step guide for installing the water supply line.
Safety and technical details for electrical hookup.
Final steps for connecting the appliance to the electricity supply.
Choosing the optimal installation location and room conditions.
Understanding operating temperature ranges and ventilation needs.
Installing spacers and limiting door opening angle.
Placing, aligning, and leveling the appliance.
Integrating the appliance into kitchen cabinetry.
Technical specifications of the appliance's physical size.
Introduction to combining appliances side-by-side.
List of fixings and tools required for side-by-side installation.
Safe handling of combined units and front installation steps.
Aligning units vertically and in depth with the upper bracket.
Steps for securing connecting brackets from the rear.
Finalizing the installation of connecting brackets.
Attaching front trim pieces and covers for aesthetic finish.
Fine-tuning the height and supporting appliance doors.
Adjusting the height of appliance doors for proper fit.
Initial steps for reversing door swing and removing top covers.
Detaching the soft-close mechanism from the door hinge.
Safely removing the door and swapping the lower hinge plate.
Securing hinge plates and swapping the upper hinge.
Completing upper hinge work and relocating the door opening aid.
Managing door sliders and refitting the opening aid.
Reattaching the door and securing the bearing bush stopper.
Final checks on hinge pin and soft-close mechanism.
Replacing the upper covers after door hinging adjustment.
Adjusting the lower door position for a flush fit.
| Door hinge | Left |
|---|---|
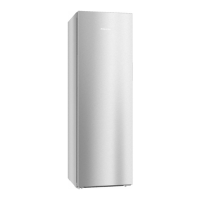
| Product type | Upright freezer |
| Product color | Stainless steel |
| Reversible doors | Yes |
| Appliance placement | Freestanding |
| Convertible freezer | - |
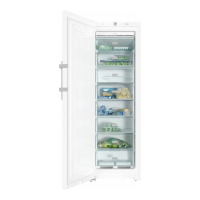
| Freezer number of shelves/baskets | 7 |
| Lamp type | LED |
| Cord length | 2.2 m |
| Noise level | 37 dB |
| Star rating | 4* |
| Climate class | SN-T |
| Freezing capacity | 18 kg/24h |
| Freezer net capacity | 277 L |
| Freezer gross capacity | - L |
| Storage time during power failure | 20 h |
| Current | 10 A |
| Connected load | - W |
| AC input voltage | 220 - 240 V |
| AC input frequency | 50 Hz |
| Energy efficiency scale | A to G |
| Annual energy consumption | 248 kWh |
| Depth | 675 mm |
|---|---|
| Width | 600 mm |
| Height | 1850 mm |
| Weight | 85500 g |