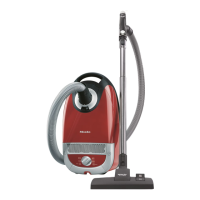
Disposing of your old appliance
Before disposing of your old appliance remove the dustbag and filters and dispose of them with your household waste. Electrical and electronic appliances often
contain valuable materials. They also contain specific materials, compounds and components, which were essential for their correct function and safety. These
could be hazardous to human health and to the environment if disposed of with your domestic waste or if handled incorrectly. Please do not, therefore, dispose of
your old appliance with your household waste.
Please dispose of it at your local community waste collection / recycling centre for electrical and electronic appliances, or contact your dealer or Miele for
advice. You are also responsible (by law, depending on country) for deleting any personal data that may be stored on the appliance being disposed of. Please
ensure that your old appliance poses no risk to children while being stored prior to disposal.
Notes on Delegated Regulation
(EU) No. 665/2013 and 666/2013
This vacuum cleaner is a domestic vacuum cleaner and is classified as a universal vacuum cleaner in accordance with the above-mentioned regulations.
These operating instructions, the EU data sheet and the online energy efficiency label for this vacuum cleaner are available to download from the Miele website at
www.miele.com.
The annual energy consumption stated on the data sheet and on the energy efficiency label describes the indicative annual energy consumption (kWh per year),
based on 50 cleaning cycles. Actual energy consumption depends on how the vacuum cleaner is used.
All tests and calculations were carried out according to the following harmonised standards applicable at the time in due consideration of the published regulation
guidelines of the European Commission from September 2014:
1. EN 60312-1 Vacuum cleaners for household use – Part 1: Dry vacuum cleaners – Methods for measuring the performance.
2. EN 60704-2-1 Household and similar electrical appliances – Test code for the determination of airborne acoustical noise – Part 2-1: Particular requirements
for vacuum cleaners.
3. EN 60335-2-2 Household and similar electrical appliances – Safety – Part 2-2: Particular requirements for vacuum cleaner and water suction appliances.
Not all floorheads and accessories supplied with the vacuum cleaner are intended for intensive cleaning of carpets or
hard floors as described in the regulations. The following floorheads and settings were used to determine the values:
For energy consumption and cleaning class on carpet and hard floors and sound power level on carpet the universal floorhead was used with the brush retracted
(press the foot switch). If your vacuum cleaner is supplied as standard with an SID Intensive floorhead, this will have been used for determining the values. If
your vacuum cleaner is supplied as standard with the SRD hard floorbrush, this is designed for intensive vacuuming of hard floors with gaps and crevices and will
have been used to determine the above values on hard floors. The values on the EU data sheet and the energy efficiency label refer exclusively to the
combinations and settings of floorheads on the different floor surfaces described here. Only original Miele dustbags, motor protection filters and exhaust filters were
used for all measurements.
llustrations
The illustrations referred to in the text are shown on the fold-out pages at the end of these operating instructions.
Preparing for use
Attach the suction hose (dia. 01)
nsert the hose connector into the suction socket on the vacuum cleaner until it clicks into position. To do this, line up the guides on the two pieces.
To detach the suction hose (dia. 02)
Press the release buttons at the side of the hose connector, and lift the hose from the socket.
Connect the suction hose to the handle (dia. 03)
Fit the connector at the other end of the suction hose into the handle until it clicks into position.
Your vacuum cleaner is fitted with one of the following suction tubes, depending on model:
EasyLock suction tube
Telescopic suction tube
Comfort telescopic suction tube
To assemble the EasyLock tube (dia. 04)
Hold the suction tube by the connection piece and push it into the second suction tube, turning it clockwise or anti-clockwise until it clicks into position.
Slide the connection piece upwards until it clicks into position.
Connect the handle to the suction tube (dia. 05 + 06)
1. Insert the handle into the suction tube until it clicks into position. To do this, line up the guides on the two pieces.
To detach the handle
2. To detach the handle from the suction tube, press the release button and pull the handle out of the suction tube, twisting it slightly as you do so
Adjusting the telescopic suction tube(dia. 07)
One part of the telescopic tube is packed inside the other, and it can be adjusted to suit your height for comfortable vacuuming.
Press the release button and adjust the tube to the desired height.
Adjusting the Comfort telescopic suction tube (dia. 07)
One part of the Comfort telescopic tube is packed inside the other, and it can be adjusted to suit your height for comfortable vacuuming.
Grasp the release mechanism and adjust the telescopic suction tube to the required length.
Connect the suction tube to the floorhead (dia. 08)
Push the suction tube into the floorhead and turn it clockwise or anticlockwise until it clicks into position.
To separate the suction tube from the floorhead press the release button and pull the suction tube away from the floorhead, twisting it slightly as you do so.
To adjust the floorhead (dia. 09, 10 + 11)

 Loading...