Press the release catch on the filter grille and open the grille as far as it will go.
Grasp the used AirClean filter by one of the clean, unsoiled sections and take it out.
Replace it with a new AirClean exhaust filter
If you wish to fit an AirClean Plus 50, Active AirClean 50 or an HEPA AirClean 50 filter, see “Replacing one type of exhaust filter with another”.
Close the filter grille.
Close the dust compartment lid.
Replacing the AirClean Plus 50, Active AirClean 50 and HEPA AirClean 50 exhaust filters (dia. 36 + 37)
Do not use more than one exhaust filter at a time.
Open the dust compartment lid.
Lift the exhaust filter and remove it.
Insert a new exhaust filter, making it sure it goes in properly, then press it down into position.
If you are using exhaust filter c or d, press the exhaust filter TimeStrip® change indicator (dia. 15).
After approx. 10 – 15 seconds, a thin red line will appear in the left hand side of the display (dia. 16).
If you wish to fit an AirClean filter, see “Replacing one type of exhaust filter with another”.
Close the dust compartment lid.
Replacing one type of exhaust filter with another (dia. 12)
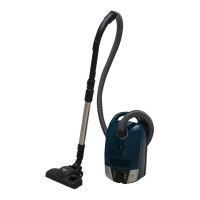
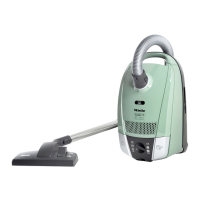
Depending on model, your vacuum cleaner will be fitted as standard with one of the following exhaust filters:
1. AirClean
2. AirClean Plus 50 (light blue)
3. Active AirClean 50 (black)
4. HEPA AirClean 50 (white)
Do not use more than one exhaust filter at a time.
When changing the filter, please note
1. If you wish to replace exhaust filter a with filter b, c or d, it is essential that you remove the filter grille before you fit the new exhaust filter. If you are using
exhaust filter c or d, you must also activate the exhaust filter TimeStrip® change indicator (dia. 15).
2. If you wish to replace exhaust filter b, c or d with filter a it is essential that this filter is fitted in the filter grille * (dia. 35).
Filter grille – see “Optional accessories”
Replacing the thread lifters (dia. 38 + 39)
(not possible on EcoTeQ Plus floorheads)
The thread lifters on the suction inlet to the floorhead can be replaced. Replace the thread lifters if the pile has worn down.
Lever the thread lifters from the slots. To do so use a suitable tool, e.g. a flat blade screwdriver.
Fit new thread lifters.
Cleaning the roller on the AllTeQ floorhead (dia. 40)
Clean the roller on the floorhead if required.
1. Release the bearing (with bayonet fitting) using a coin.
2. Press the bearing out, and remove.
3. Remove the roller
Remove any threads and hair, replace the roller and refit the bearing, locking it back into position.
Replacement parts are available from your Miele dealer or from the Miele Spare Parts Dept.
Cleaning and care
Always disconnect the vacuum cleaner from the electrical supply before cleaning it. Switch off at the wall socket and unplug it.
Vacuum cleaner and accessories
The vacuum cleaner and all plastic accessories can be cleaned with a proprietary cleaner suitable for plastic.
Do not use abrasive cleaning agents, glass cleaning agents, allpurpose cleaners or oil-based conditioning agents!
Dust compartment
The dust compartment can, if necessary, be cleaned using a dry duster, brush or, if available, a second vacuum cleaner to vacuum the dust out.
Problem solving guide
Many malfunctions and faults that can occur in daily operation can be easily remedied. Time and money will be saved because a service call will not be needed.
The following guide may help you to find the reason for a malfunction or a fault, and to correct it.
 Loading...