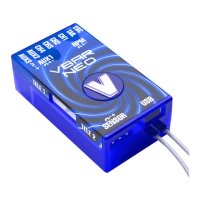
8. Wiring your VBar
Connectors
ESC
TAIL
CH1-4
AUX1
AUX2, AUX3
RPM
Sensor
USB
TELE 1, TELE 2
Electronic Speed Controller, Throttle Servo
Tail servo
Swash plate servos according to diagram in the software
Bus-Receiver (SBus, HoTT SUM(D), UDI)
Additional functions (AUX2+3 VBar Control Satellite)
RPM sensor input
External gyro sensor (optional), NO power supply!
USB wire
Telemetry bus for VBar Control, or Spektrum satellites
Power supply may be connected to any port except Sensor. There is no voltage
divider needed for rpm sensors. For further applications (additional functions)
see App in VBar Control and online manual on www.vstabi.info.
9. Initialization (Pitch Twitch, V is lit)
During Initialization, the VBar goes through a self-test. The
helicopter must be at rest during this test. When the test is
nished, you will see a brief twitching (jump) of the swash
plate. Also the V will light up solid green.
10. Pre-ight check
Before each ight you must double-check the active
direction of the swash plate and the tail rotor. To do so, lift
the helicopter up and move it along the three axis.

 Loading...