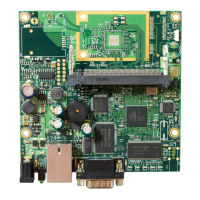
RouterBOARD 411 Series User's Manual
Booting options
First, RouterBOOT loader is started. It displays some useful information on the onboard RS232C
asynchronous serial port, which is set to 115200bit/s, 8 data bits, 1 stop bit, no parity by default. The loader
may be configured to boot the system from the onboard NAND module or from Ethernet network. See the
respective section of this manual for how to configure booting sequence and other boot loader parameters.
Onboard NAND Storage Device
The RouterBOARD may be started from the onboard NAND storage chip. As there is no partition table on the
device, the boot loader assumes the first 4MiB form a YAFFS filesystem, and executes the file called “kernel”
stored in the root directory on that partition.
Booting from network
Network boot works similarly to PXE or EtherBoot protocol, and allows you to boot a RouterBOARD 411
series computer from an executable image stored on a TFTP server. It uses BOOTP or DHCP (configurable in
boot loader) protocol to get a valid IP address, and TFTP protocol to download an executable (ELF) kernel
image combined with the initial RAM disk (inserted as an ELF section) to boot from (the TFTP server's IP
address and the image name must be sent by the BOOTP/DHCP server).
To boot the RouterBOARD computer from Ethernet network you need the following:
● An ELF kernel image for the loader to boot from (you can embed the kernel parameters and initrd
image as ELF sections called kernparm and initrd respectively)
● A TFTP server which to download the image from
● A BOOTP/DHCP server (may be installed on the same machine as the TFTP server) to give an IP
address, TFTP server address and boot image name
See the RouterBOOT section on how to configure loader to boot from network.
Note that you must connect the RouterBOARD you want to boot, and the BOOTP/DHCP and TFTP servers to
the same broadcast domain (i.e., there must not be any routers between them).
RouterBOOT
The RouterBOOT firmware (also referred as “boot loader” here) provides minimal functionality to boot an
Operating System. It supports serial console via the onboard serial port at the boot time. The loader
supports booting from the onboard NAND device and from a network server (see the respective section for
details on this protocol).
Boot Loader Configuration
Loader parameters may be configured through the onboard RS232C DB9 asynchronous serial interface. To
connect to it, use a standard null-modem cable. By default, the port is set to 115200bit/s, 8 data bits, 1 stop
bit, no parity. Note that the device does not fully implement the hardware (RTS/CTS) flow control, so it is
suggested to try to disable hardware flow control in the terminal emulation program in case the serial
console does not work as expected, and if it does not help, make a new cable using the pinout given in the
Appendix.
To enter the loader configuration screen, press any key (or only [Delete] key (or [Backspace] key – see the
note for the respective configurable option), depending on the actual configuration) just after the loader is
asking for it:
RouterBOOT booter 2.12
RouterBoard 411
CPU frequency: 300 MHz
Memory size: 32 MB
Press any key within 2 seconds to enter setup
RouterBOOT-2.12
What do you want to configure?
d - boot delay
k - boot key
s - serial console
o - boot device
u - cpu mode
r - reset configuration
6

 Loading...