Transom
Fix the s/s exhaust to the skin fitting and secure with the heavy duty clamp. Cut the exhaust at a convenient place and slide over the
first section of insulating sleeve, turn the ends back inside themselves and clamp in place with 2 x 38mm hose clips provided. Now
put a heavy duty clamp on the remaining end and insert the silencer.
Take the remaining insulation sleeve and 2 x 38mm clamps, slide onto the exhaust, form into a swan neck to prevent any ingress of
water, cut to length and fit to the silencer with the heavy duty clamp. Now fix the insulation sleeve as before.
NOTE: THE EXHAUST DOES GET HOT- DO NOT CLAMP IT TO ANY COMBUSTIBLE MATERIALS.
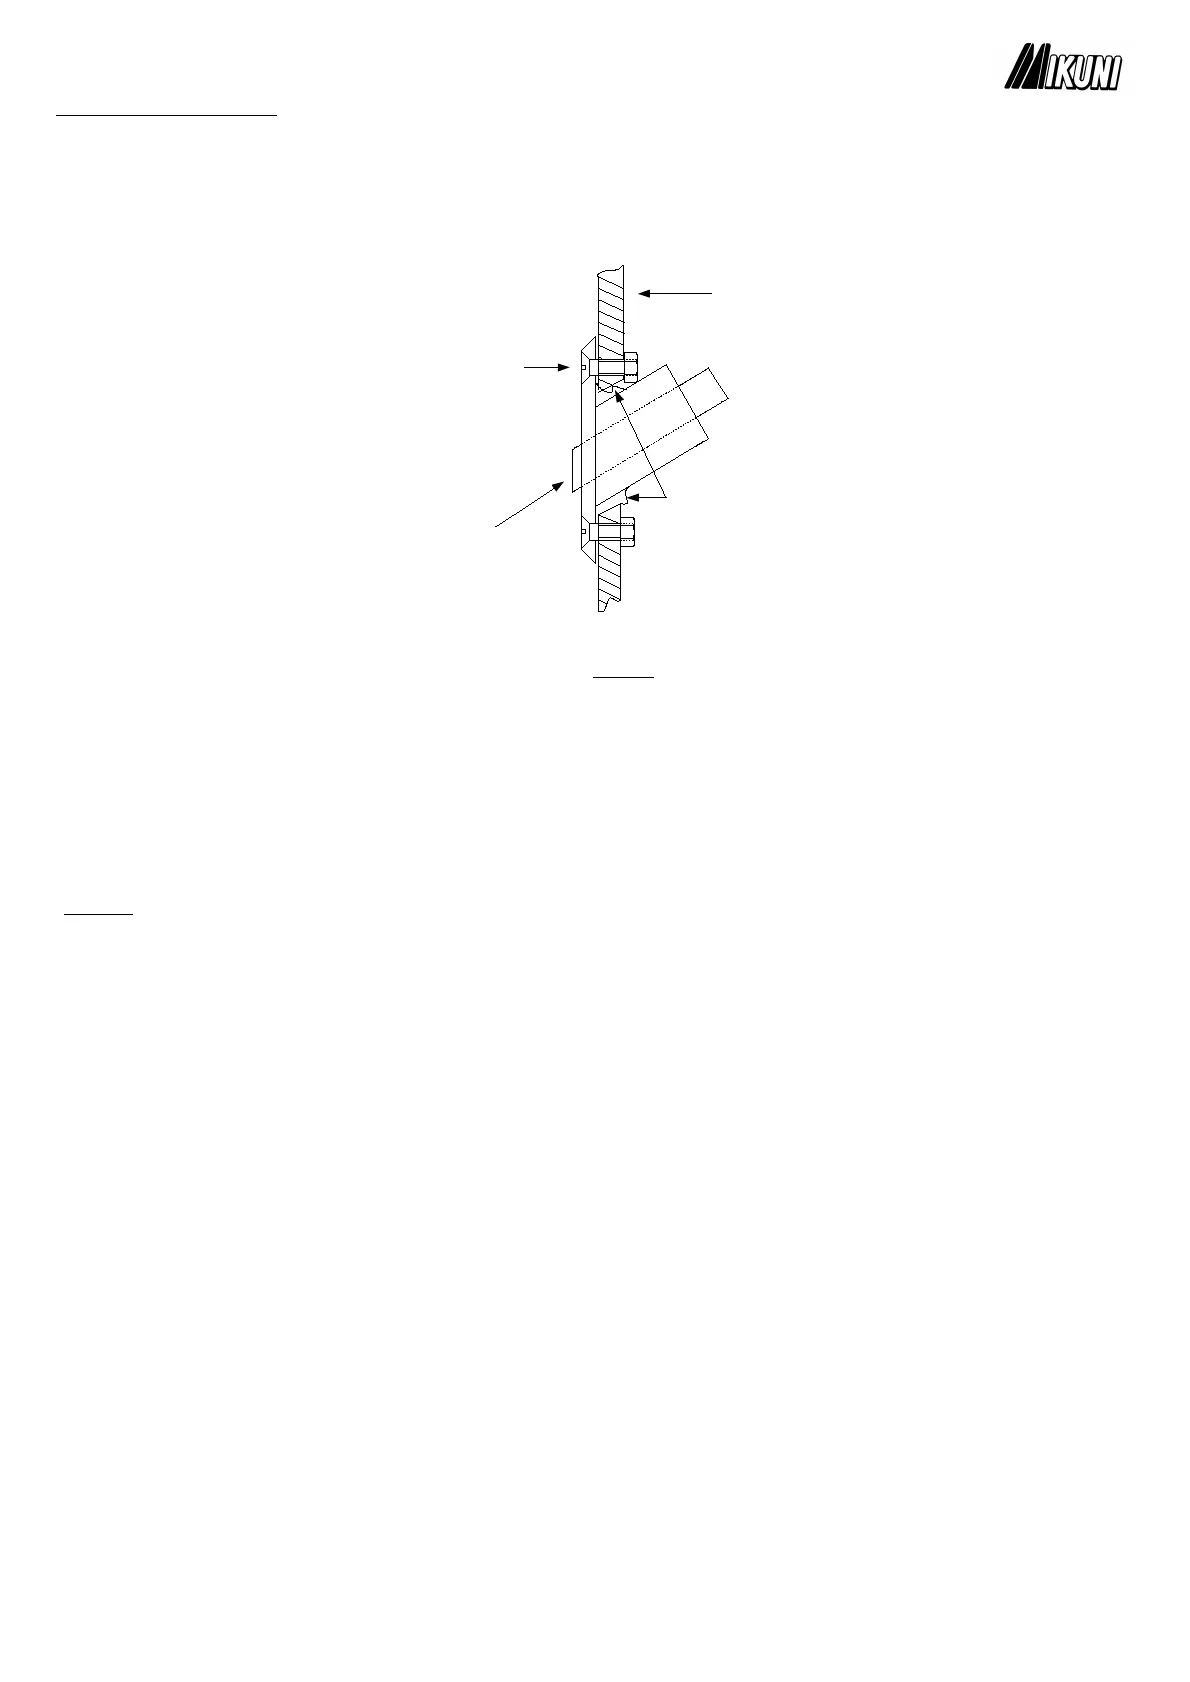
Stainless Steel Skin Fitting:
Once you have planned the siting, drill a 4mm pilot hole as guidance for the pilot drill o n the hole saw arbour. Now drill the correct
size hole: MX40=40mm MX60=55mm. When you have completed this re-drill the hole at an angle at a slow speed (see dia 2 ) to
allow the skin fitting to fit in a snug hole. Now drill 4 x 5mm holes for the fixing bolts, appl y silicon to the rear of the face and secure
in place with the 4 x M5 x 40 c/s screws provided.
Drill with hole saw at angle after
you have drilled the
perpendicular hole.
BE CAREFUL!
4 x fixing screws
Dia 5.
Silicon sealant
3. Combustion Air Inlet.
The combustion air is normally drawn from the area/locker that the heater is situat ed in. Ensure that there is adequate ventilation for
the burner MX40 = 1,020mm
2
. MX60 = 1,960mm
2
.
The MX40 has an integral combustion air silencer and filter whilst the MX60 is a seperate unit which has to be fitted. Mount the
silencer in a convienient place near the heater with the cable ties provided. Now cut the 28mm enduraflex ducting to length and fix
using 2 x 28mm hose clips.
4. Fuel System.
The heater is supplied with a fuel standpipe to be fitted into the top of the fuel tank. Use this whe never possible-it is the preferred
method because it does not interfere with the engine fuel supply.
Find a suitable location in the fuel tank that has no obstructions inside, put some g rease around the chosen location and drill a 22mm
hole - the grease should help prevent any debris falling into the fuel tank. Now cut the standpipe so that it is about 30mm off the
bottom of the fuel tank, slide into place and tighten the fixing nut. (see dia 6.)
The fuel pump should be fitted near the fuel standpipe
- 5 -
 Loading...