OM-244 997 Page 19
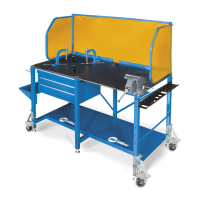
M. Installing Stiffener Bracket And Work Lead Tab
After setting the welding table in
place, make final adjustments to
leveling feet keeping the top level
and the feet solid on the floor. Tight-
en jam nuts on feet at this time.
1 Stiffener Bracket
Use two bolts EE and two locknuts
ZZ and install stiffener bracket to
rear of end subframes.
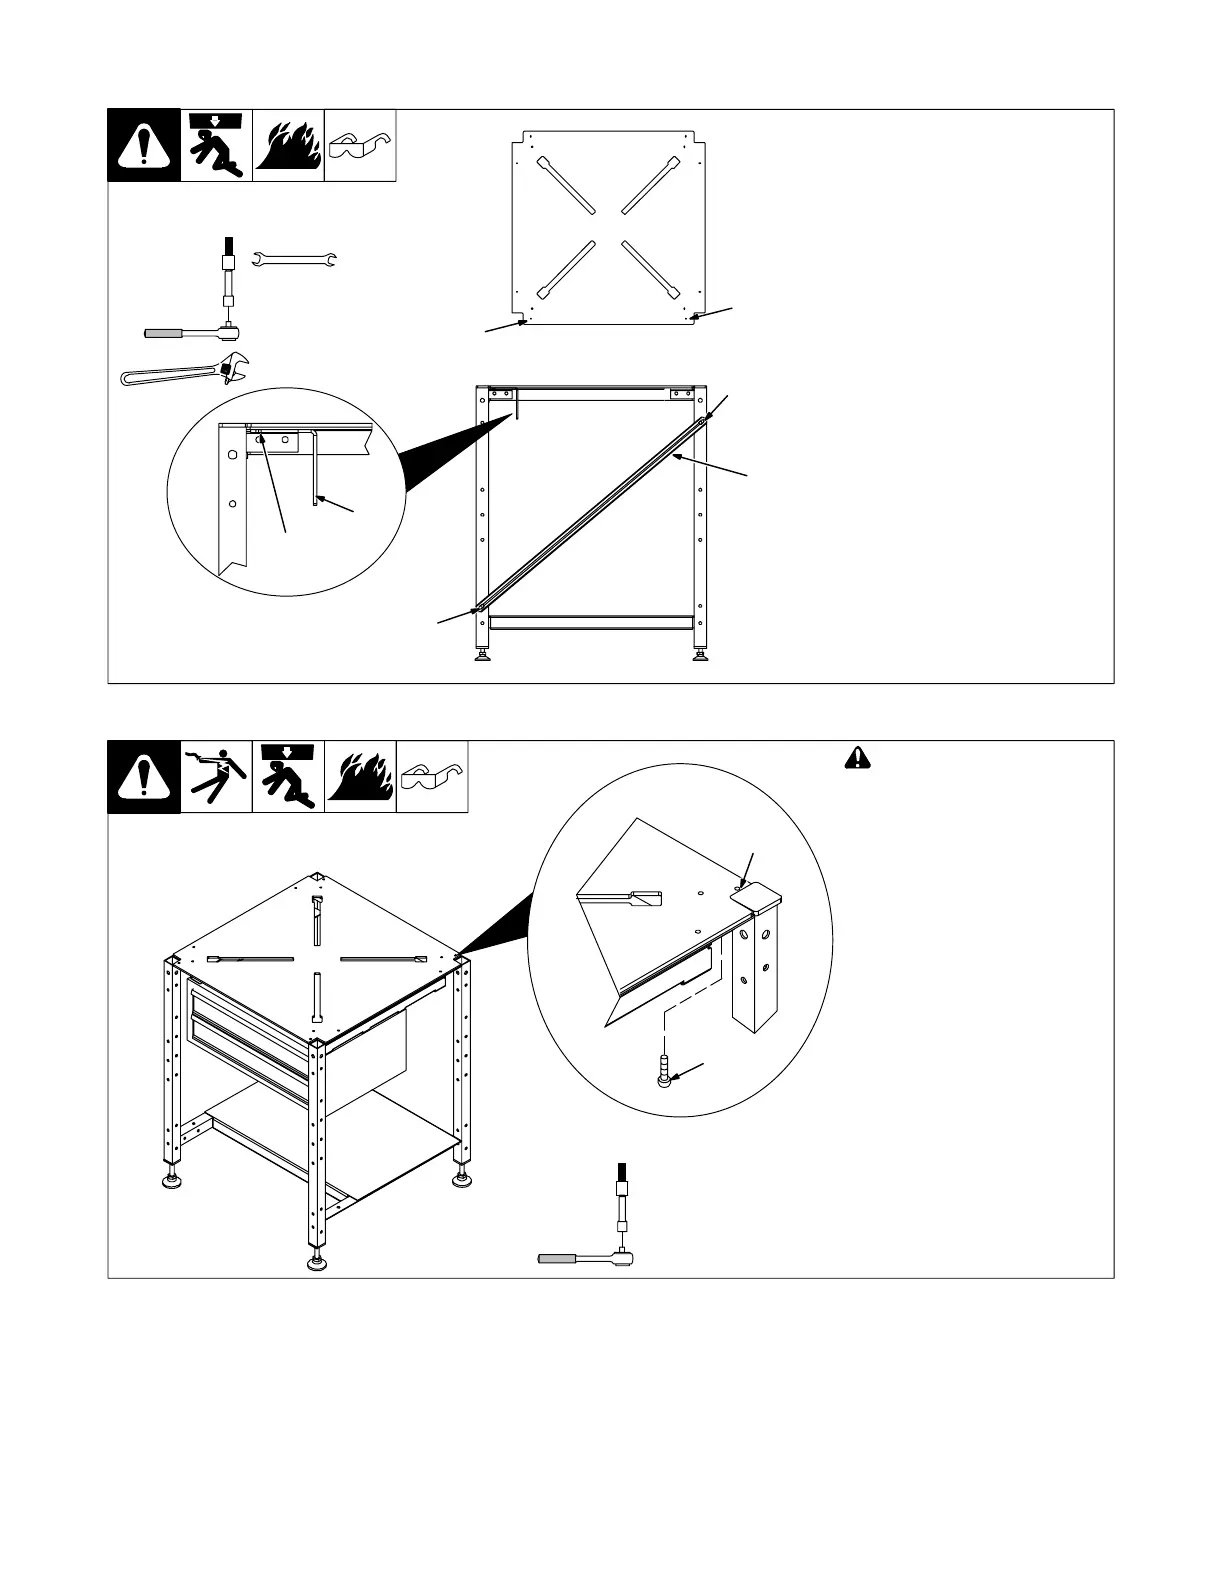
2 Tapped Holes For Work Lead
Ta b
3 Work Lead Tab
Attach work lead tab with one bolt
DD to bottom side and at the rear of
the top using either one of the two
tapped holes.
Tools Needed:
1
1/2 in.
hex bit 3/16 in.
EE and ZZ
EE and ZZ
2
2
Top View
Rear
3
DD
N. Grounding The Welding Table
! Connect welding table to a
good electrical ground
(independent of the welding
leads) unless a qualified
person assures it is safe to
work on an ungrounded
workpiece.
1 Ground Bolt
2 Tapped Hole For Ground Bolt
Use the supplied ground bolt to
connect the welding table to a good
electrical ground according to
national, state, and local codes.
Tools Needed:
1
2
hex bit 3/16 in.
 Loading...