41
CONTENTS
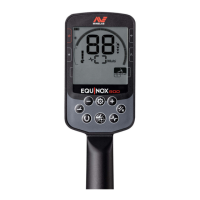
TARGET IDENTIFICATION NUMBER
Target Identification (Target ID) numbers range from –19 to
99 with ferrous (iron) targets ranging from –19 to 0�
When a target is detected, it is represented as a number
that appears on the Target Identification Number field
on the display� This indicates the target’s ferrous or
non-ferrous properties for quick and easy identification�
For example, a US quarter has a Target ID of 89� This
means that each time a Target with an ID of 89 is detected,
there is a good chance that it will be a US quarter�
A Target ID number appears when a target is detected� This example shows
the detection of a shallow US quarter� The corresponding Target ID Segment
flashes upon detection (flashing segment shown in grey)�
The last detected Target ID remains on the display for five
seconds or until another target is detected�
Note: Some non-ferrous targets display a negative ID if
there is an adjacent ferrous target�
Target ID Accuracy
Multi-IQ technology gives greater Target ID accuracy and
increased detecting performance, especially in heavily
mineralised ground� In benign ground, a single frequency
may perform adequately, however depth and stable
Target IDs will be limited by ground noise�
Multi-IQ simultaneous multi-frequency will achieve
maximum depth with a very stable target signal� In
mineralised ground, single frequencies will not be able to
effectively separate the target signal from the ground
signal, giving decreased results� Multi-IQ will still detect at
depth, losing a minimal amount of Target ID accuracy�
If there is no detection or the detector passes over a
target that it rejects, the display shows two large dashes�
Two large dashes on the Target Identification Number
field when there is no detection�
DISCRIMINATION SCALE
The circular Discrimination Scale corresponds to the 119
Target IDs� Accepted (detected) targets are shown as
visible segments, and will flash when a target with that ID
is detected� Rejected (non-detected or ‘blanked’) targets
are turned Off�
Discrimination Segments are turned On (accepted) or Off
(rejected) to create Discrimination Patterns�
You can discriminate between desired and undesired
targets that appear along the Discrimination Scale�
Therefore you only hear target signals from those you want
to find, and unwanted targets are ignored�
You can do this by the following methods:
Accepting/Rejecting detected targets upon detection
using the Accept/Reject button� See "Accept or Reject
Targets Upon Detection" on page 36�
Creating a discrimination pattern via Accept/Reject
in the Settings Menu� See "Creating a Discrimination
Pattern" on page 36�
Target Identification
 Loading...