Do you have a question about the Mini 805 and is the answer not in the manual?
How to adjust the date and time settings on the dash camera.
Procedure for changing the user interface language.
Configures continuous or segmented video recording modes.
Activates recording when motion is detected in standby mode.
Adjusts the sensitivity of the G-Sensor for automatic file locking.
Restores the dash camera to its original factory settings.
Erases all data from the microSD card to prepare it for use.
Enables or disables the GPS module for tracking and speed logging.
Configures the lane departure warning system and its calibration.
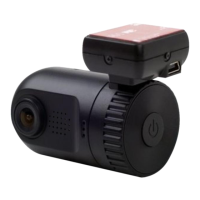
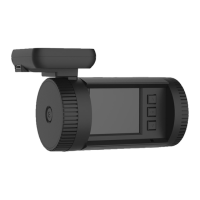
The MINI0805 Dash Camera is a compact, in-car recording device designed to capture video and still images while driving, providing a record of events on the road. It is preconfigured for a simple plug-and-play experience, automatically turning on and beginning to record when the vehicle's engine is started and power is received. The camera is intended to be set up before driving, allowing the driver to maintain concentration on the road while the device handles recording.
The dash camera requires a CLASS 6 or CLASS 10 High Capacity microSD card (up to 32GB) for storing videos and photos. Some models may support up to 128GB and feature dual-card functionality. The device can record continuously or in segmented loop recordings of 1, 3, or 5-minute blocks. When the memory card is full, the oldest files will be overwritten by new recordings, unless those files have been locked. If the loop recording function is turned off, recording will stop once the card space is full, displaying a "card full" message.
To take a photo, the user can press and hold the OK button while recording or on standby. Reviewing recorded videos and photographs is done directly on the dash camera's display screen. After powering on, the camera automatically records; to enter standby mode, the OK button must be pressed. From standby, pressing and holding the DOWN button enters playback mode. In playback mode, the UP or DOWN buttons are used to highlight a file, and the OK button plays it. To edit a file, highlight it with the UP and DOWN buttons, then press and hold the UP button to access options like deleting, protecting, auto-playing, copying to another card, or switching cards for review. The DOWN button is pressed and held to exit playback mode.
The dash camera features a G-Sensor that automatically locks video recordings when the unit is shaken vigorously, such as during an impact. For lower impacts or other reasons to save a file, the user can press the DOWN button while recording to lock the current file, preventing it from being overwritten by loop recording.
The device's settings can be customized. To access the menus, the dash camera must be powered on, and the OK button pressed to stop recording. Pressing and holding the UP button allows navigation through options using the UP and DOWN buttons, with the OK button confirming selections. Settings include:
Video files and data can be transferred by removing the microSD card and inserting it into a computer with a card reader, or by connecting the dash camera directly to a PC via a USB data cable, where it functions as a USB disk. The dash camera can also be connected to a TV via AV or HDMI for playback on a larger screen, though it cannot record while connected to a TV.
To ensure proper functioning, the dash camera should not be exposed to dusty, dirty, or sandy areas, as this can damage components. The normal operating temperature range is 0°C to 40°C (32°F to 104°F). High temperatures, especially in parked cars in direct sunlight, can shorten the life of electronic devices, degrade plastic components, and potentially cause the dash camera to crash or be damaged if Motion Detection mode is active. Similarly, extremely low temperatures can damage electronic components, and freezing water from moisture can cause damage upon thawing.
Users should not attempt to dismantle or open the casing, as this can result in electrical shock and damage to the device. The dash camera should be handled with care to avoid damage from dropping, sudden impact, or vibration. For cleaning, only a slightly damp cloth should be used; harsh chemicals, cleaning solutions, or high-concentration detergents are not recommended.
If the device crashes, pressing the power button for 10 to 15 seconds will reset and restart it. Troubleshooting common issues includes checking if the microSD card is locked or full (if loop recording is OFF) if recording fails. For automatic stops during recording, using a high-speed Class 6 or Class 10 microSD card compatible with SDHC is recommended due to the large data stream of high-definition video. If "File Error" occurs during playback, formatting the microSD card via the menu before use is advised. If there's no image on the TV, confirm correct AV/HDMI cable connection and TV input mode. Blurred images may indicate a dirty lens, which should be cleaned with lens paper, and any protective film should be removed before first use. If the supply indicator doesn't work, ensure sufficient power. Horizontal stripes interference suggests an incorrect "Flicker" setting, which should be reset to 50 Hz or 60 Hz based on local power supply frequency. If the camera doesn't auto-start recording after car power-on, ensure loop recording is set to 1, 3, or 5 minutes (not OFF) and that recording is set to an external card if applicable. If the machine keeps recording automatically and cannot be stopped, check if Motion Detect function is ON, as it will auto-start recording when motion is detected and stop when the screen returns to calm. If auto power off doesn't work, ensure motion detection is turned off, as the machine will remain in standby mode and not shut down automatically if motion detection is active.
| G-Sensor | Yes |
|---|---|
| Loop Recording | Yes |
| Motion Detection | Yes |
| Lens | 6-layer glass lens |
| Storage | MicroSD |
| Power Source | 12V |
| Video Resolution | 2560x1440p @ 30fps |