3.2 Mounting
1) Base station
With one foldable legs at the back of the unit, the base station can be placed onto any flat surface or wall
mounted at the desired location by the hanging holes also at the back of the unit. It is important to check
that the radio signal can be received before permanently mounting any of
the units
2) Remote sensor
Note: To achieve a true temperature reading, avoid mounting remote sensor
in direct sunlight. We recommend that you mount the remote sensor on an
outside North-facing wall; obstacles such as walls, concrete, and large metal
objects will reduce the range.
To wall mount, use 3 screws to affix the wall bracket to the desired wall, plug
in the remote sensor to the bracket.
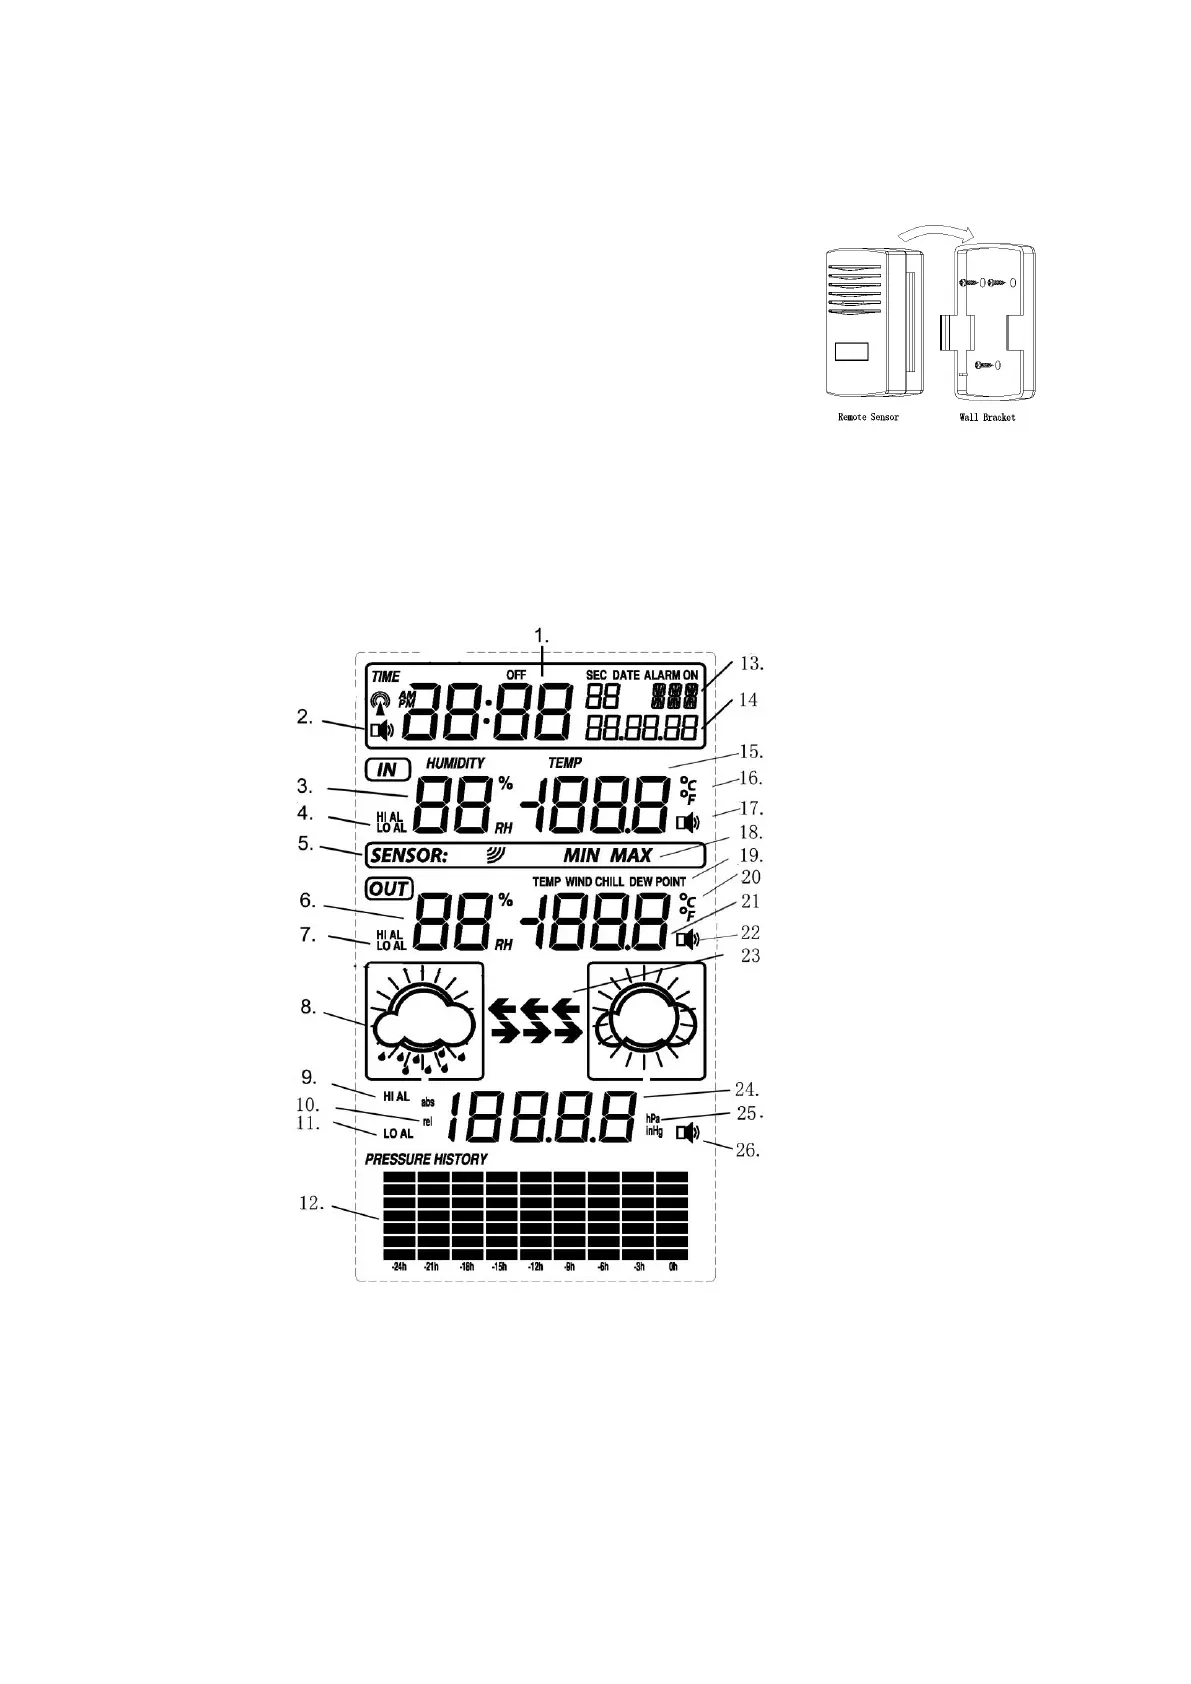
4. LCD overview
4.1 LCD overview
The following illustration shows the full segments of the LCD for description purposes only and will not
appear like this during normal operation.
1. Time
2. Alarm on indicator
3. Indoor humidity display
4. Indoor temperature and humidity low / high alarm
5. Remote sensor transmit
6. Outdoor humidity display
7. Outdoor temperature and humidity low/high alarm
8. Weather forecast icon
9. Pressure high alarm
10. Absolute or relative air pressure selection
11. Pressure low alarm
14. Date
15. Indoor temperature display
16. Temperature display unit
17. Indoor temperature and humidity alarm on
indicator
18. MIN/MAX information
19. Dew point temperature display
20. Temperature display unit
21. Outdoor temperature display
22. General outdoor alarm icon
23. Weather tendency indicator