9
Starting/warming up the coffee machine
• Use pods suitable for this model only.
• Insert the plug of the power cord into the electrical socket.
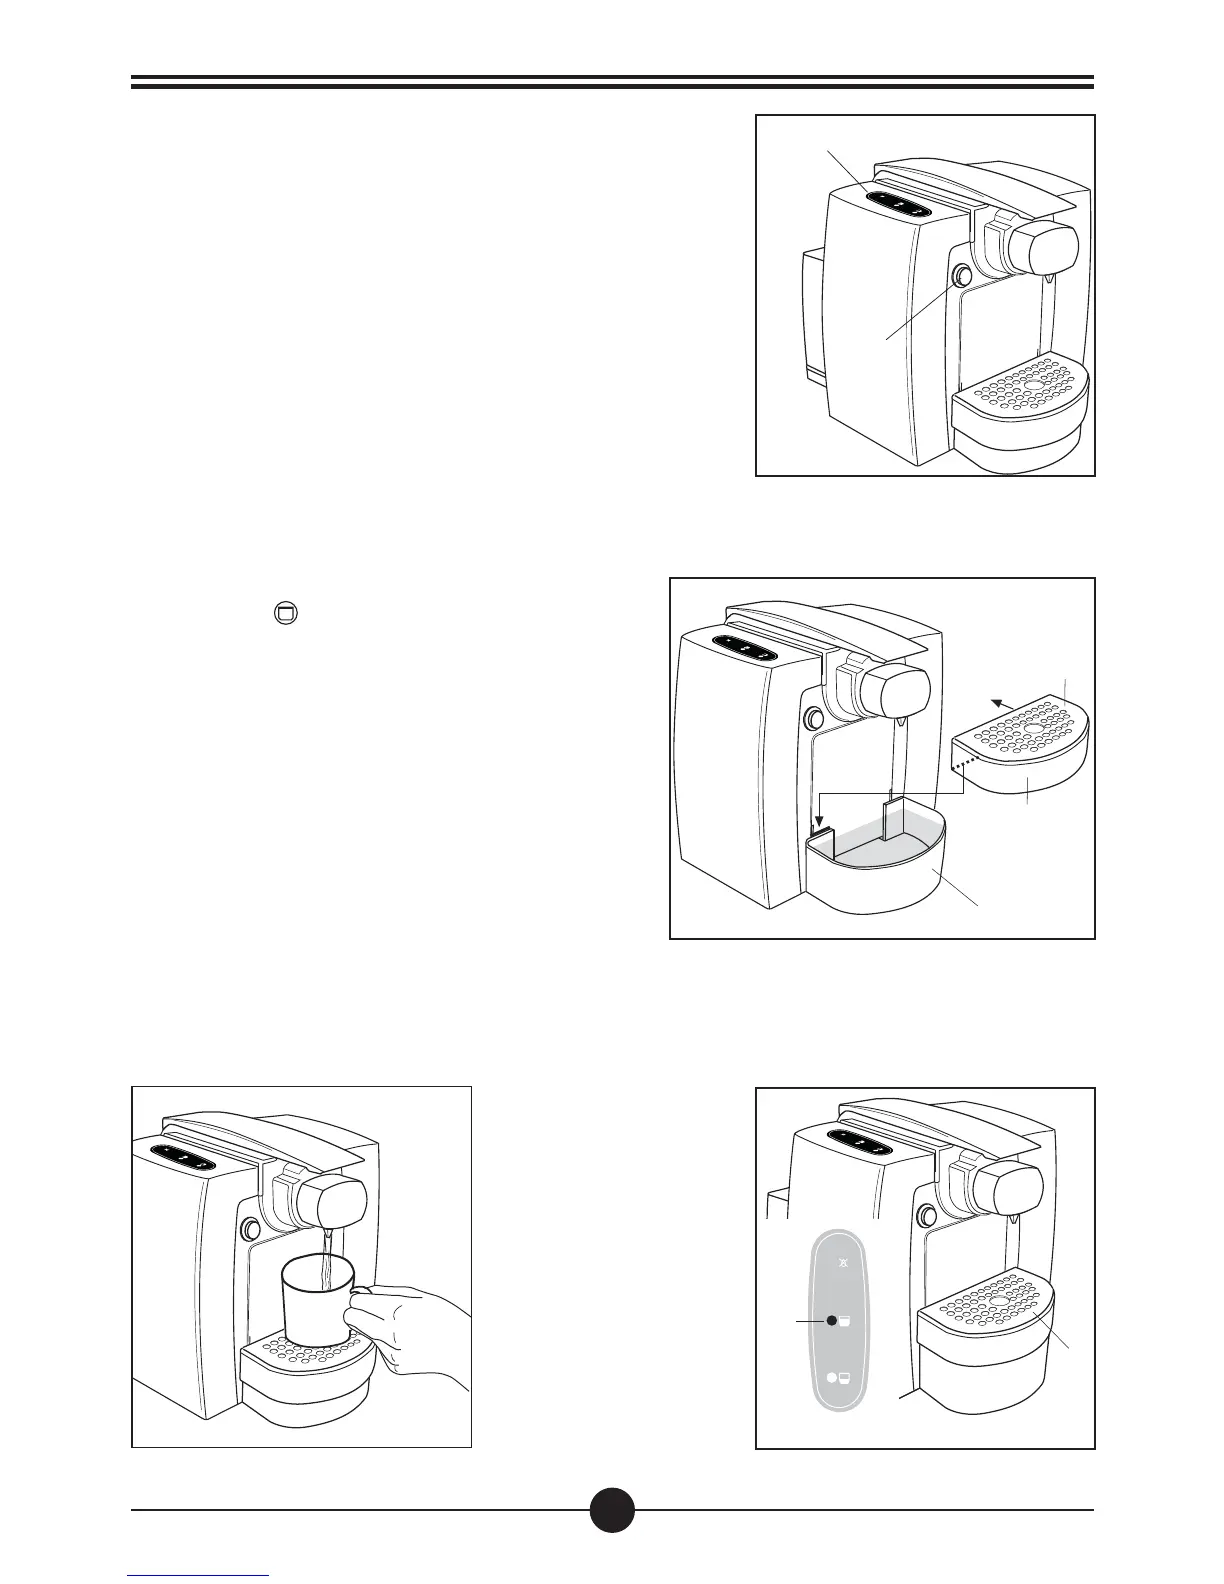
• Switch on the appliance with the main switch (9).(Fig.4)
• When the led (2) turns on, the coffee machine is ready for
use (Fig.4).
•
The control buttons will start flashing. Once the right
temperature is reached, they will illuminate steadily, indicating
that the machine is ready for use (Fig.4).
The machine should be rinsed both at its very first use and
when it has been inoperative for a long spell of time. By
performing this quick procedure, you will ensure that all inner
circuits are rinsed.
•Ensure that there are no pods inside the unit; power on the
Rinsing the machine/inner circuits
• Remove the grid (5). (Fig. 5)
•
Press button (D) (Fig. 7) and wait until delivery
is complete. Now the machine is rinsed.
NOTE
The grid height (5) can be adjusted depending on
the cup size. You can choose two different positions.
To adjust the grid to its maximum height, lift the support
(14), place it against the pods collection box, and
drive it into its seat
(Fig. 5).
• To prepare espresso lungo, place the grid (5) at
its lower position
(Fig. 6)
• To properly prepare an espresso, place the grid
(5) at its highest position (Fig. 7)
Fig.7
5
D
Dispenser buttons
9
Fig. 4
Fig.5
6
5
14
Fig.6