11
ENGLISH
3. High efciency lters (Optional parts)
Thehighefciencylterscannotbereused.Alwaysreplacewithnew
lters.Fordetails,consultyourdealer.
Assembly after maintenance
Bearing in mind the following points, assemble the parts following
thesequencefortheirremovalinreverse.
- ArrangetheLossnaycorewiththeairltersideasshowninthe
name plate on the Fresh Master.
5. Inspection and Maintenance
Iftheunitistobeusedforprolongedperiodsoftime,pleasehavethefollowingitemsinspectedbyanauthorizedserviceofceatintervalsof
about once a year.
Be sure to turn off the isolator of the distribution board before conducting maintenance or inspection.
Part to be inspected
Description of maintenance and inspection
Possibleconsequenceifmain-
tenance is not conducted
Inspection item Action to take
Strainer
Inspect for dust clogging. Remove and clean the dust if clogged. Unable to humidify
Inspect for cracks in O-rings. Replace the O-rings if cracked. *Note 1 Water leakage
Humidifying elements
Inspect for water leakage from the sur-
face of each of humidifying element.
Replace the humidifying element if
water spurts from its surface. *Note 2
Water leakage
Inspect for dust and particles on the
surface of each humidifying element.
If the air pathway is covered by dust
or particles, carefully clean it using a
vacuum cleaner, or wash it with water
by referring to the cleaning procedure
on page 12.
Reducedairow
Reduced humidifying power
* Note 1: Replacement O-rings: Commercially available O-rings P22A and P20
* Note 2: A small amount of water may form through dew condensation, but it is not abnormal.
Preparation before cleaning
1. Close the service valve to prevent residual water from spat-
tering.
2. Take a countermeasure against water leakage.
- Water inside the humidifying elements will leak. Place a vinyl
sheet in the ceiling or take another countermeasure to pre-
vent water leakage.
3. Drain the residual water from the pipe.
- Place a bucket or other container under the discharge valve
and open the valve to collect the residual water in the pipe.
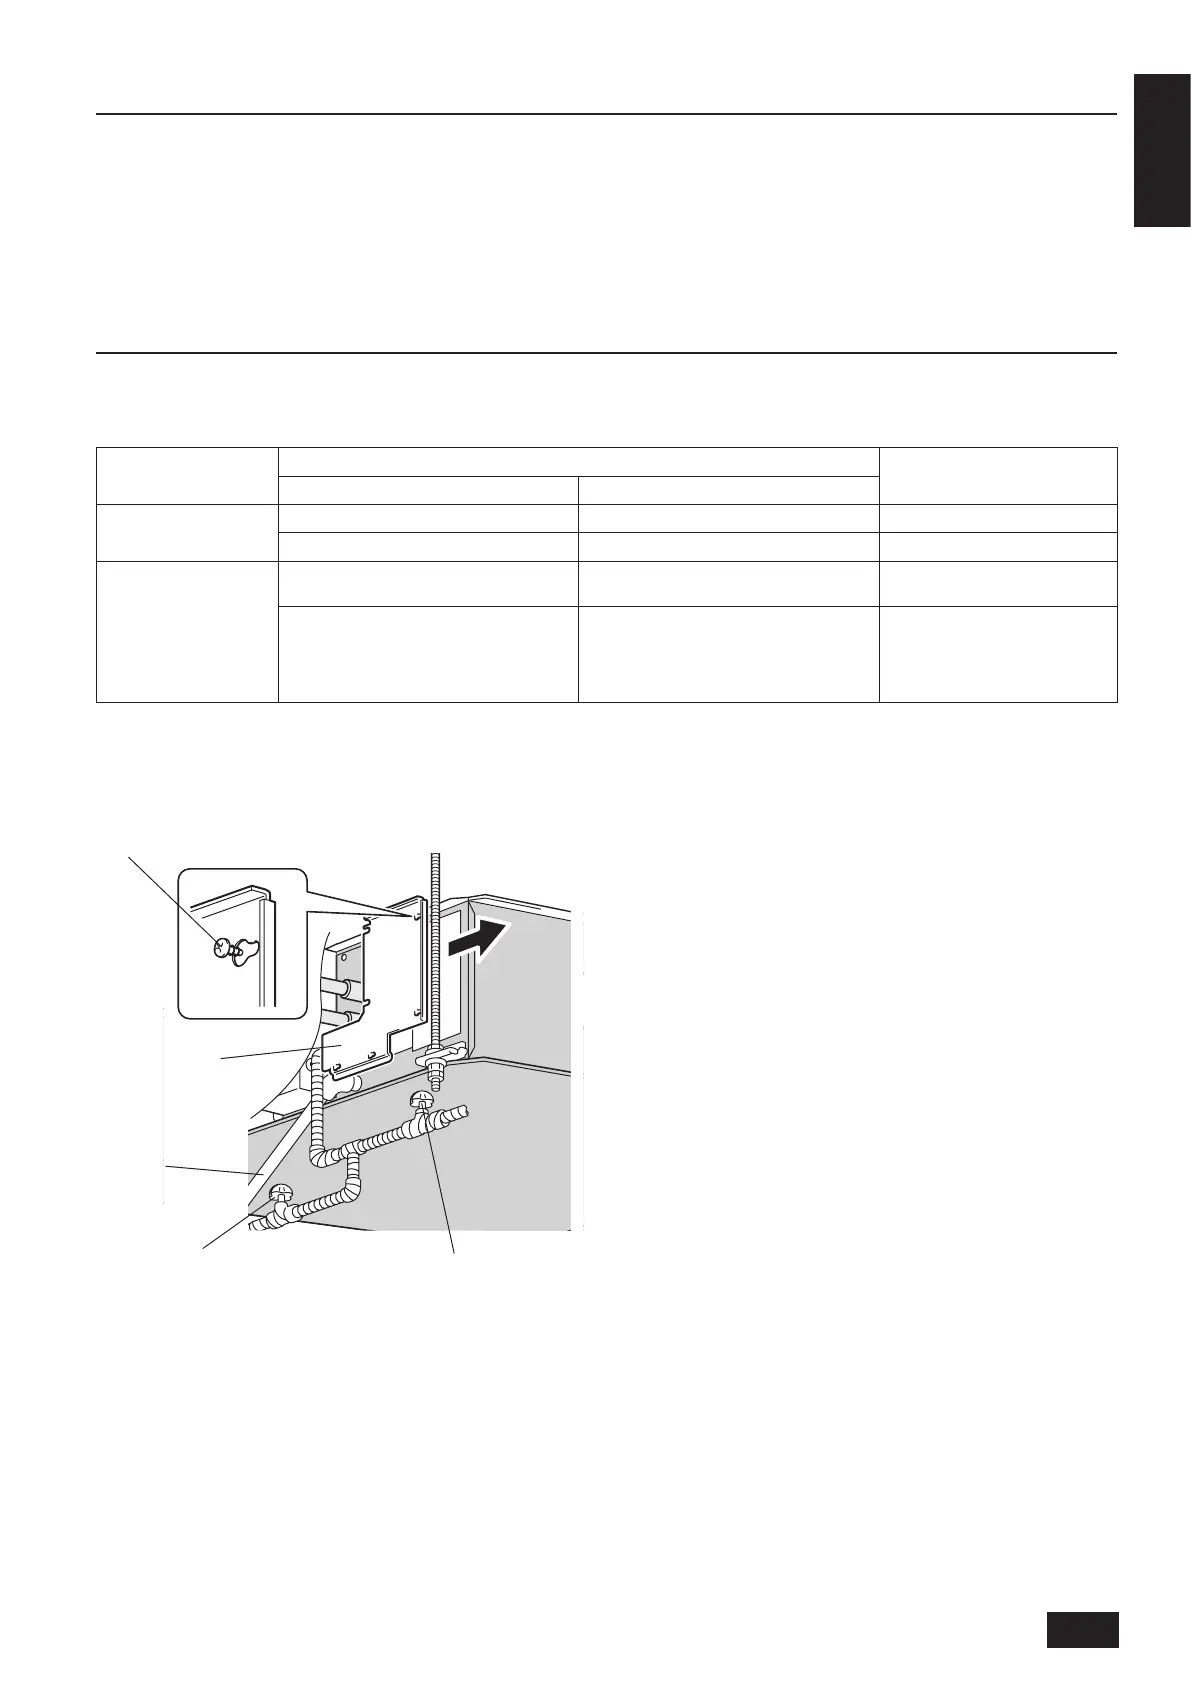
4. Remove the maintenance cover (for humidifying).
- Remove the seven mounting screws, slide the maintenance
cover to the right, and remove it from the potbelly-shaped
holes(sixlocationsfortheGUF-50RDH4).
Mounting screw
Maintenance cover
(for humidifying)
Drain pipe
Discharge valve
Service valve
 Loading...