1. BEFORE INSTALLATION
WARNING
7KLVXQLWXVHVDÀDPPDEOHUHIULJHUDQW
,IUHIULJHUDQWOHDNVDQGFRPHVLQFRQWDFWZLWK¿UHRUKHDWLQJSDUWLWZLOOFUHDWHKDUPIXOJDVDQGWKHUHLVULVNRI¿UH
5HDGWKH23(5$7,1*,16758&7,216FDUHIXOO\EHIRUHRSHUDWLRQ
6HUYLFHSHUVRQQHODUHUHTXLUHGWRFDUHIXOO\UHDGWKH23(5$7,1*,16758&7,216DQG,167$//$7,210$18$/EHIRUHRSHUDWLRQ
)XUWKHULQIRUPDWLRQLVDYDLODEOHLQWKH23(5$7,1*,16758&7,216,167$//$7,210$18$/DQGWKHOLNH
1-1. THE FOLLOWING SHOULD ALWAYS BE OBSERVED FOR SAFETY
%HVXUHWRUHDG³7+()2//2:,1*6+28/'$/:$<6%(2%6(59(')256$)(7<´EHIRUHLQVWDOOLQJWKHDLUFRQGLWLRQHU
%HVXUHWRREVHUYHWKHZDUQLQJVDQGFDXWLRQVVSHFL¿HGKHUHDVWKH\LQFOXGHLPSRUWDQWLWHPVUHODWHGWRVDIHW\
$IWHUUHDGLQJWKLVPDQXDOEHVXUHWRNHHSLWWRJHWKHUZLWKWKH23(5$7,1*,16758&7,216IRUIXWXUHUHIHUHQFH
:KHQXVLQJWKLVSURGXFWLQ$XVWUDOLDFDUHIXOO\UHDGWKH$XVWUDOLDQ,QVWLWXWHRI5HIULJHUDWLRQDQG)ODPPDEOHUHIULJHUDQWV6DIHW\*XLGHLQ$LUFRQGLWLRQLQJDQG+HDWLQJ$,5$+DVZHOO
-*%+
Required Tools for Installation
3KLOOLSVVFUHZGULYHU
/HYHO
6FDOH
8WLOLW\NQLIHRUVFLVVRUV
PPKROHVDZ
7RUTXHZUHQFK
:UHQFKRUVSDQQHU
PPKH[DJRQDOZUHQFK
)ODUHWRROIRU55$
*DXJHPDQLIROGIRU55$
9DFXXPSXPSIRU55$
&KDUJHKRVHIRU55$
3LSHFXWWHUZLWKUHDPHU
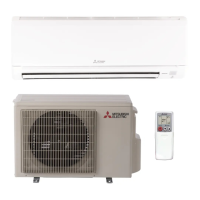
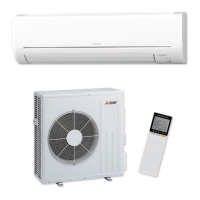
63/,77<3($,5&21',7,21(56
INSTALLATION MANUAL
ENGLISH
Model names are indicated in 1-3.
REFRIGERANT
$SSURSULDWHSHUVRQDOSURWHFWLYHHTXLSPHQW
7KHLQVWDOOHUVKRXOGHQVXUHWKH\FKHFNWKHUHVSHFWLYH:RUN+HDOWK
DQG6DIHW\:+6$FWZLWKLQWKHLUMXULVGLFWLRQDVWKHUHTXLUHPHQWV
DQGREOLJDWLRQVPD\GLIIHU
CAUTION
&RXOGOHDGWRVHULRXVLQMXU\LQSDUWLFXODUHQYLURQPHQWVZKHQRSHUDWHGLQFRUUHFWO\
WARNING
&RXOGOHDGWRGHDWKVHULRXVLQMXU\HWF
■ Do not install the unit by yourself (user).
,QFRPSOHWHLQVWDOODWLRQ FRXOGFDXVH ¿UHHOHFWULF VKRFN
LQMXU\GXHWRWKHXQLWIDOOLQJRUOHDNDJHRIZDWHU&RQVXOW
WKHGHDOHUIURPZKRP\RXSXUFKDVHGWKHXQLWRUDTXDOL¿HG
LQVWDOOHU
■ Perform the installation securely referring to the
installation manual.
,QFRPSOHWHLQVWDOODWLRQ FRXOGFDXVH ¿UHHOHFWULF VKRFN
LQMXU\GXHWRWKHXQLWIDOOLQJRUOHDNDJHRIZDWHU
■ When installing the unit, use appropriate protective
equipment and tools for safety.
)DLOXUHWRGRVRFRXOGFDXVHLQMXU\
■ Install the unit securely in a place which can bear the
weight of the unit.
,IWKHLQVWDOODWLRQORFDWLRQFDQQRWEHDUWKHZHLJKWRIWKH
XQLWWKHXQLWFRXOGIDOOFDXVLQJLQMXU\
■ (OHFWULFDOZRUNVKRXOGEHSHUIRUPHGE\DTXDOL¿HG
experienced electrician, according to the installation
manual. Be sure to use an exclusive circuit. Do not
connect other electrical appliances to the circuit.
,IWKHFDSDFLW\RIWKHSRZHUFLUFXLWLVLQVXI¿FLHQWRUWKHUH
LVLQFRPSOHWHHOHFWULFDOZRUNLWFRXOGUHVXOWLQD¿UHRUDQ
HOHFWULFVKRFN
■ Earth the unit correctly.
'RQRWFRQQHFWWKHHDUWKWRDJDVSLSHZDWHUSLSHOLJKW
QLQJ URG RU WHOHSKRQH HDUWK 'HIHFWLYH HDUWKLQJ FRXOG
FDXVHHOHFWULFVKRFN
■ Do not damage the wires by applying excessive pres-
sure with parts or screws.
'DPDJHGZLUHVFRXOGFDXVH¿UHRUHOHFWULFVKRFN
■ Be sure to cut off the main power in case of setting
up the indoor P.C. board or wiring works.
)DLOXUHWRGRVRFRXOGFDXVHHOHFWULFVKRFN
■ 8VH WKH VSHFL¿HG ZLUHV WR FRQQHFW WKH LQGRRU DQG
RXWGRRUXQLWVVHFXUHO\DQGDWWDFKWKHZLUHV¿UPO\WR
the terminal block connecting sections so the stress
of the wires is not applied to the sections. Do not
extend the wires, or use intermediate connection.
,QFRPSOHWHFRQQHFWLQJDQGVHFXULQJFRXOGFDXVH¿UH
■ 'RQRWLQVWDOOWKHXQLWLQDSODFHZKHUHLQÀDPPDEOH
gas may leak.
,IJDVOHDNVDQGDFFXPXODWHVLQWKHDUHDDURXQGWKHXQLW
LWFRXOGFDXVHDQH[SORVLRQ
■ Do not use intermediate connection of the power
cord or the extension cord and do not connect many
devices to one AC outlet.
,WFRXOGFDXVHD¿UHRUDQHOHFWULFVKRFNGXHWRGHIHFWLYH
FRQWDFWGHIHFWLYHLQVXODWLRQH[FHHGLQJWKHSHUPLVVLEOH
FXUUHQWHWF
■ %HVXUHWRXVHWKHSDUWVSURYLGHGRUVSHFL¿HGSDUWV
for the installation work.
7KHXVHRIGHIHFWLYHSDUWVFRXOGFDXVHDQLQMXU\RUOHDNDJH
RIZDWHUGXHWRD¿UHDQHOHFWULFVKRFNWKHXQLWIDOOLQJ
HWF
■ When plugging the power supply plug into the outlet,
make sure that there is no dust, clogging, or loose
parts in both the outlet and the plug. Make sure that
the power supply plug is pushed completely into the
outlet.
,I WKHUH LV GXVW FORJJLQJ RU ORRVH SDUWV RQ WKH SRZHU
VXSSO\SOXJRUWKHRXWOHWLWFRXOGFDXVHHOHFWULFVKRFNRU
¿UH,IORRVH SDUWV DUH IRXQG RQWKHSRZHUVXSSO\SOXJ
UHSODFHLW
■ Attach the electrical cover to the indoor unit and the
service panel to the outdoor unit securely.
,IWKHHOHFWULFDOFRYHURIWKHLQGRRUXQLWDQGRUWKHVHUYLFH
SDQHORIWKHRXWGRRUXQLWDUHQRWDWWDFKHGVHFXUHO\LWFRXOG
UHVXOWLQD¿UHRUDQHOHFWULFVKRFNGXHWRGXVWZDWHUHWF
■ When installing, relocating, or servicing the unit,
PDNHVXUHWKDWQRVXEVWDQFHRWKHUWKDQWKHVSHFL¿HG
refrigerant (R32) enters the refrigerant circuit.
$Q\SUHVHQFHRIIRUHLJQVXEVWDQFHVXFKDVDLUFDQFDXVH
DEQRUPDO SUHVVXUH ULVH DQG PD\ UHVXOW LQ H[SORVLRQ RU
LQMXU\7KHXVHRIDQ\UHIULJHUDQWRWKHUWKDQWKDWVSHFL
¿HGIRUWKHV\VWHPZLOOFDXVHPHFKDQLFDOIDLOXUHV\VWHP
PDOIXQFWLRQRU XQLWEUHDNGRZQ ,QWKH ZRUVW FDVH WKLV
FRXOGOHDGWRDVHULRXVLPSHGLPHQWWRVHFXULQJSURGXFW
VDIHW\
■ Do not discharge the refrigerant into the atmosphere.
If refrigerant leaks during installation, ventilate the
room. Check that the refrigerant does not leak after
installation has been completed.
,IUHIULJHUDQWOHDNVDQGFRPHVLQFRQWDFWZLWK¿UHRUKHDW
LQJSDUWRIVXFKDIDQKHDWHUNHURVHQHKHDWHURUFRRNLQJ
VWRYHLWZLOOFUHDWHKDUPIXOJDV
■ Use appropriate tools and piping materials for instal-
lation.
7KHSUHVVXUHRI5LVWLPHVPRUHWKDQ51RWXVLQJ
DSSURSULDWHWRROVRUPDWHULDOVDQGLQFRPSOHWHLQVWDOODWLRQ
FRXOGFDXVHWKHSLSHVWREXUVWRULQMXU\
■ When pumping down the refrigerant, stop the com-
pressor before disconnecting the refrigerant pipes.
,IWKHUHIULJHUDQWSLSHVDUHGLVFRQQHFWHGZKLOHWKHFRP
SUHVVRULVUXQQLQJDQGWKHVWRSYDOYHLVRSHQDLUFRXOGEH
GUDZQLQDQGWKHSUHVVXUHLQWKHUHIULJHUDWLRQF\FOHFRXOG
EHFRPHDEQRUPDOO\KLJK7KLVFRXOGFDXVHWKHSLSHVWR
EXUVWRULQMXU\
■ When installing the unit, securely connect the refriger-
ant pipes before starting the compressor.
,IWKHFRPSUHVVRULVVWDUWHGEHIRUHWKHUHIULJHUDQWSLSHVDUH
FRQQHFWHGDQGZKHQWKHVWRSYDOYHLVRSHQDLUFRXOGEH
GUDZQLQDQGWKHSUHVVXUHLQWKHUHIULJHUDWLRQF\FOHFRXOG
EHFRPHDEQRUPDOO\KLJK7KLVFRXOGFDXVHWKHSLSHVWR
EXUVWRULQMXU\
■ )DVWHQDÀDUHQXWZLWKDWRUTXHZUHQFKDVVSHFL¿HG
in this manual.
,IIDVWHQHGWRRWLJKWDÀDUH QXW PD\ EUHDN DIWHU D ORQJ
SHULRGDQGFDXVHUHIULJHUDQWOHDNDJH
■ The unit shall be installed in accordance with national
wiring regulations.
■ :KHQXVLQJDJDVEXUQHU RU RWKHU ÀDPHSURGXFLQJ
equipment, completely remove all of the refrigerant
from the air conditioner and ensure that the area is
well-ventilated.
,I WKH UHIULJHUDQW OHDNV DQG FRPHV LQ FRQWDFW LQ ¿UH RU
KHDWLQJSDUWLWZLOOFUHDWHKDUPIXOJDVDQGWKHUHLVULVNRI
¿UH
■ Do not use means to accelerate the defrosting process
or to clean, other than those recommended by the
manufacturer.
■ The appliance shall be stored in a room without
continuously operating ignition sources (for exam-
SOHRSHQ ÀDPHVDQRSHUDWLQJJDVDSSOLDQFHRU DQ
operating electric heater.
■ Do not pierce or burn.
■ Be aware that refrigerants may not contain an odour.
■ Pipe-work shall be protected from physical damage.
■ The installation of pipe-work shall be kept to a mini-
mum.
■ Compliance with national gas regulations shall be
observed.
■ Keep any required ventilation openings clear of ob-
struction.
■ In Australia, only technicians that possess the appro-
priate license issued by the Australian Refrigeration
Council (ARC) should install this product.
■ Install an earth leakage breaker depending on the
installation place.
,IDQHDUWKOHDNDJHEUHDNHULVQRWLQVWDOOHGLWFRXOGFDXVH
HOHFWULFVKRFN
■ Perform the drainage/piping work securely according
to the installation manual.
,IWKHUHLVGHIHFWLQWKHGUDLQDJHSLSLQJZRUNZDWHUFRXOG
GURSIURPWKHXQLWVRDNLQJDQGGDPDJLQJKRXVHKROGJRRGV
■ 'RQRWWRXFKWKHDLULQOHWRUWKHDOXPLQXP¿QVRIWKH
outdoor unit.
7KLVFRXOGFDXVHLQMXU\
■ Do not install the outdoor unit where small animals
may live.
,IVPDOODQLPDOVHQWHUDQGWRXFKWKHHOHFWULFSDUWVLQVLGHWKH
XQLWLWFRXOGFDXVHDPDOIXQFWLRQVPRNHHPLVVLRQRU¿UH
$OVRDGYLVHXVHUWRNHHSWKHDUHDDURXQGWKHXQLWFOHDQ
MEANINGS OF SYMBOLS DISPLAYED ON INDOOR UNIT AND/OR OUTDOOR UNIT