EasyManua.ls Logo

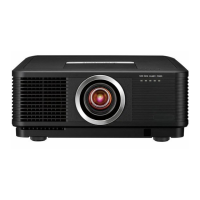
Mitsubishi Electric UL7400U User Manual

Mitsubishi Electric UL7400U
68 pages
To Next Page IconTo Next Page
Page #1 background imageLoading...
Page #1 background image
U
UL7400
This User Manual is important to you.
Please read it before using your projector.
LCD PROJECTOR
MODEL
UL7400U
User Manual

Other manuals for Mitsubishi Electric UL7400U

Questions and Answers:

Mitsubishi Electric UL7400U Specifications

General IconGeneral
BrandMitsubishi Electric
ModelUL7400U
CategoryProjector
LanguageEnglish

Summary

Safety Precautions

Electrical Shock Hazards

Warnings about opening the projector, removing covers, and handling power cords.

Fire and Moisture Hazards

Caution against exposing the appliance to rain or moisture.

Usage Restrictions

Notes on power cord usage and installation location.

General Safety Warnings

Instructions to read manuals, retain instructions, and adhere to all warnings.

Important Safeguards

Instruction and Handling Guidelines

Read, retain, follow instructions; safe cleaning and attachment practices.

Environmental and Usage Precautions

Avoid water, unstable surfaces, and ensure ventilation.

Power and Servicing Safety

Power source, cord protection, overloading, servicing, and replacement parts safety.

Operational Safety Warnings

Unplug if wrong, no cabinet removal, no modification, no damaged projector use, no sun exposure.

Installation Environment Requirements

Proper installation location, temperature, humidity, and altitude guidelines.

Preparing Your Projector

Checking Included Accessories

Verify all accessories are present in the package.

Remote Control Battery Installation

Steps for inserting and removing batteries from the remote control.

Projector Overview

Identification of external parts of the projector.

Control Panel Layout

Description of the projector's control area buttons.

Terminal Panel Connections

Details of the projector's input and output terminals.

Indicator Lights Explained

Meaning of FILTER, STATUS, and POWER indicators.

Remote Control Button Identification

Numbered identification of all buttons on the remote control.

Using the Remote Control

Remote Control Operational Range

Guidelines for operating the remote control within its effective range and angle.

Wired Remote Control Connection

Instructions for connecting and using the projector with a wired remote control.

Setting Projector ID Numbers

How to set CONTROLLER ID and PROJECTOR ID for multiple projector control.

Setting Up Your Projector

Pre-Setup Environment Checks

Verify operating environment before projector setup.

Screen and Projection Setup

Guidelines for installing the screen and projector for optimal projection.

Projection Distance and Screen Size

Tables showing screen size, aspect ratio, and projection distance.

Basic Setup Adjustments

Procedures for turning on the projector and adjusting focus/image position.

AUTO POWER OFF Setting

How to change the automatic projector power-off setting.

High Altitude Mode Configuration

Setting HIGH ALTITUDE MODE based on operating altitude.

Image Orientation Adjustment

Setting IMAGE REVERSE for different mounting orientations.

Correcting Image Skew and Distortion

Adjusting projector tilt and addressing fine streaks or distortions.

Keystone Distortion Correction

Adjusting image shape to correct trapezoidal distortion.

Cornerstone Distortion Correction

Fine-tuning image shape using the Cornerstone adjustment.

Cornerstone Corner Adjustment

Adjusting individual corners for precise image shape correction.

ARC and Origin Adjustment

Correcting image arcs and adjusting horizontal/vertical origins.

Adjusting Horizontal Arc Origin

Adjusting the horizontal origin of the arc for image correction.

Adjusting Vertical Arc Origin

Adjusting the vertical origin of the arc for image correction.

Ceiling Mount Installation

Guidelines for front projection ceiling mounting and safety precautions.

Rear Projection Setup

Instructions and cautions for rear projection setup.

Viewing Computer Images

Connecting Projector to Computer

Procedures for connecting analog and digital computer signals.

Monitor and Audio Connections

Connecting monitor output and audio output for computer viewing.

Power Cord Installation

Steps for safely plugging in the projector's power cord.

Power Cord Handling Cautions

Precautions for plugging/unplugging power cords.

Terminal Cover Installation

How to install the projector's terminal cover.

Projecting Computer Images

Steps for turning on the projector and displaying computer images.

Stopping Projection

Procedures for properly turning off the projector and cooling down.

Direct Power Off Function

How to turn off the projector by simply unplugging the power cord.

Screen Blanking Function

Temporarily muting video and audio signals using the BLANK button.

Automatic Image Positioning

Using AUTO POSITION to optimize image placement.

Notebook Computer Connection Notes

Specific considerations when connecting notebook computers.

Resolution Matching

Ensuring computer and projector resolutions match for clear images.

Setting Image Aspect Ratio

Changing the aspect ratio of input signals for optimal screen display.

Viewing Video Images

Connecting Projector to Video Equipment

Connecting video players, VCRs, or tuners using BNC or S-Video cables.

Connecting with HDMI/DVI-D

Connecting to devices with HDMI or DVI-D outputs for high-quality images.

DVI-D Connection Details

Specifics for connecting via DVI-D terminal, including audio.

Power Cord and Terminal Cover

Reminder for power cord and terminal cover installation.

Projecting Video Images

Steps for turning on the projector and displaying video signals.

Stopping Video Projection

Procedures for turning off the projector and cooling down.

Speaker Volume Control

Adjusting the projector's speaker volume.

Aspect Ratio for Video Signals

Changing aspect ratio for video signals.

Menu Operation

Image Menu Overview

Summary of image adjustment settings.

Installation Menu Overview

Summary of installation-related settings.

Feature Menu Overview

Summary of feature settings like aspect ratio and projector ID.

Signal Menu Overview

Summary of signal input settings like resolution and sync.

Network Menu Overview

Summary of network configuration settings.

Information Menu Overview

Summary of information display for lamp time, serial number, etc.

How to Set the Menus

Step-by-step guide for navigating and adjusting menu settings.

IMAGE Menu Details

Detailed explanation of IMAGE menu items and their functions.

INSTALLATION Menu Details

Detailed explanation of INSTALLATION menu items and their functions.

FEATURE Menu Details

Detailed explanation of FEATURE menu items and their functions.

FEATURE Menu Details (Continued)

Further explanation of FEATURE menu items, including ADVANCED MENU.

SIGNAL Menu Details

Detailed explanation of SIGNAL menu items and their functions.

NETWORK Menu Details

Detailed explanation of NETWORK menu items and their functions.

INFORMATION Menu Details

Explanation of INFORMATION menu items displaying projector status.

Adjusting Projected Images

Brightness (Contrast/Brightness) Adjustment

How to adjust image brightness and contrast using the menu.

Color Adjustment (Color/Tint)

How to adjust image color thickness and tint.

Sharpness Adjustment

How to adjust image sharpness.

Color Temperature Settings

Selecting preset color temperatures or customizing them.

Color Temperature Explanation

Understanding color temperature and how to adjust it.

Color Enhancer Settings

Adjusting brightness and hue balance using the Color Enhancer.

Super Resolution Image Fineness

Adjusting image fineness using the Super Resolution feature.

Color Tone (NCM) Adjustment

Adjusting the tone of individual colors using the NCM menu.

Computer Image Adjustment Flowchart

Step-by-step guide for troubleshooting and adjusting computer image display.

Manual Computer Image Adjustment

Menu-based adjustments for computer image issues like noise or displacement.

Image Position Adjustment Methods

Simple methods to adjust horizontal and vertical image positions.

LPF Filter Function

Enabling the LPF to reduce streak noise, with a slight softening effect.

Initial Network Settings

Projector Name Configuration

Setting a name to identify the projector on the network.

Network Certification Setup

Enabling or disabling network certification using a password.

Network Password Management

Setting and confirming a password for network control.

IP Configuration Settings

Configuring IP address, subnet mask, and default gateway.

DHCP Setting

Enabling or disabling DHCP for automatic IP address assignment.

Subnet Mask Configuration

Setting the subnet mask for network configuration.

Saving IP Configuration Settings

How to save the current IP configuration settings.

Control System Configuration

Setting the projector's control system (STANDARD, AMX, CRESTRON).

Default Gateway Configuration

Setting the default gateway for network communication.

Network Settings Initialization

Resetting network settings to factory defaults.

Using Network Functions

Guidelines for using network functions, including LAN connection.

Glossary of Network Terms

Definitions of common network terms like DHCP, IP Address, etc.

Advanced Features

Customizing Startup Screen

Capturing and setting a custom image as the startup screen.

Password Protection Function

Enabling and managing password protection for projector operation.

Split Screen Display

Displaying computer and video images simultaneously on a split screen.

Image Freeze Function

Temporarily stopping the motion in an image to display a still picture.

Computer-Based Supervision and Control

Using computers for projector supervision and control via LAN.

AMX Device Discovery

Integration with AMX control systems.

Crestron RoomView Connected™

Integration with Crestron RoomView control systems.

PJLink™ Protocol Support

Compatibility with the PJLink™ standard for projector control.

LAN Control Utility Connection

Details on connecting and using the LAN control utility.

User Manual for LAN Control Utility

How to access and use the LAN Control Utility user manual.

PJLink™ Supported Commands

List of commands supported by the PJLink™ protocol for projector control.

Replacing the Lamp

Lamp Replacement Interval

Recommended timing for lamp replacement based on usage hours.

Lamp Replacement Safety Precautions

Critical safety warnings before and during lamp replacement.

Lamp Replacement Procedure

Step-by-step instructions for removing the old lamp and installing a new one.

Resetting Lamp Operation Time

Procedure to reset the lamp operation time after replacement.

Ceiling Mount Lamp Removal

Specific procedure for removing lamp from ceiling-mounted projectors.

Maintenance

Cleaning Projector Body and Grilles

Instructions for cleaning the projector exterior and ventilation grilles.

Surface Protection

Precautions to prevent projector surface fading or deterioration.

Lens Cleaning Procedure

Guidelines for safely cleaning the projector lens.

Roll-Up Filter

Setting the Filter Roll Interval

How to set the automatic filter rolling interval.

Manual Filter Roll-Up

Procedure for manually rolling the filter.

Filter Replacement Procedure

Steps for replacing the roll-up filter cartridge.

Resetting the Filter Roll Counter

How to reset the filter usage counter after replacement.

Replacing the Lens

Lens Removal Procedure

Steps for removing the projector's lens.

Mounting Optional Lenses

Instructions for attaching and removing optional lenses.

Troubleshooting

Power and Startup Issues

Solutions for the projector not turning on or initial startup problems.

No Image or Signal Issues

Troubleshooting steps for when no image is displayed or "NO SIGNAL" appears.

Image Quality Problems

Solutions for issues like shaking, distortion, blurriness, or wavy images.

Display Artifacts and Noise

Addressing red/blue/green dots, black dots, fine streaks, or noise in images.

Color and Hue Adjustments

Solutions for incorrect hue, color tint, or missing image elements.

Operational and Environmental Issues

Troubleshooting for exhaust air, no audio, menu unresponsiveness, or temperature warnings.

Remote Control Malfunctions

Solutions for remote control not functioning or having limited range.

Control Button Issues

Troubleshooting when projector buttons or focus/zoom/lens shift are not working.

Post-Lamp Replacement Checks

Checks to perform after replacing the projector lamp.

Kensington Lock Security

Information on using the Kensington Security Standard connector.

Indicators

Normal Operation Indicators

Explanation of indicator lights during normal power standby, cooling, warmup, and operation.

Indicator Status During Replacement

Meaning of indicators related to lamp operation time and filter replacement.

Abnormal Condition Indicators

Troubleshooting based on indicator status for open covers, blocked vents, or abnormal lamp/filter conditions.

Specifications

General Projector Specifications

Details on type, model, display technology, lens, and lamp specifications.

Input/Output Connectivity

List of all available input and output terminals and their types.

Operating Environment and Power

Specifications for operating temperature, voltage, and power consumption.

Physical and Optional Components

Projector dimensions, weight, and optional replacement parts.

Computer Signal Resolution Compatibility

Table detailing compatible resolutions, frequencies, and modes for computer signals.

RGB Signal Specification Details

Further details on RGB signals and connector pin assignments.

Projector Dimension Drawings

Visual representations of projector dimensions with and without the terminal cover.

Short Throw Zoom Lens Specifications

Details for the OL-XL7100SZ short throw zoom lens.

Long Throw Zoom Lens Specifications

Details for the OL-XL7100LZ long throw zoom lens.

Tele Throw Zoom Lens Specifications

Details for the OL-XL7100TZ tele throw zoom lens.

Rear Projection Short Throw Lens Specs

Details for the OL-XL7100FR rear projection short throw lens.

Related product manuals