CAUTION
l
If
there is any air left in the tyre when
you remove the valve insert, the valve in-
sert may fly out and injure you. Make
sure the tyre contains no air before remov-
ing the valve insert.
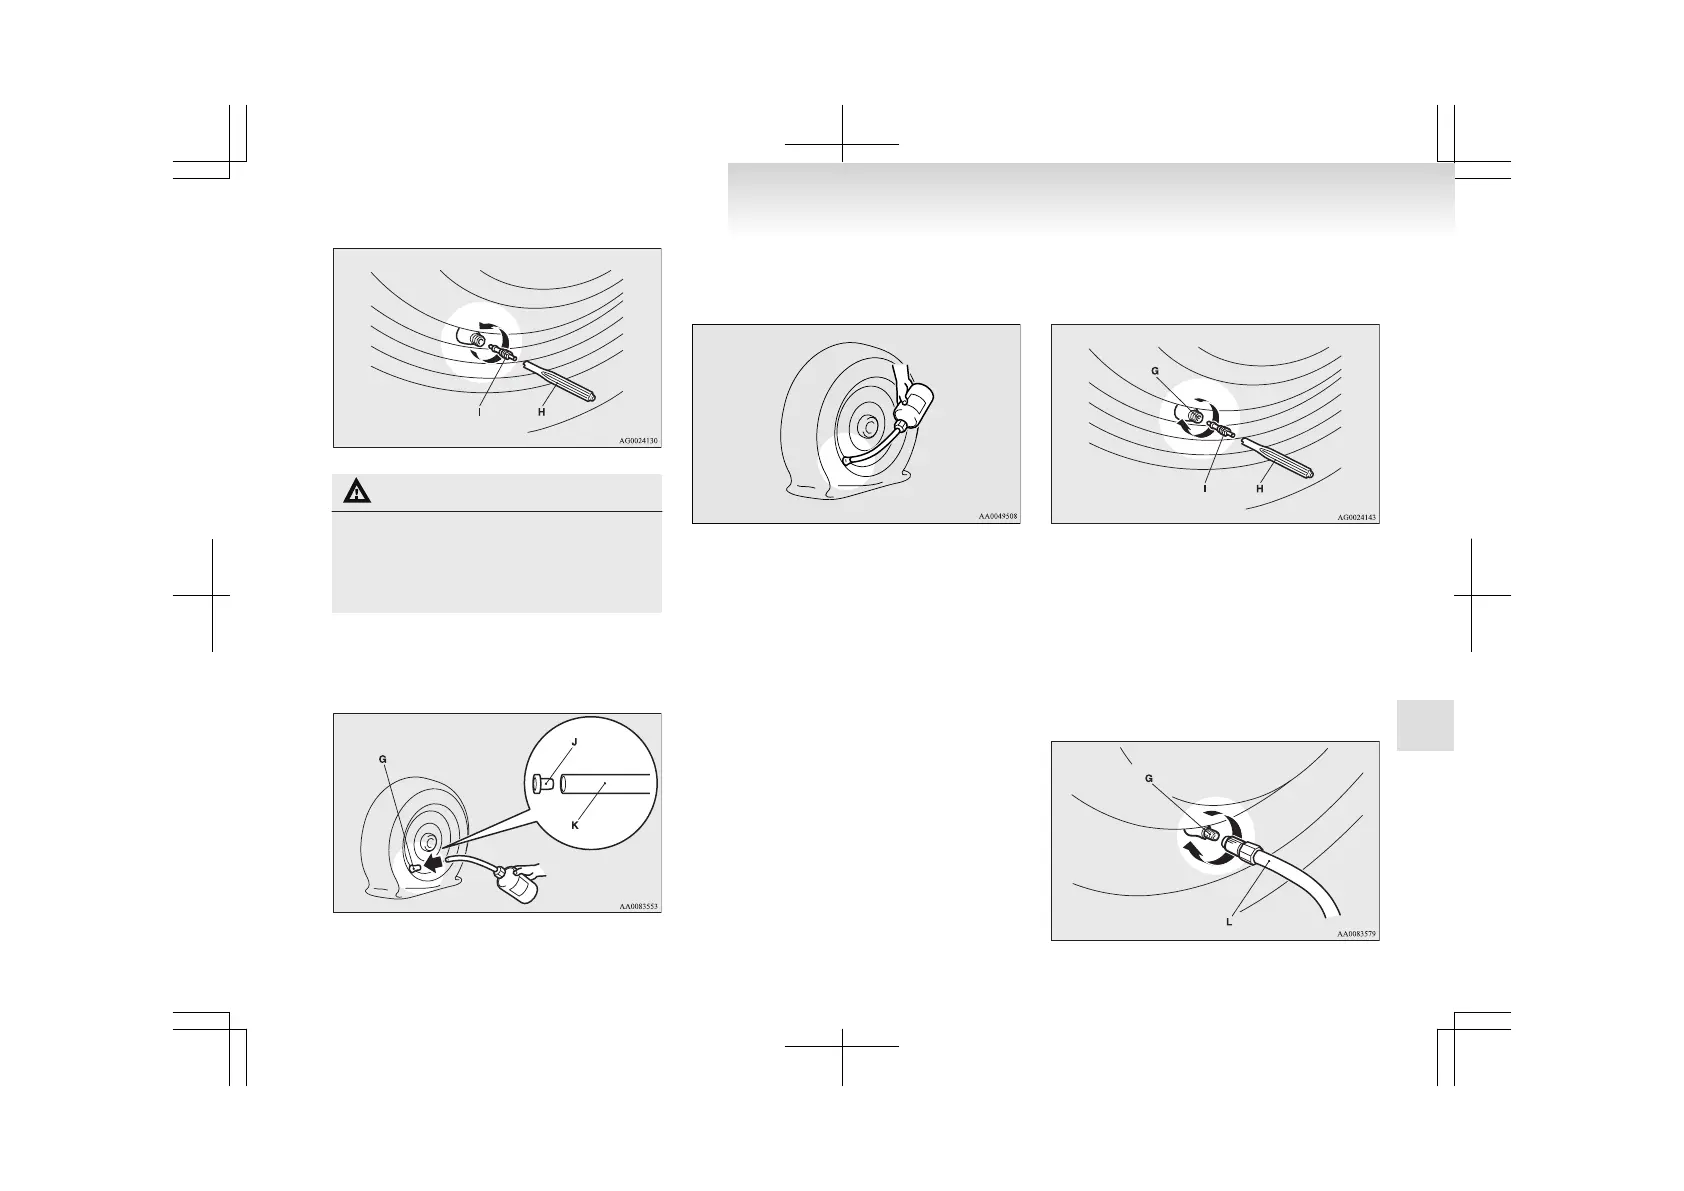
10. Remove
the plug (J) from the free end of the
hose (K).
Press the hose onto the valve (G).
11. Holding the sealant bottle upside-down,
squeeze it again and again to inject all of the
sealant into the tyre.
NOTE
l
When
injecting the sealant, position the
valve away from the bottom, i.e., away from
the point where the tyre touches the ground.
If the valve is near the point where the tyre
touches the ground, the sealant may not go in-
to the tyre easily.
12. After injecting the sealant, pull the hose off
the valve, remove any residual sealant from
the valve, rim and/or tyre.
Fit the valve insert (I) into the valve (G), and
screw
the valve insert securely into place us-
ing the valve remover (H).
NOTE
l
When
removing and screwing in the valve in-
sert using the valve remover, turn the valve
remover by hand. Using a tool to turn the
valve remover could damage it.
13. Pull out the compressor hose (L) from the
side of the tyre compressor, and then secure-
ly attach the hose to the tyre valve (G).
For emergencies
6-09
6

 Loading...