F9Q ENGINE – Timing Belt
11A-4-3
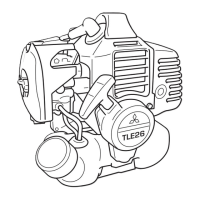
(4) Check that the crankshaft groove C is located at the
center between the two ribs A on the cylinder block front
plate, and that the portion B of the crankshaft is in the
illustrated position.
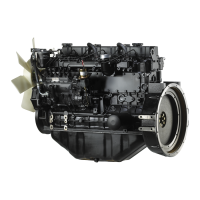
(5) Check that the tensioner is securely positioned on the
pin D.
(6) Fit the timing belt, aligning marks on the belt with the
marks on the camshaft and crankshaft sprockets. (77
teeth inserted between the two marks on the belt)
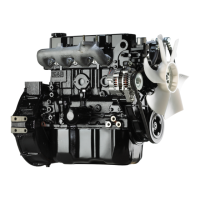
(7) Place the tensioner pulley against the belt by tightening
bolt E on the tensioner support.
Caution
D Do not reuse the removed timing belt.
(8) Remove the pin installed in Step 3.
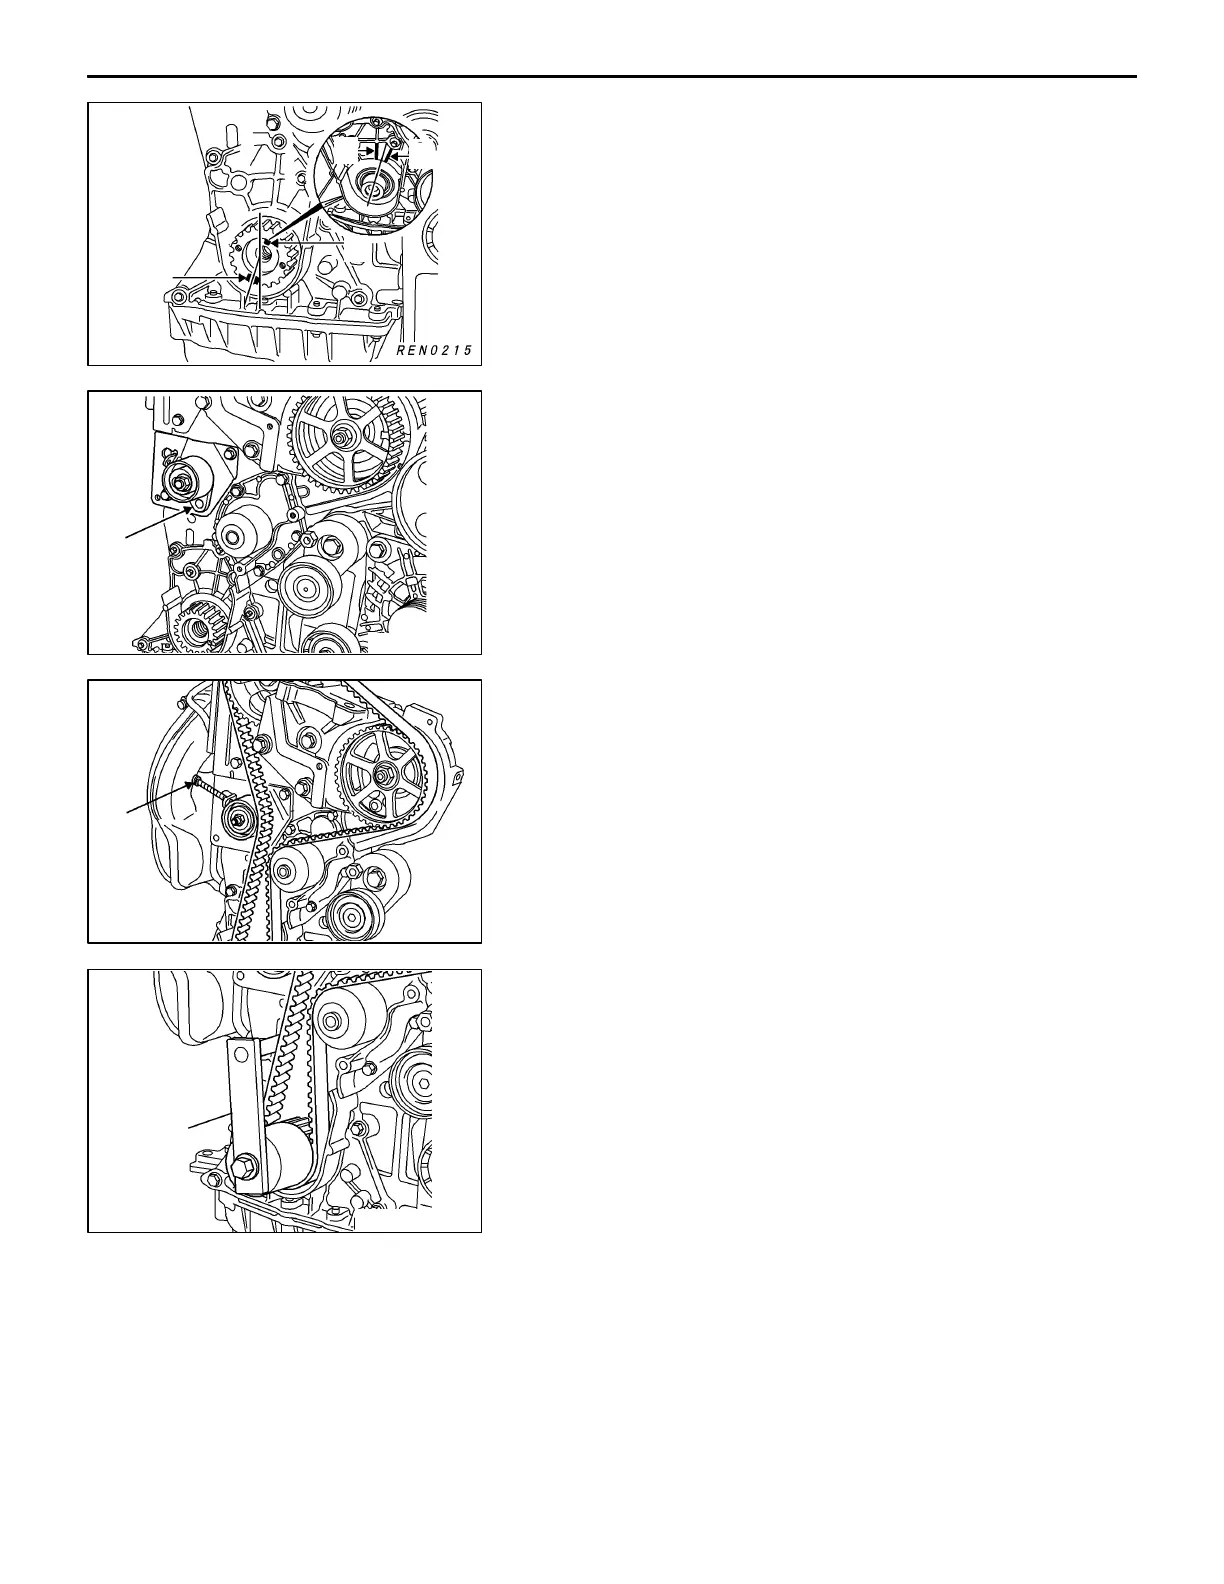
(9) Set the special tools on the crankshaft sprocket.
(10)Tighten the crankshaft to 11 Nm.
(11)Connect the special tool (MB991704) to the MUT-II. Then,
connect the MUT-II to the battery.
(12)Connect the MUT-II to the diagnosis connector.
(13)Turn the crankshaft clockwise to set the No. 1 cylinder
to top dead center on the compression stroke.
(14)Select “Belt tension measurement” from the MUT-II menu
screen.
PWEE0001
E
Jun. 2000Mitsubishi Motors Corporation
PWEE0001-A
E
Mar. 2001Mitsubishi Motors Corporation Revised
A
A
A
B
C
REN0168
D
REN0169
E
REN0170
MB996048
 Loading...