62
CN2
Connect to the outdoor controller circuit
board (CN2)
1-5: Power circuit board
→ Transmitting
signal to the controller board (0-5V DC)
2-5: Zero cross signal (0-5V DC)
3-4: Not used
6-5: 16V DC
7-5: 16V DC
[ 5 :
–
1, 2, 6, 7 : + ]
Outdoor power circuit board
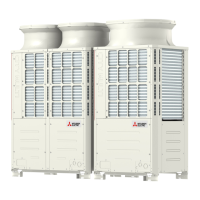
PUMY-P100YHM PUMY-P100YHM
1
PUMY-P125YHM PUMY-P125YHM1
PUMY-P140YHM PUMY-P140YHM1
PUMY-P100YHMA(-BS)
PUMY-P125YHMA(-BS)
PUMY-P140YHMA(-BS)
CN5
Detection of
primary current
(Connect to the
outdoor noise filter
circuit board (CNCT))
CN4
Connect to the
outdoor controller
circuit board
(CN4)
W
N2N1P2
P1 L1
L2
L3
W
W
TAB connecter
on X52A
Connect to the
RS resistor
POWER
MODULE
TB-C1
Connect to the
smoothing capacitor
CB1
– , CB2 +
TB-P2
Connect to the smoothing
capacitor CB1
+
TB-U, TB-V,
TB-W
Connect to the
compressor (MC)
Voltage among
phases:
10V-400V AC
TB-L1, TB-L2, TB-L3
Connect to the
outdoor converter
circuit board
(L1-OU, L2-OU,
L3-OU)
380V-415V AC
TB-N1
Connect to the
smoothing capacitor
CB2
– and the CK
capacitor
CN7
Connect to the
outdoor converter
circuit board
(CN7)
Brief check of POWER MODULE
W Usually, each point is in a state of being short-circuited if they are broken.
Measure the resistance in the following points (connectors, etc.).
If they are short-circuited, it means that they are broken.
1. Check of POWER MODULE
1.Check of DIODE circuit
L1 - P1 , L2 - P1 , L3 - P1 , L1 - N1 , L2 - N1 , L3 - N1
2.Check of IGBT circuit
P2 - U , P2 - V , P2 - W , N2 - U , N2 - V , N2 - W
Note:The marks, L1 , L2 , L3 , N1 , N2 , P1, P2 , U , V and W
shown in the diagram are not actually printed on the board.
 Loading...