115
4. Removing the thermistor <2-phase pipe> (TH6), thermis-
tor <Liquid> (TH3) and thermistor <Suction> (TH33)
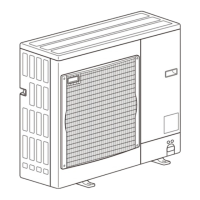
(1)Removetheservicepanel.(SeePhoto1)
(2)Removethetoppanel.(SeePhoto1)
(3)Removethefrontpanel.(SeePhoto1)
(4)Removetheconduitcoverandcordcover.
(5)Removethebackpanelfixingscrews,4fromtherightand
3fromtherearside,anddetachthebackpanel.
(SeePhoto1)
(6)DisconnecttheconnectorTH3(white)orTH6/7(red)or
TH33(yellow)onthecontrollercircuitboardintheelectri-
calpartsbox.
(7)Loosentheclampfortheleadwireintherearofthe
electricalpartsbox.
(8)Pulloutthethermistor<Liquid>(TH3)andthermistor
<2-phasepipe>(TH6)andthermistor<suction>(TH33)
fromthesensorholder.
Note: Replace the thermistor <2-phase pipe> (TH6) and the
thermistor <Ambient> (TH7) together since they are
combined.
Refer to No. 5. to remove the thermistor <Ambient> (TH7).
Photo 5
Photo 6
Thermistor
<2-phasepipe>
(TH6)
Clamp
Electrical
partsbox
Thermistor
<Liquid>(TH3)
Thermistor
<Suction>
(TH33)
3. Removing the electrical parts box
(1)Removetheservicepanel.(SeePhoto1)
(2)Removethetoppanel.(SeePhoto1)
(3)Removethefrontpanel.(SeePhoto1)
(4)Disconnecttheindoor/outdoorconnectingwirefrom
terminalblock.
(5)Removeallthefollowingconnectorsfromcontrollercircuitboard;
fanmotor,linearexpansionvalve,thermistor<Outdoorpipe>,
thermistor<Shell>,thermistor<Outdoor2-phasepipe>,
thermistor<Outdoor>,highpressureswitch,four-wayvalve
andbypassvalve.
Pulloutthedisconnectedwirefromtheelectricalpartsbox.
<Diagramsymbolintheconnectorhousing>
•Fanmotor(CNF1)
•Linearexpansionvalve(LEV-A)
•Thermistor<Liquid>(TH3)
•Thermistor<Comp.surface>(TH32)
•Thermistor<2-phasepipe,Ambient>(TH6/7)
•Highpressureswitch(63H)
(6)Removetheterminalcoveranddisconnectthecompressor
leadwire.
(7)Removetheelectricalpartsboxfixingscrews,1fromthe
front,therightandtherearside,anddetachtheelectrical
partsboxbypullingitupward.
Electricalpartsbox Controllercircuit
board(C.B.)
Electricalpartsbox
fixingscrews
Terminalblock(TB1)
OPERATING PROCEDURE PHOTOS
 Loading...