1. Remove the drain hose. 2. Remove the drain cap. 3. Insert the drain cap. 4. Connect the drain hose.
gnipiPediSthgiRgnipiPediStfeL
Preparation of indoor unit
Pipe
Drain hose
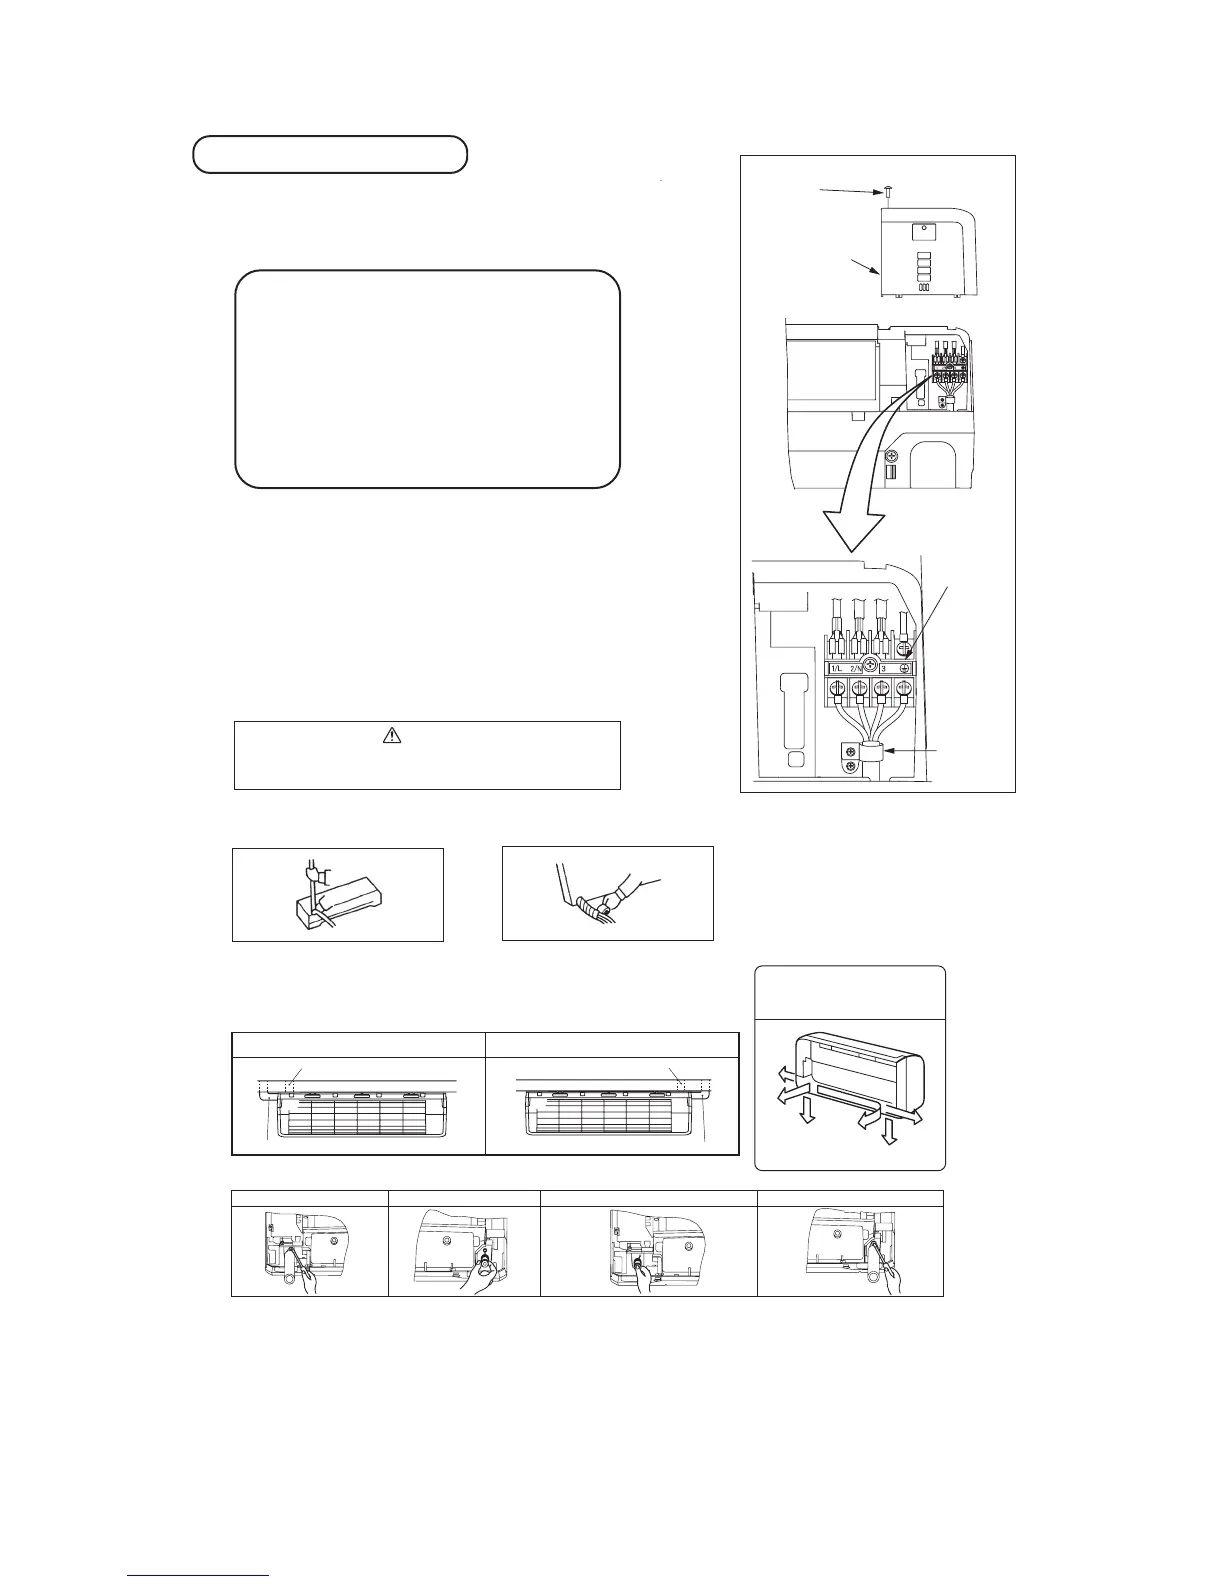
① Mounting of connecting wires
ⓐ Open the air inlet panel.
ⓑ Remove the lid.
ⓒ Remove the wiring clamp.
ⓓ Connect the connecting wire securely to the terminal block.
Use cable for interconnection wiring to avoid loosening of the
wires.
CENELEC code for cables Required field cables.
H05RNR4G1.5 (Example) or 245IEC57
H Harmonized cable type
05 300/500 volts
R Natural-and/or synth. rubber wire insulation
N Polychloroprene rubber conductors insulation
R Standed core
4or5 Number of conductors
G One conductor of the cables is the earth conductor (yel-
low/green)
1.5 Section of copper wire (mm
2
)
• Connect the connection wire securely to the terminal block. If
the wire is not affixed completely, contact will be poor, and it
is dangerous as the terminal block may heat up and catch fire.
• Take care not to confuse the terminal numbers for indoor
and outdoor connections.
• Earth lead wire shall be longer than the other lead wires for
the electrical safety in case of the slipping out of the cord
from the anchorage.
• The earth line of power cord must be properly earthed.
• Affix the connection wire using the wiring clamp.
ⓔ Fix the connecting wire by wiring clamp.
ⓕ Attach the lid.
ⓖ Close the air inlet panel.
② Shaping the pipe ③ Taping of the exterior
• Hold the bottom of the pipe and change its
direction before stretching it and shaping it.
• Tape only the portion that runs through the wall.
Always tape the crossover wires with the pipe.
④ Cautions when piping from the left and the rear center of the unit
[ Top View ]
• Remove the screw and
pull the drain hose,
while twisting.
• Remove it with hand
or pliers.
•
Insert the drain cap which was removed
at procedure “2” securely using a hex-
agonal wrench etc.
Note: Be careful that If it is not inserted
securely, water leakage may occur.
• Insert the drain hose se-
curely, Push the drain hose
while twisting. Install the
screw.
Note: Be careful that If it is
not Inserted securely, water
leakage may occur.
Right rear piping
Left rear piping
Left side piping
Right side piping
[Drain hose changing procedures]
Left downward
Right
Rear
Downward
Left rear
Left
Piping is possi ble in th e rear, left,
left rear, left downward, right or
dow nward direction .
Service panel
Terminal block
Clamp
The screw of the service panel is tightened securely.
In case of faulty wiring connection, the indoor unit stops, and
then the run lamp turns on and the timer lamp blinks.
CAUTION
 Loading...