EasyManua.ls Logo

MK Sound MX-700 - User Manual

MK Sound MX-700
19 pages
Print Icon
To Next Page IconTo Next Page
Loading...
Miller & Kreisel Sound Corporation
10391 Jefferson Boulevard
Culver City, CA 90232 USA
(310) 204-2854 FAX (310) 202-8782
http:\\www.mksound.com
© 1998 Miller & Kreisel Sound Corp.
operation
manual
MX-700, MX-200,
MX-125 Mk II,
MX-105 Mk II, MX-70B
VX-100, V-125,
V-75 Mk II, VX-7 Mk II
powered subwoofers

Questions and Answers

Summary

Safety Instructions

General Safety Guidelines

All safety and operating instructions should be read and adhered to.

Product Placement and Accessories

Do not place product on unstable surfaces; use manufacturer-recommended accessories.

Power and Electrical Safety

Operate from correct power source, avoid overloading and liquid entry.

Servicing and Repair Precautions

Refer servicing to qualified personnel; use correct replacement parts and safety checks.

Introduction

Where to Locate Your Subwoofer

Corner Placement Recommendation

Place subwoofer against a wall, preferably in a corner for best structural strength and listening position.

Driver Orientation Experimentation

Experiment with driver orientation; aiming into the wall may yield best results.

Listening Position Walk-Around Test

Test locations by listening at the position to find the best bass impact.

Multiple Subwoofer Placement

Place multiple subwoofers in the same location or at equal distances to avoid phase cancellation.

Room Influence on Bass Response

Room size and construction significantly affect bass quantity and quality.

Subwoofer Hook-Up

RCA Jack Connection Method

Use RCA-type jacks for preferred connection to Subwoofer's INPUT jacks.

Speaker Wire Connection Method

Use speaker wire connections for specific models (MX-70B, V-125, etc.).

TAPE OUT Jacks Limitation

Do not use TAPE OUT jacks as they have a fixed output level.

Switched Outlet Power Ratings

Specify minimum power ratings for switched outlets when plugging in subwoofer.

Wiring with RCA Jack Inputs

Connecting to Surround Processor;Receiver

Connect Subwoofer's INPUT jacks to preamp-level outputs of processors or receivers.

Connecting to Stereo Amp;Preamp

Connect Subwoofer to preamp outputs of stereo amps or preamps.

Using Y-connector for Dual Subwoofers

Use a Y-connector to split signal to feed two subwoofers from one output.

Using Speaker Wire Connections

Speaker Wire Hookup for Specific Models

Connect specific subwoofer models (MX-70B, V-125, etc.) using speaker wire.

Model Limitations for Speaker Wire

Certain models (MX-700, MX-200, etc.) cannot use speaker wires.

Connecting Left Channel Speaker Wire

Run speaker wire from amplifier's Left output to Subwoofer's Left FROM AMPLIFIER terminals.

Connecting Right Channel Speaker Wire

Make matching connections for the Right channel speaker wire.

Satellite Speaker Wiring Options

Direct Connection to Amp;Receiver

Connect Satellite speakers and Subwoofer directly to amp/receiver using separate wires.

Connecting Satellites to Subwoofer

Connect Satellite speakers to the Subwoofer's input terminals for convenience.

Amplifier Speaker Output Options

Connect Satellites to one output and Subwoofer to another if amp has two sets.

Using HP-80 or VF-80 High-Pass Filters

System Requirements for Filters

Requires amp/receiver with Preamp/Main Output and Power Amp/Main Input jacks.

Multichannel System Filter Use

3 channel filters require dedicated subwoofer output jack.

Filter Interaction with Component Filters

Turn off component filters; do not run with multiple filters.

Plugging in the Subwoofer

Initial Power-Up Procedure

Set BASS LEVEL to MIN, then plug in AC cord. Expect a thump sound.

Continuous Plugged-In Operation

Keep Subwoofer plugged in 24/7 for normal operation and convenience.

Satellite;Subwoofer Phasing Test

Phasing Test Procedure

Play bass-heavy music, switch PHASE on subwoofer, listen for most bass.

Two Subwoofer Phasing Test

Test each subwoofer individually for phasing when using two.

Using Spectrum Analyzer for Phase

Use pink noise and spectrum analyzer to find optimal phase setting.

Reason for Phasing Test

Ensures mid-bass frequencies are in phase to avoid cancellation.

Listening Position Experimentation

Experiment with speaker placement for optimal sound balance.

Special Instructions for the VX-7 Mk II

Use of the Low Pass Filter Control

Filter Function and Setting

Sets upper rolloff, fine-tuning transition between Subwoofer and Satellites.

Recommended Filter Setting

85 Hz is recommended for best blend in most systems, especially M&K Satellites.

Achieving Balanced Acoustic Output

Goal is balanced acoustic output, not necessarily flat electrical output.

Use of the Bypass Switch

Bypass Function for THX;Dolby Systems

Bypass internal filter when using component with built-in Low-Pass filter.

Using Multiple Subwoofers

Benefits of Multiple Subwoofers

Provides improved impact, definition, output, and dynamic range.

Placement Strategies for Multiple Subwoofers

Place in same location or at equal distances to avoid phase cancellation.

Connecting Two Subwoofers

Run one wire/interconnect to each Subwoofer; adjust BASS LEVEL accordingly.

Home Theatre Usage

Subwoofer Output for Home Theatre

Use Subwoofer Output jack for multichannel Home Theatre systems.

Playback Level for Video Sources

May prefer higher playback level for video sources with less deep bass.

Magnetic Shielding Clearance

Keep 2-3 feet clearance from TV unless subwoofer is magnetically shielded.

Connecting to Surround Sound Receiver;Processor

Preferred connection is SUBWOOFER OUTPUT (or MONO) RCA jack.

Alternative Connection via Speaker Wires

Connect to front Left/Right speaker outputs if no subwoofer output jack.

Dolby Surround WIDE;NORMAL Switch Setting

Set Center channel WIDE/NORMAL switch to NORMAL for proper bass delivery.

Special Installation Notes

Spike;Foot Installation for Floor Coupling

Use spikes for carpet coupling or inverted spikes with rubber feet for hard floors.

Threaded Inserts Compatibility

Inserts are 1/4-20, compatible with most speaker feet/spikes.

Securing Feet with Washer and Nut

Use washer and jamb nut to secure feet, preventing damage to insert/foot.

Model-Specific Placement and Setup

MX-Series Inverted Driver Placement

Experiment with placement; slight elevation improves distortion cancellation.

Low Pass Filter Criticality for MX Models

Low Pass Filter setting is critical for MX models; consider below 85 Hz.

MX-70 B Compact Cabinet Installation

Install MX-70B vertically or horizontally; ensure proper grille placement.

MX-700 & VX-100 Pressure-Loaded Design

Orient MX-700/VX-100 horizontally or vertically for maximum room coupling.

MX-700 Rack Mounting Option

MX-700 can be rack mounted; contact M&K for kit.

Troubleshooting

No Output Troubleshooting Steps

Check power, BASS LEVEL, and red LED/AC fuse status.

Woofer Cuts Out at High Volume

Protection circuit activates due to overheating; unplug and cool down.

No Output - LED Lit Test Procedure

Test function by touching RCA cable plug while adjusting BASS LEVEL.

Input Cable and Wire Check

Double-check input cables and speaker wires for defects.

Overheating Protection Reset

Woofer may cut out due to overheating; unplug and let it cool.

Little Output from FROM AMPLIFIER Terminals

Check input cable phase; reverse connections for one channel if needed.

Weak Midbass Range Solution

Refer to Phasing Test; reverse speaker connections or switch PHASE control.

Thump on System Turn On

Switch to speaker wire FROM AMPLIFIER terminals to eliminate thump.

Persistent Hum or Buzz Diagnosis

Avoid running cables near AC cords; reroute cables to eliminate hum.

Hum Source Identification Method

Remove input cables; if hum persists, Subwoofer is source.

AC Ground Loop Hum Mitigation

Try plugging into same outlet as amplifier or reversing AC plug polarity.

Unusual Sound with No Music

Remove input cables; if noise persists, contact dealer/factory.

Fuse Replacement Procedure

Disconnect cord, remove cap, replace with identical fuse type only.

Replacement Fuse Values (U.S. Fuses)

Lists required fuse types and values for U.S. standard fuses by model.

Replacement Fuse Values (IEC Fuses)

Lists required fuse types and values for IEC standard fuses by model.

If You Need Service

Contacting M&K for Service

Contact dealer or M&K with model, serial number, purchase date, and problem description.

Service Authorization Requirement

Do not return speakers for service without prior authorization.

Warranty Information Details

Three year limited parts and labor warranty; transferable. Excludes abuse, misuse, etc.

M&K 5.1 Multichannel & Pro-Logic System Setup Guide

Five Key System Setup Items

Location, speaker aiming, small speaker setting, calibration, and phase are key.

Front Speaker Setup Guidelines

Equidistant from listening position, symmetrical to room surfaces.

Subwoofer Location Strategy

Best in corner for output/response; use listening position walk-around test.

Multiple Subwoofer Placement Strategy

Place in same location or at equal distances to avoid phase cancellation.

Surrounds Speaker Placement Guidelines

Position surrounds for THX speaker setup, usually left/right of listening position.

Wiring and Interconnect Installation

Install all wiring and interconnects properly.

Subwoofer Connection to Processor

Always use processor/receiver's subwoofer output.

Front Speaker Aiming Techniques

Aim front speakers vertically and horizontally using a laser level for imaging.

Dolby Digital AC-3 Setup Recommendations

Set High-Pass filters ON (SMALL), turn off Dialog Normalization and Bass Peak Level Management.

Pro-Logic Setup Instructions

Follow specific instructions for Pro-Logic processor/receivers.

Pro-Logic Filter and Channel Settings

Turn on THX filters (80 Hz), set center channel to Normal, turn off limiters.

Input Level Calibration Procedure

Calibrate input level per processor/receiver manufacturer's instructions.

Digital Input Usage Best Practice

Use digital input when available for digital sources.

Channel Level Setting Method

Set all channels to the same level using a Sound Level Meter.

Phase Checking Procedure

Check phase for main speakers and subwoofer/main speakers at 80 Hz crossover.

System Performance Verification

Play familiar content to verify overall system performance and recheck if needed.

Input and Mode Settings Check

Check settings for each input and mode; some require separate entry.

Final Check of System Settings

Write down all processor settings for future reference.

Overview

This document is an operation manual for Miller & Kreisel (M&K) powered subwoofers, covering models MX-700, MX-200, MX-125 Mk II, MX-105 Mk II, MX-70B, VX-100, V-125, V-75 Mk II, and VX-7 Mk II. It provides comprehensive instructions for setup, operation, and maintenance of these deep bass powered subwoofers, designed to enhance audio and multichannel audio/video systems.

Function Description:

M&K powered subwoofers are designed to reproduce deep and powerful bass frequencies, complementing satellite or main speakers in an audio system. They are non-directional below approximately 100-150 Hz, meaning their placement does not affect the perceived direction of bass sounds, which are instead localized by higher frequency overtones from the satellite speakers. All M&K powered subwoofers feature exceptionally sharp (36 dB/octave) low-pass filters to remove unwanted midbass and midrange frequencies, ensuring that the subwoofer only reproduces the intended low-frequency content.

Important Technical Specifications:

  • Models Covered: MX-700, MX-200, MX-125 Mk II, MX-105 Mk II, MX-70B, VX-100, V-125, V-75 Mk II, VX-7 Mk II.
  • Low-Pass Filter: 36 dB/octave slope, adjustable up to 125 Hz. The "LOW PASS FILTER" control provides a rolloff of 12 dB/octave up to 125 Hz, where it shifts to 36 dB/octave. A setting of 85 Hz is generally recommended for optimal blend with M&K Satellites.
  • Inputs: RCA-type jacks for preamp-level connections (preferred for MX-700, MX-200, MX-125 Mk II, VX-100) and speaker wire connections (for MX-70B, V-125, V-75 Mk II, VX-7 Mk II).
  • Power Requirements (Switched Outlet Minimums):
    • 200 watts: V-100, V-75 Mk II, VX-7 Mk II
    • 300 watts: MX-105 Mk II, MX-125 Mk II, MX-70B, V-125
    • MX-700 and MX-200 should not be used with switched outlets.
  • Fuse Values (U.S. Standard, 3AG-250 VAC SLO-BLO 1 1/4" x 1/4"):
    • MX-2000: 110v 6 amp, 220v 3 amp
    • MX-300: 110v 6 amp, 220v 3 amp
    • MX-200: 110v 4 amp, 220v 2 amp
    • MX-700: 110v 5 amp, 220v 2.5 amp
    • MX-145: 110v 2.5 amp, 220v 1.25 amp
    • MX-125 Mk II: 110v 4 amp, 220v 2 amp
    • MX-100: 110v 4 amp, 220v 2 amp
    • MX-105/Mk II: 110v 2.5 amp, 220v 1.25 amp
    • MX-90: 110v 2 amp, 220v 1 amp
    • MX-80: 110v 1.25 amp, 220v .75 amp
    • MX-70/MX-70B: 110v 2 amp, 220v 1 amp
    • V-100: 110v 4 amp, 220v 2 amp
    • V-125: 110v 2 amp, 220v 1 amp
    • V-90: 110v 1.25 amp, 220v .75 amp
    • V-75/V-75 Mk II: 110v 1.25 amp, 220v .75 amp
    • V-3B: 110v 1.25 amp, 220v .75 amp
    • VX-4: 110v 1 amp, 220v .75 amp
    • VX-7B/VX-7 Mk II: 110v 1 amp, 220v .75 amp
    • VX-100: 110v 2 amp, 220v 1 amp
  • Fuse Values (IEC 127-2/III Standard, 5 X 20 mm timelag "T" fuse):
    • MX-2000: 220v 2.5 A
    • MX-300: 220v 2.5 A
    • MX-200: 220v 1.6 A
    • MX-145: 220v 1 A
    • MX-125: 220v 1.6 A
    • MX-100: 220v 1.6 A
    • MX-105/Mk II: 220v 1 A
    • MX-90: 220v 800 ma
    • MX-80: 220v 630 ma
    • MX-70/70B: 220v 800 ma
    • V-100: 220v 1.6 A
    • V-125: 220v 800 ma
    • V-90: 220v 630 ma
    • V-75/V-75 Mk II: 220v 630 ma
    • V-3B: 220v 630 ma
    • VX-4: 220v 630 ma
    • VX-7/7B/Mk II: 220v 630 ma
    • VX-100: 220v 800ma
  • Magnetic Shielding: MX-700, VX-100, and V-125 are magnetically shielded. Other models are not and require 2-3 feet clearance from televisions.
  • Warranty: Three-year limited parts and labor warranty, transferable to subsequent owners. Covers subwoofer amplifiers but excludes abuse, misuse, unauthorized repairs, speakers without serial numbers, and shipping/accident damage.

Usage Features:

  • Placement: M&K subwoofers perform well in most room locations. For best performance, placement against a wall, preferably in a corner, is recommended. Experimentation with orientation (e.g., aiming the front driver into the wall) is encouraged. Avoiding corners near doorways or openings is advised. For multiple subwoofers, placing them in the same location (stacking or side-by-side) is ideal, but different locations at equal distances from the listening position can be used to avoid phase cancellation.
  • Connection Methods:
    • RCA Jack Inputs: Preferred method, connecting directly to preamp-level components (surround sound processors, preamplifiers, integrated amps with preamp outputs, electronic high-pass filters, crossovers) using shielded RCA-RCA interconnect cables. A Y-connector can be used if only one preamp output is available or for feeding two subwoofers.
    • Speaker Wire Connections: Used for MX-70B, V-125, V-75 Mk II, VX-7 Mk II when RCA outputs are unavailable. Connect amplifier's left and right channel output terminals to the subwoofer's "FROM AMPLIFIER" terminals. An optional RM-2 High Level to Low Level convertor is available for MX-700, MX-200, MX-125 Mk II, and MX-105 Mk II if only speaker-level outputs are present.
  • Satellite Speaker Wiring Options (when using speaker wire connections):
    • Connect satellite speakers and subwoofer directly to the amp/receiver with separate wires.
    • Connect satellite speakers to the subwoofer's "FROM AMPLIFIER" terminals, sharing the same terminals as the amplifier's output.
  • HP-80 or VF-80 Electronic High-Pass Filters: Optional filters to improve performance by filtering bass signals to main amplifier and satellite speakers. Require preamp/main output and power amp/main input jacks. Should be turned off if the component has its own filters or is THX-certified.
  • "BASS LEVEL" Control: Adjusts the subwoofer's output level to balance with satellite speakers. Can be set higher for cinema/TV or lower to avoid disturbing neighbors.
  • "PHASE" Switch (+/-): Used to optimize the transition between subwoofer and satellite speakers. A phasing test involves listening to mid-bass (70-100 Hz) and selecting the switch position that yields more bass. For VX-7 Mk II, phase is adjusted by reversing positive and negative speaker inputs on BOTH satellite speakers.
  • "BYPASS" Switch (VARIABLE/BYPASS): For MX-700, MX-200, MX-125 Mk II, MX-105 Mk II, VX-100, V-125. Bypasses the internal low-pass filter when using a THX, Dolby Digital, DTS component with a built-in low-pass filter or a separate electronic crossover.
  • Multiple Subwoofers: Using two or more subwoofers improves impact, definition, output, and dynamic range. Connect one speaker wire or interconnect to each subwoofer. The "BASS LEVEL" control may need to be set slightly higher.
  • Home Theatre Usage: For multichannel Home Theatre systems, use the Subwoofer Output jack. A higher playback level may be preferred for video sources.
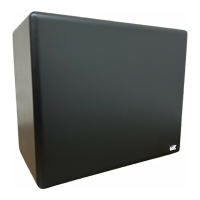
  • MX-700 & VX-100 Specifics: Pressure-loaded design allows for maximum coupling to a room, suitable for horizontal or vertical orientation. 17" width allows for rack mounting (kit available from M&K).
  • MX-70B Specifics: Compact cabinet, suitable for vertical or horizontal installations. Has two speaker grills; if a solid grille covers the inverted driver, leave it in place.
  • Feet/Spikes: MX-700, MX-200, MX-125 Mk II, MX-105 Mk II, VX-100 models include a hardware kit with black metal spikes/rubber feet. Spikes can elevate the subwoofer for better coupling on carpet. For hardwood/tile/concrete, spikes should be inverted with rubber feet pressed over the flat end. Use provided washer and jamb nut for secure mounting.

Maintenance Features:

  • Power On/Off: Once wired and plugged in, the subwoofer should remain plugged in 24 hours a day. A "thump" sound upon plugging/unplugging is normal.
  • Troubleshooting Guide:
    • No Output: Check AC plug, "BASS LEVEL" control (must be above "MIN"), and the red LED on the back panel. If the LED is off, check/replace the AC fuse.
    • Intermittent Output (after high volume): Indicates activation of the protection circuit due to overheating. Unplug for at least 30 minutes to reset.
    • Low Output (using "FROM AMPLIFIER" terminals): Check input cable phase by reversing (+) and (-) connections for ONE CHANNEL ONLY.
    • Weak Midbass: Perform the Phasing Test (Section 5, page 10) by reversing satellite speaker connections or switching the "PHASE" switch.
    • Thump on System Turn-On: Indicates the preamp, receiver, or processor is generating the thump. Switch to speaker wire "FROM AMPLIFIER" input terminals to eliminate.
    • Persistent Hum/Buzz: Remove all input cables to the subwoofer. If hum persists, the subwoofer is the source. If hum disappears, it's from another component. Reroute cables away from AC cords. Try plugging the subwoofer into the same outlet as the amplifier/receiver or reversing its AC plug polarity.
  • Fuse Replacement: Disconnect the supply cord. Remove the fuse cap (push and turn counterclockwise for arrowed caps, use flat head screwdriver for slotted caps). Replace only with an identical size and value fuse to avoid fire hazard and maintain warranty.
  • Service: Contact M&K dealer or M&K directly for service. Do not return speakers to the factory without prior authorization. Provide model, serial numbers, purchase date, dealer name, and problem description.
  • Safety Instructions: Emphasizes reading and retaining instructions, heeding warnings, following instructions, avoiding unrecommended attachments, keeping away from water/moisture, using recommended accessories, connecting to proper power source, avoiding overloading, preventing liquid entry, and referring all servicing to qualified personnel. Unplug for service if cord/plug is damaged, liquid spilled, object fallen in, abnormal operation, dropped/damaged, or distinct change in performance. Use specified replacement parts. Perform safety checks after repairs. Keep away from heat sources.

MK Sound MX-700 Specifications

General IconGeneral
BrandMK Sound
ModelMX-700
CategorySubwoofer
LanguageEnglish

Related product manuals