General Saturn Install Instructions
• Start by removing the rear battery/expansion cover door.
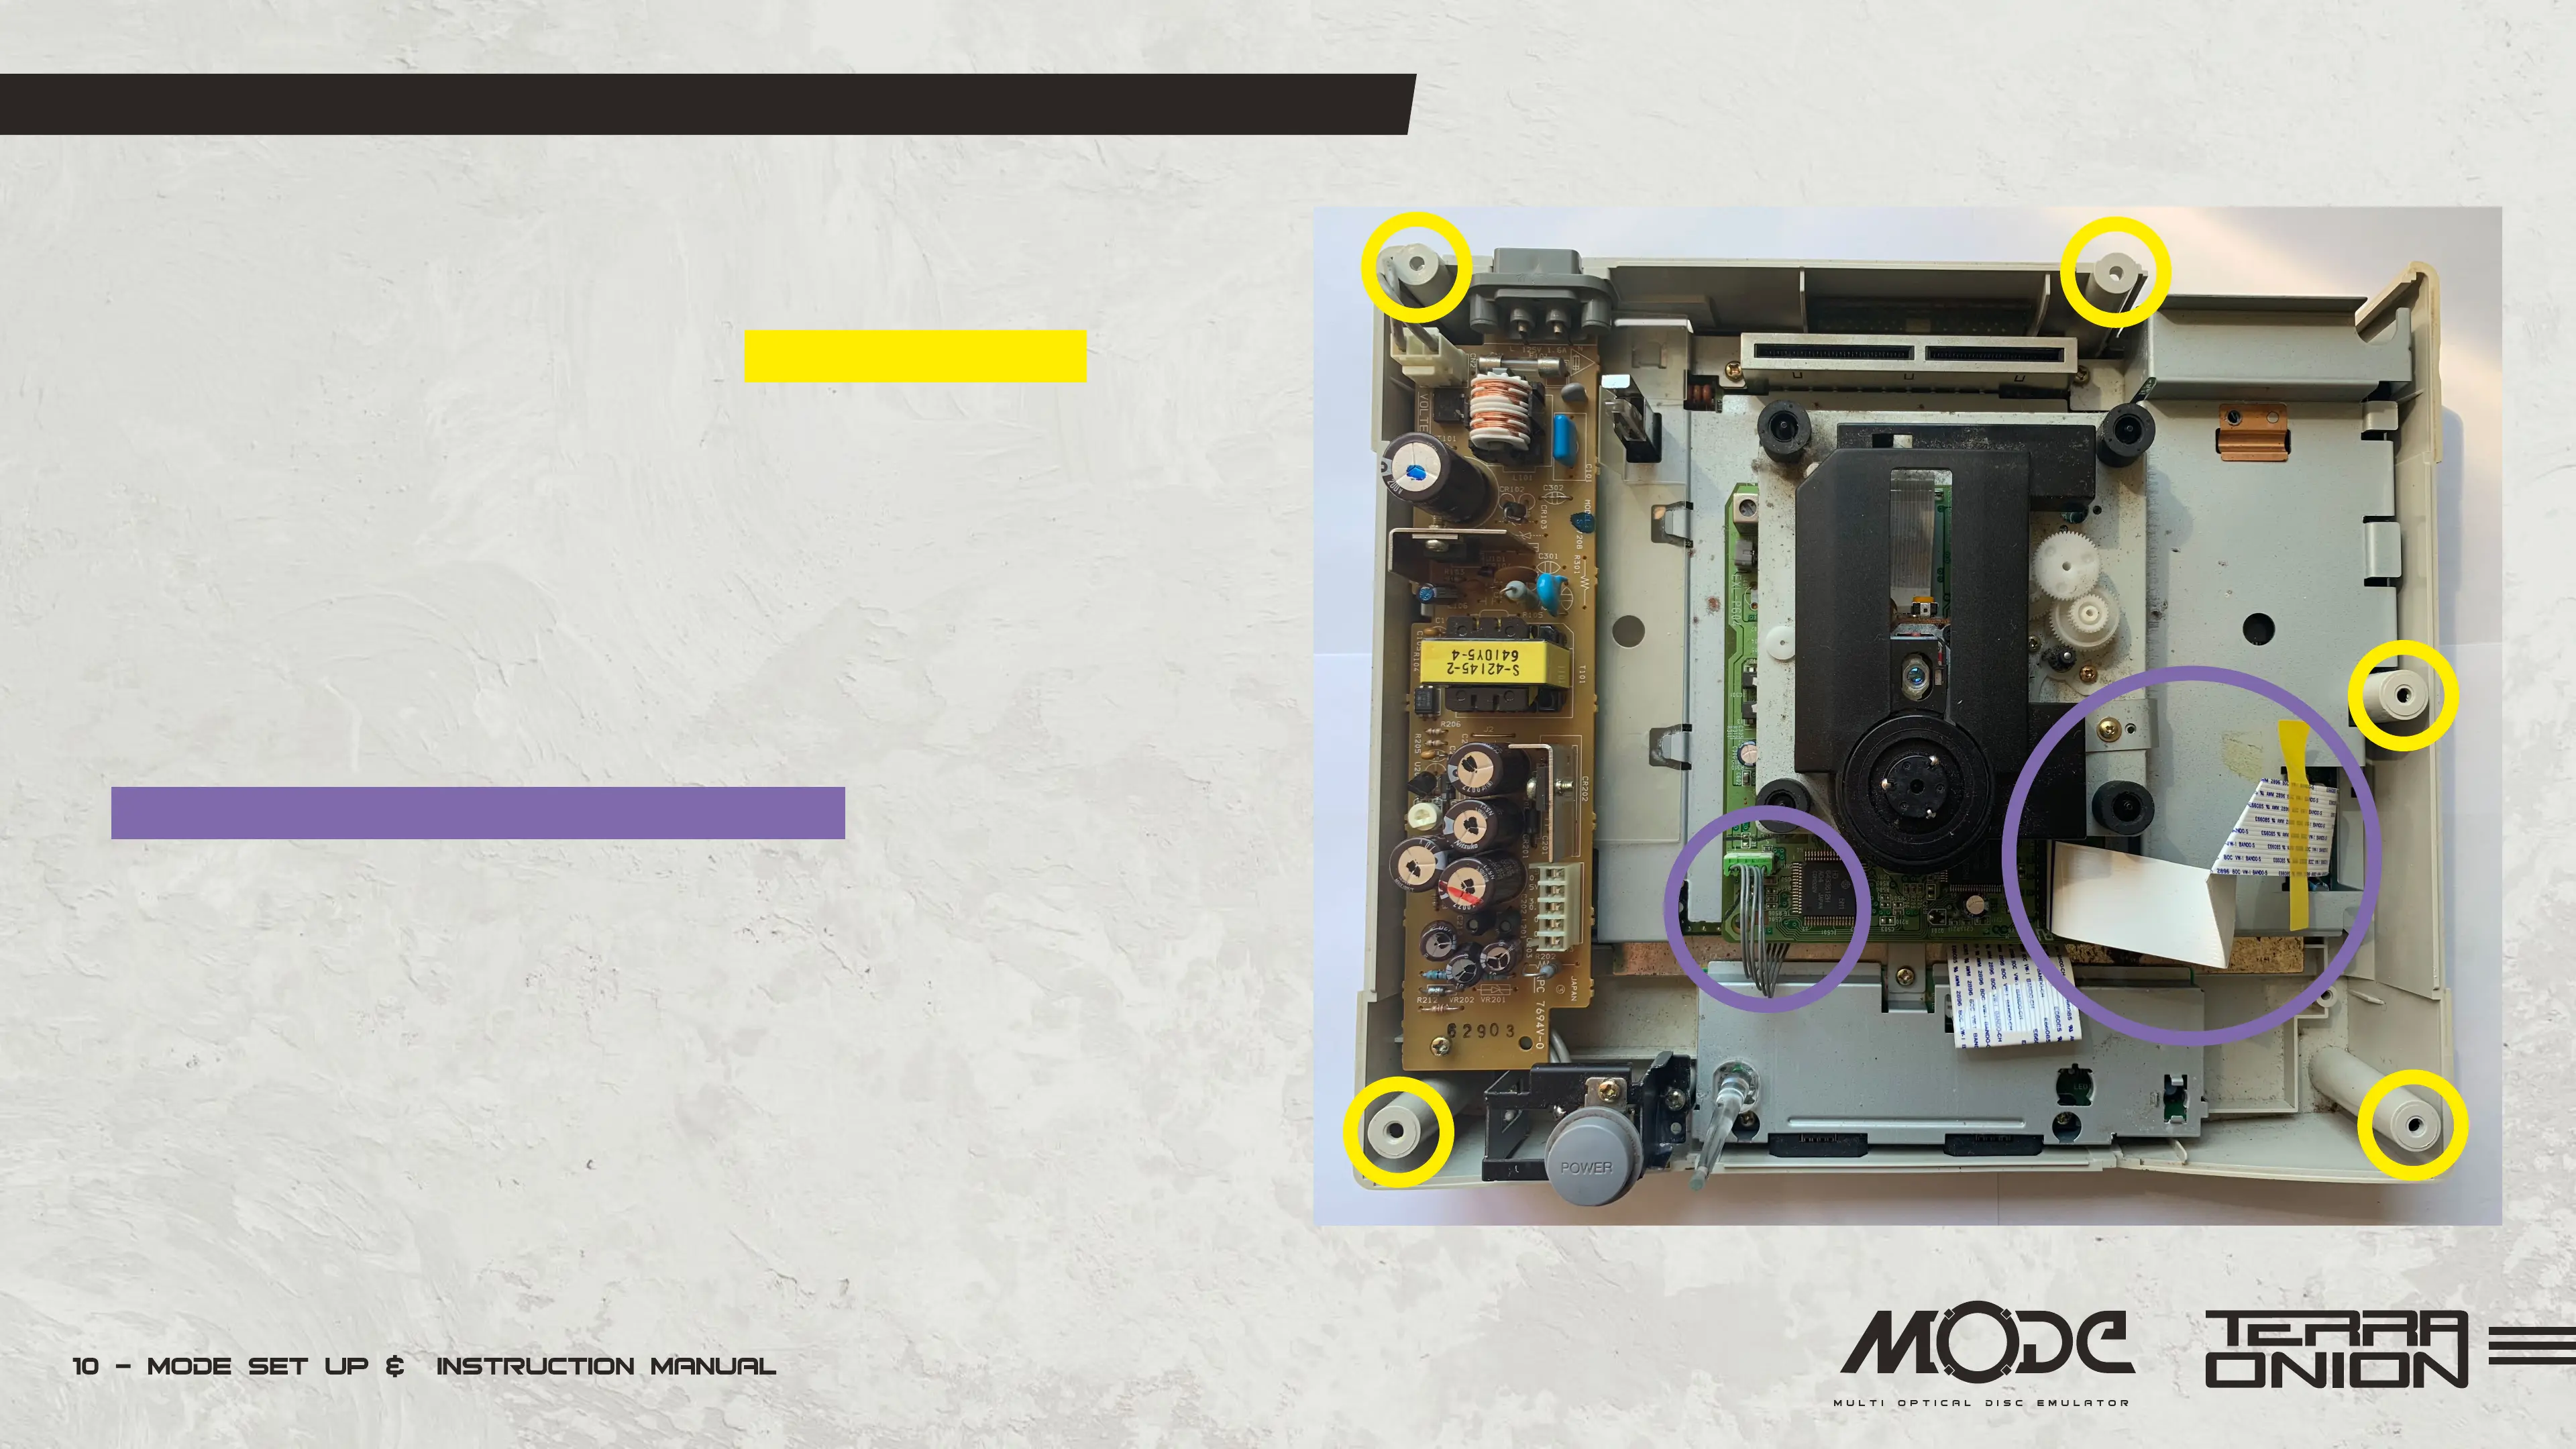
• Flip over your Sega Saturn console and remove the 5 screws
holding the top to the bottom case.
• Lift off the top cover. If your Saturn has the power supply in the
lid please disconnect the wiring from the connected wiring from the
CD Assembly. Then set the lid aside.
• Disconnect any cables and data ribbon cable from the Saturn
optical drive and lift the drive out of the console. Note how many
connectors are on the lower left of the CD-ROM if you have a
single 5-pin connector you have a 21-pin Saturn (as shown here).
If you have 2 connectors (a 2-pin and a 4-pin) you have a 20-pin
Saturn. Set the CD Drive aside as it won’t be needed again.
 Loading...