15 | PageRev C | 1/22/20
x16
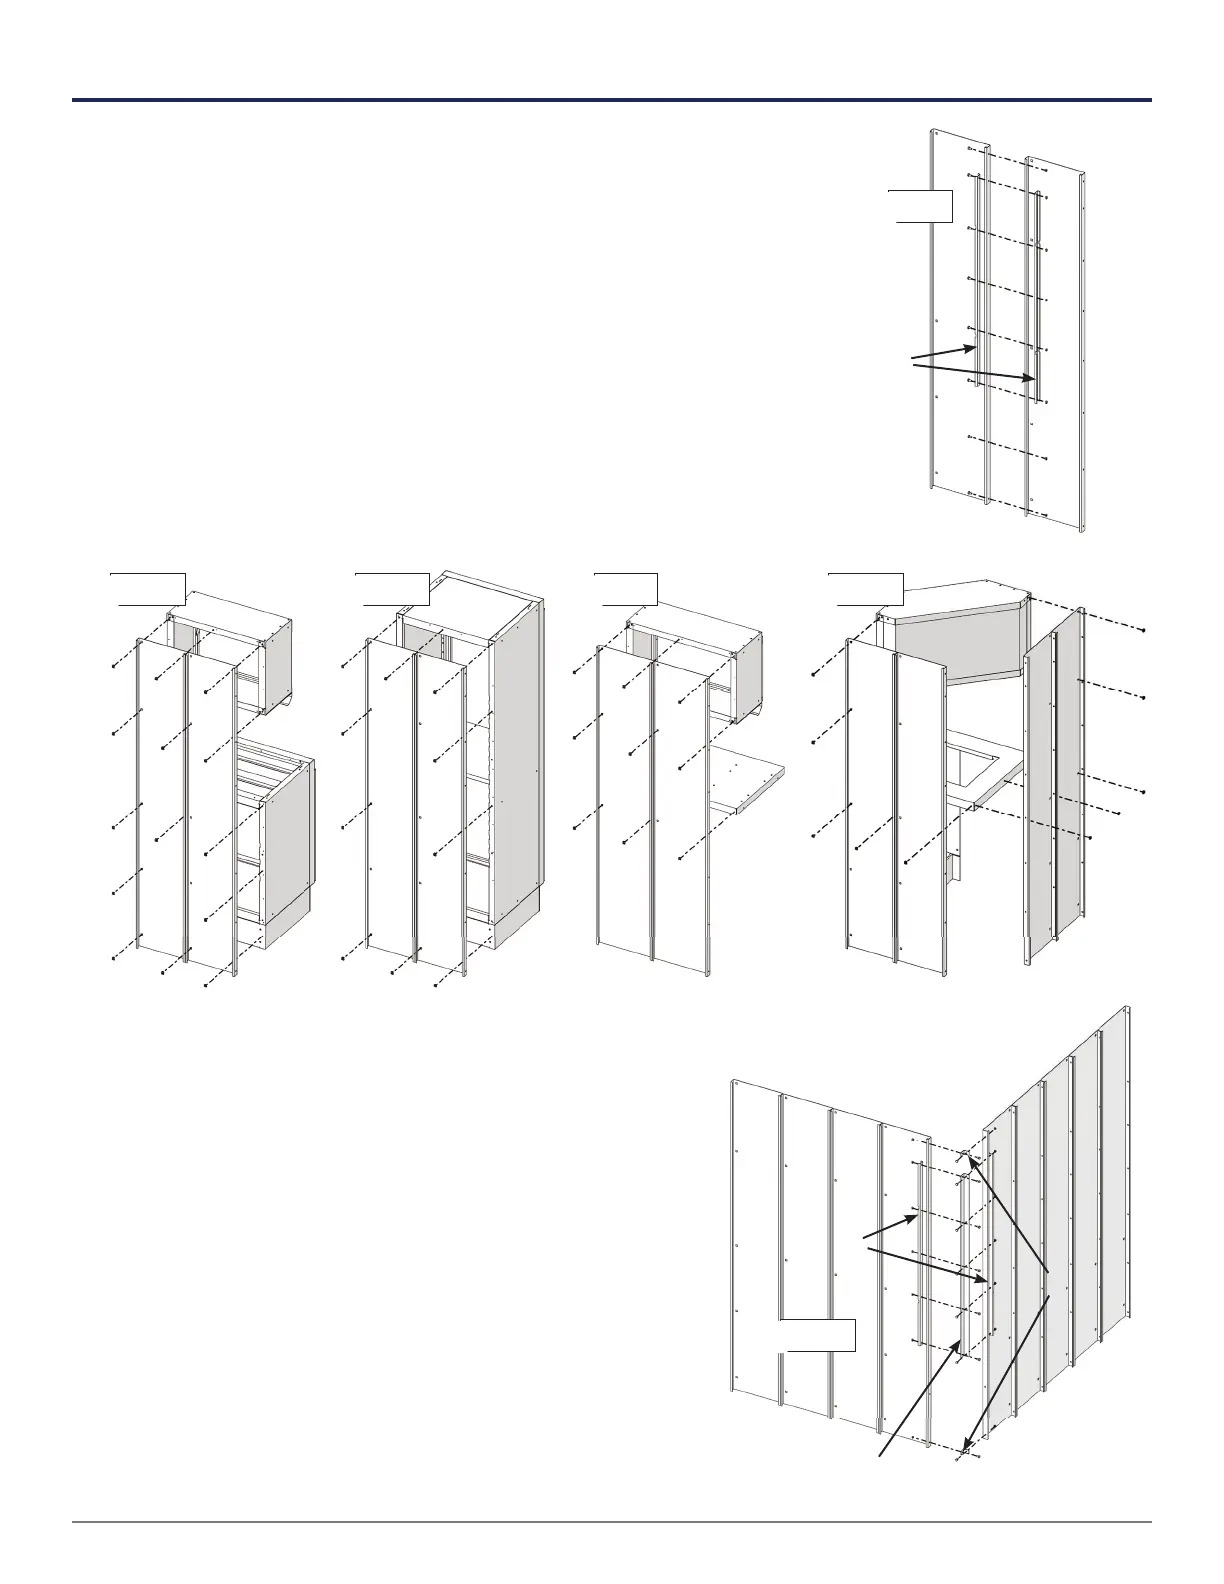
INSTANT WALL
Instant Wall panels come in two sizes: a 12" wide panel that will make
up the majority of your Instant wall, and a 14" wide panel that is only
used with Mobile Toolboxes.
Step 1 Pair off Instant Wall panels of the same size. Bolt them together
with a stiffener on both sides of the joint. Keep the tops of
the panels fl ush when tightening the bolts.
Step 2 Insert cage nuts in the back of each panel section. Refer
to the diagrams below for the number of nuts and where to
put them for each type of cabinet.
Step 3 Starting at a corner (if you have one), bolt the
panel sections from step 1 together with
stiffeners until the Instant Wall is complete.
Assemble corner joints using two stiffeners,
a long angle , and two short angles .
Closet Mobile Toolbox & 28" Overhead CornerBase Cabinet & Overhead
x14
x10
x9
x10
x8