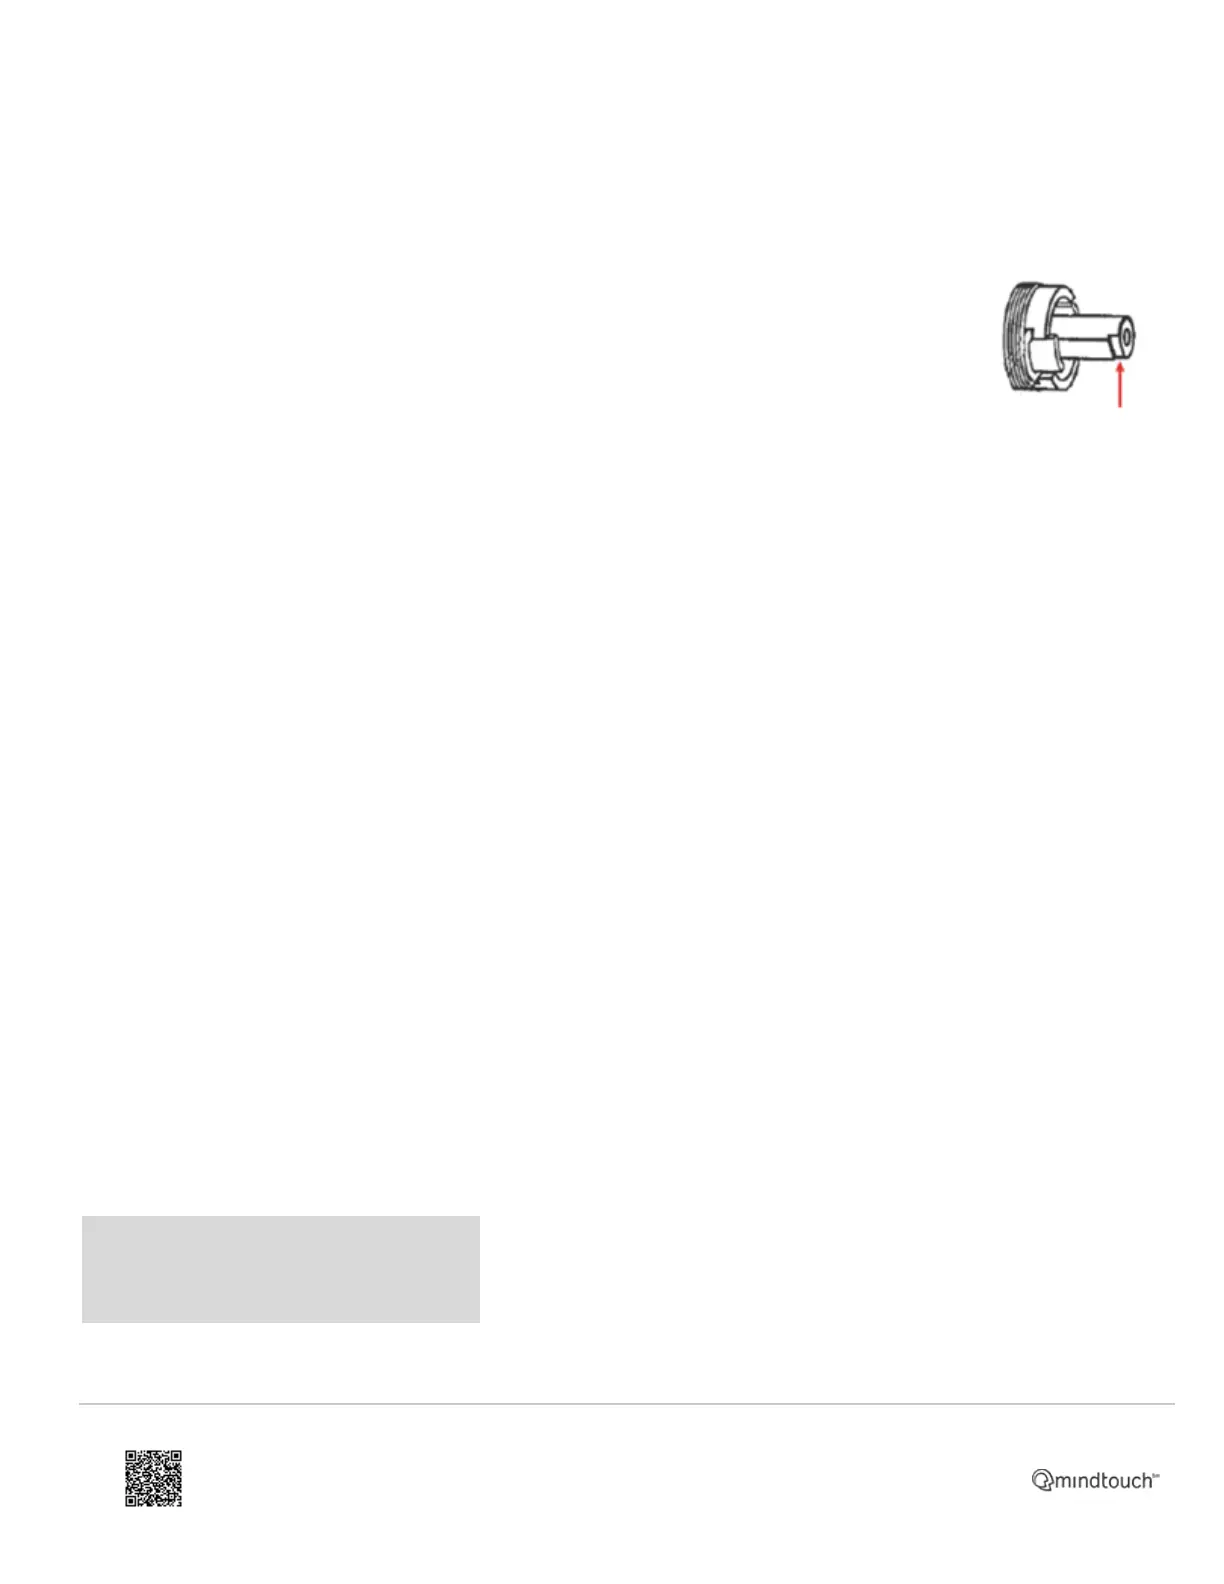
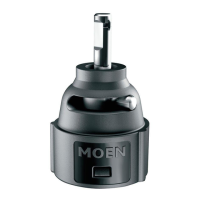
3. Rotate
the stem of the
cartridge (#8A)
so the small
notch is facing
down. The notch
on the stem of
the cartridge
(#2) determines
the hot and cold
location. If the
hot and cold are
reversed, rotate
the stem of the
cartridge (#8A)
180 degrees.
4. Slide the stop tube (#6A) back
onto the valve body (#9A).
5. Position the escutcheon plate
(#5A) with the word "Moen" upright
and slide it onto the valve body
(#9A).
6. Position the upper mounting cup
(#2A) so the screw holes lines up
with the screw holes on the valve
body (#9A). While holding the
upper mounting cup (#2A) in
position, use a phillips screwdriver
to thread the upper mounting cup
screws (#1A) clockwise until tight.
Repeat this step with the lower
mounting cup (#4A) and lower
mounting cup screws (#3A).
Oval Shaped Escutcheon Plate (After 2007):
https://solutions.moen.com/Article_Library/1225_Cartridge%3A_Moentrol_with_Integrated_Transfer_Valve
Updated: Wed, 14 Sep 2022 18:42:34 GMT
Powered by
3