EasyManua.ls Logo

Moen 1248 - User Manual

Moen 1248
2 pages
Print Icon
To Next Page IconTo Next Page
Loading...
1248 Cartridge: 1/2" Exact Temp Valve
This article will provide instructions on how to replace a 1248 cartridge for the lower handle on a 3301 and 3321 1/2"
Exact Temp valve. The valve was introduced in 2000 and retired in 2006.
Preparation:
The water supply shut off valves must be turned off- see article How to Turn Off the Water
Supply to the Faucet.
Recommended Tools: Wrench, Pliers, Phillips Screwdriver
The following instructions assume the handle and associated handle pieces have been removed.
For additional details, visit solutions.moen.com and select the type you are repairing. The
faucet guide will contain specific information on handle assemblies associated with that style of
product.
1248
Cartridge:
Disassembly:
1. Position a wrench on the flat hexagonal portion of
the cartridge retaining nut (A) and rotate counter-
clockwise to remove.
2. Using pliers, gently pull the flow extension (C) out
of the valve body (E). The flow extension (C),
cartridge screw (B) and cartridge (D) will remove
together.
3. Using a wrench, pull the cartridge (D) out of the
valve body (E).
Assembly:
1. Align the tab on the side of the cartridge (D) with the
notch in the brass valve body (E) and slide the cartridge
(D) into the valve body (E).
https://solutions.moen.com/Article_Library/1248_Cartridge%3A_1%2F%2F2%22_Exact_Temp_Valve
Updated: Mon, 24 Apr 2023 21:50:01 GMT
Powered by
1
Question and Answer IconNeed help?

Do you have a question about the Moen 1248 and is the answer not in the manual?

Summary

1248 Cartridge: 1;2 Exact Temp Valve

Preparation

Steps and tools required before replacing the 1248 cartridge.

Disassembly

Instructions for removing the old cartridge and related parts from the valve.

Assembly

Instructions for installing the new cartridge into the valve body.

Summary

1248 Cartridge: 1;2 Exact Temp Valve

Preparation

Steps and tools required before replacing the 1248 cartridge.

Disassembly

Instructions for removing the old cartridge and related parts from the valve.

Assembly

Instructions for installing the new cartridge into the valve body.

Overview

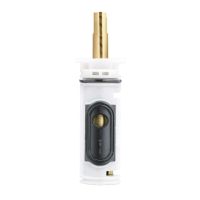
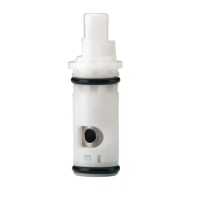
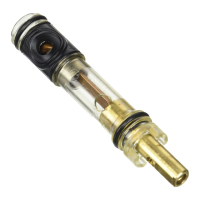
This document provides detailed instructions for replacing the 1248 cartridge in a Moen 1/2" Exact Temp Valve, specifically for models 3301 and 3321. The valve, manufactured between 2000 and 2006, is designed to regulate water temperature. The cartridge is a crucial component for controlling both water flow and temperature within the valve.

Function Description

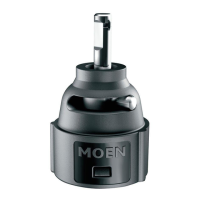
The 1248 cartridge serves as the core mechanism within the Moen Exact Temp Valve, enabling precise control over water temperature and flow. It is responsible for mixing hot and cold water to achieve the desired temperature, which is then delivered through the faucet. The cartridge works in conjunction with the handle assembly to allow users to adjust these parameters. When the handle is turned, it manipulates internal components of the cartridge, which in turn regulate the proportion of hot and cold water entering the mixing chamber. This ensures a consistent and comfortable water temperature for the user. The design of the cartridge, including its various parts like the flow extension, cartridge screw, and retaining nut, facilitates this precise control and allows for straightforward replacement when necessary.

Usage Features

The Moen Exact Temp Valve, with its 1248 cartridge, is designed for ease of use in controlling water temperature. While the document focuses on replacement, the underlying function of the cartridge is to provide a reliable and consistent water temperature experience. Users interact with the valve through a handle, which, when turned, adjusts the cartridge to achieve the desired temperature. The "Exact Temp" designation implies a system designed to maintain a set temperature, preventing sudden fluctuations that can occur with less sophisticated valves. The cartridge's internal design allows for smooth operation, ensuring that temperature adjustments are responsive and accurate. The valve's integration into a faucet system means it is a fundamental part of the daily water delivery experience, offering comfort and control.

Maintenance Features

The primary maintenance feature highlighted in this document is the replacement of the 1248 cartridge itself. This process is detailed step-by-step, making it accessible for individuals with basic DIY skills.

Preparation for Maintenance:

  • Water Supply Shut-Off: Before any work begins, it is imperative to turn off the water supply to the faucet. This prevents water leaks and ensures safety during the replacement process. The document refers to a separate article, "How to Turn Off the Water Supply to the Faucet," for detailed instructions on this crucial first step.
  • Recommended Tools: The necessary tools for cartridge replacement are simple and commonly available: a wrench, pliers, and a Phillips screwdriver. This minimizes the need for specialized equipment, making maintenance more convenient.
  • Handle Removal: The instructions assume that the faucet handle and any associated handle pieces have already been removed. This pre-step is essential to gain access to the cartridge. For specific details on handle removal, users are directed to solutions.moen.com, where they can find information tailored to their specific faucet style.

Disassembly Steps:

  1. Removing the Retaining Nut: A wrench is used to rotate the hexagonal cartridge retaining nut (A) counter-clockwise. This nut secures the cartridge assembly in place.
  2. Extracting the Flow Extension and Cartridge Assembly: Pliers are used to gently pull the flow extension (C) out of the valve body (E). The flow extension, cartridge screw (B), and cartridge (D) are designed to be removed together as a single unit, simplifying the extraction process.
  3. Removing the Cartridge: A wrench is then used to pull the cartridge (D) directly out of the valve body (E).

Assembly Steps (Installing the New Cartridge):

  1. Aligning and Inserting the Cartridge: The new cartridge (D) must be carefully aligned with a notch in the brass valve body (E) before being slid into place. This ensures correct orientation and proper function.
  2. Attaching the Flow Extension and Tightening the Screw: The top of the cartridge stem (D) has a profile that matches the inside of the flow extension (C). The flow extension is slid onto the stem, and a Phillips screwdriver is used to tighten the cartridge screw (B), securing these components.
  3. Securing the Cartridge Nut: The cartridge nut (A) is slid into the valve body (E). A wrench is then used on the flat sides of the nut to rotate it clockwise until it is tight. An additional 1/8 turn is recommended to ensure a secure seal without overtightening.

General Maintenance Information:

  • Online Resources: Moen provides extensive online support at solutions.moen.com, where users can find additional repair details, troubleshooting guides, and specific information on assembling handles for various product styles. This resource is invaluable for comprehensive maintenance and repair.
  • Customer Support: For further assistance, Moen offers direct customer support via phone (1-800-BUY-MOEN) and through their "Contact Us" option. International customers are directed to Moen Canada or other international sites, indicating a global support network.

By providing clear, step-by-step instructions and directing users to comprehensive online and phone support, Moen facilitates effective maintenance of their Exact Temp Valves, ensuring longevity and continued performance of the 1248 cartridge.

Moen 1248 Specifications

General IconGeneral
Model Number1248
WarrantyLimited Lifetime Warranty
TypeCartridge
CompatibilityTwo-Handle Faucets
MaterialBrass
FunctionControls water flow and temperature
FitsMoen Two-Handle Faucets

Related product manuals