EasyManua.ls Logo

Moen 87999 User Manual

Moen 87999
8 pages
To Next Page IconTo Next Page
Page #1 background imageLoading...
Page #1 background image
Installation Guide
Guía de Instalación
Guide d’installation
INS2236- 8/13
Please Contact Moen First
For Installation Help, Missing or
Replacement Parts
(USA)
1-800-BUY-MOEN (1-800-289-6636)
Mon - Fri 8:00 AM to 8:00 PM, Eastern
Sat. 9:00 AM to 5:30 PM Eastern
WWW.MOEN.COM
(Canada)
1-800-465-6130
Mon - Fri 7:30 AM to 7:00 PM, Eastern
WWW.MOEN.CA
Por favor, contáctese primero con Moen
Para obtener ayuda de instalación, piezas
faltantes o de recambio
01-800-718-4345
Lunes a viernes de 8:00 a 20:00 hs.
(Costa Este)
Sáb. 8:00 a 18:30 hs. (Costa Este)
WWW.MOEN.MX
Veuillez d’abord contacter Moen
en cas de problèmes avec l’installation, ou pour
obtenir toute pièce manquante ou de rechange
1-800-465-6130
Du lundi au vendredi:
de 7 h 30 à 19 h, HE
WWW.MOEN.CA
HERRAMIENTAS ÚTILES
Para que el cambio de la llave sea fácil y
seguro, Moen le recomienda usar estas
útiles herramientas.
OUTILS UTILES
Par mesure de sécurité et pour faciliter
l’installation, Moen suggère l’utilisation des
outils suivants.
HELPFUL TOOLS
For safety and ease of faucet replacement,
Moen recommends the use of these
helpful tools.
Your faucet may not look the same as the image above.
Su mezcladora puede no tener el mismo aspecto que la imagen que precede.
Votre robinet peut être différent de l’image ci-dessus.
ONE-HANDLE KITCHEN FAUCET
MEZCLADORA MONOMANDO PARA COCINA
ROBINET DE CUISINE À UNE POIGNÉE
Question and Answer IconNeed help?

Do you have a question about the Moen 87999 and is the answer not in the manual?

Moen 87999 Specifications

General IconGeneral
BrandMoen
Model87999
CategoryPlumbing Product
LanguageEnglish

Summary

Moen Product Support and Preparation

Contact Moen for Assistance

Provides phone numbers and websites for installation help, missing or replacement parts.

Recommended Installation Tools

Lists helpful tools for safe and easy faucet replacement.

Faucet Parts Identification and Removal Prep

English Parts List

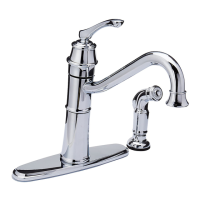
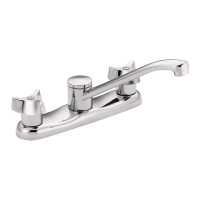
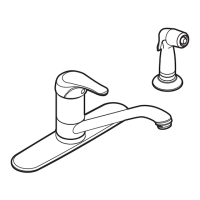
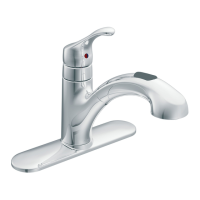
Lists all faucet components with their corresponding letters for identification.

Spanish Parts List

Lista de piezas de la mezcladora con sus letras correspondientes para identificación.

French Parts List

Liste des pièces du robinet avec leurs lettres correspondantes pour identification.

Old Faucet Removal Safety

Important safety advice before removing the existing faucet or disassembling the valve.

Faucet Installation Steps

Step 1: Faucet Body Assembly

Instructions for placing the gasket and installing the faucet body into the spout base.

Installation for 3-Hole Configuration

Steps for installing the faucet with a deck plate for three mounting holes.

Installation for Single-Hole Configuration

Steps for installing the faucet directly onto the mounting surface for a single hole.

Securing and Orienting the Faucet

Mounting Screws and Nut Installation

Instructions for installing mounting screws into the mounting nut and attaching it.

Tightening Faucet Assembly

How to evenly tighten mounting screws for a secure faucet assembly.

Outlet Hose Orientation

Guidance on orienting the outlet hose when the faucet has three hoses.

Hose Guide Installation by Deck Thickness

Thin Deck Installation (Less than 1-1/4")

Instructions for installing the hose guide on thinner countertops.

Thick Deck Installation (More than 1-1/4")

Instructions for installing the hose guide on thicker countertops.

Connecting Side Spray and Water Supply

Side Spray Hose Insertion

Guide for inserting the side spray hose into the hose guide.

Connect Side Spray to Outlet Hose

Instructions for connecting the side spray hose to the faucet outlet hose.

Attach Flexible Water Lines

Steps for attaching flexible water lines to shutoff valves and tightening them securely.

Final Checks and System Flushing

Apply Product Identification Label

Instruction to place the product identification label in the designated area.

Turn on Water and Check for Leaks

Procedure for turning on water supply and checking for any leaks.

Flush Plumbing System Debris

Steps for running water to flush debris from the plumbing system, removing aerator first.

Completing Faucet Installation

Replace and Tighten Aerator

Instructions for replacing the aerator and tightening it by hand.

Installation Complete Confirmation

Indicates the successful completion of the faucet installation process.

Moen Limited Lifetime Warranty Information

English Warranty Details

Details Moen's limited lifetime warranty for homeowners and 5-year warranty for others.

Spanish Warranty Details

Información sobre la garantía limitada de por vida de Moen para propietarios de viviendas.

French Warranty Details

Informations sur la garantie à vie limitée de Moen pour les propriétaires de maison.

Related product manuals