6
INSTALLATION OF MOUNTING ASSEMBLY READ COMPLETELY BEFORE STARTING. NOTE: Pay close attention to the order of the mounting
assembly parts, as they have been correctly assembled by the factory.
INSTALLATION OF MOUNTING ASSEMBLY READ COMPLETELY BEFORE STARTING. NOTE: Pay close attention to the order of the mounting
assembly parts, as they have been correctly assembled by the factory.
INSTALLATION OF MOUNTING ASSEMBLY READ COMPLETELY BEFORE STARTING. NOTE: Pay close attention to the order of the mounting
assembly parts, as they have been correctly assembled by the factory.
E
D
x3
1
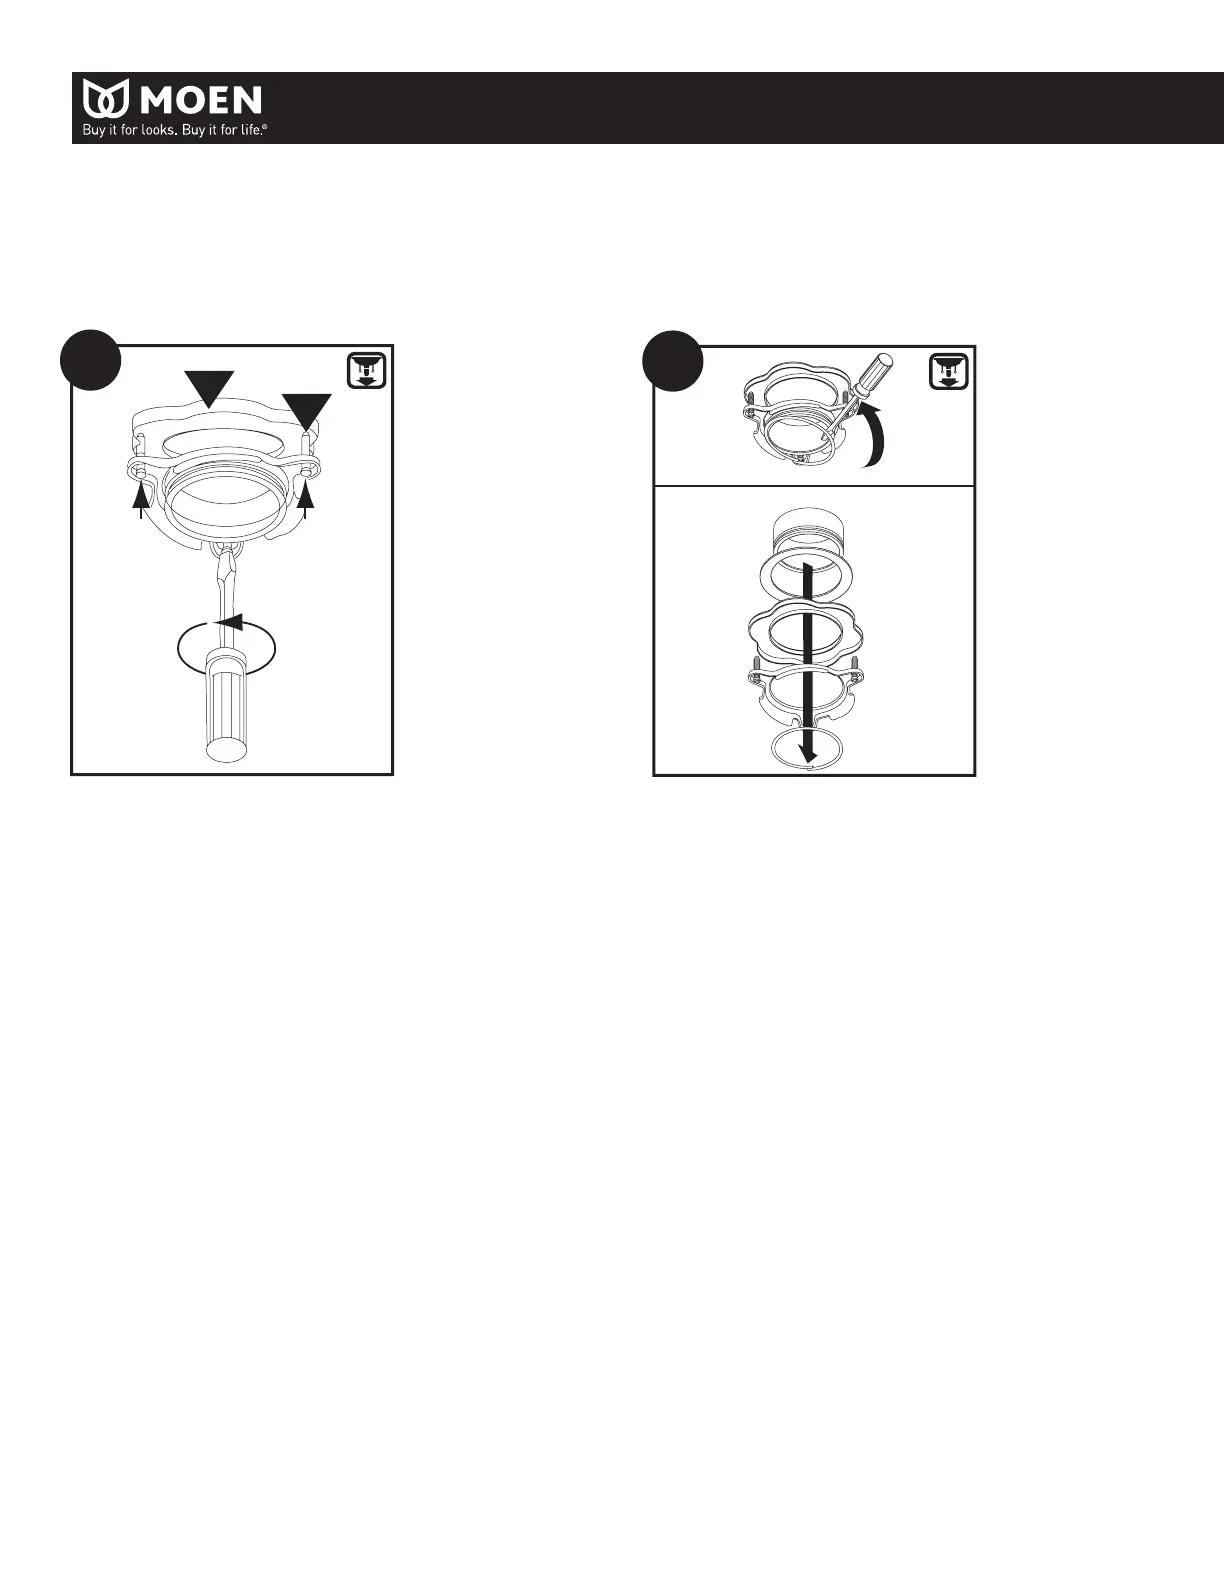
Disassemble the mounting assembly from the disposal by turning
the lower mount ring until it disengages from the ramps on the
mounting ring and the sink ange assembly can be removed. Loosen
the 3-mount screws until the mounting ring can be moved up to the
backup ange.
Disassemble the mounting assembly from the disposal by turning
the lower mount ring until it disengages from the ramps on the
mounting ring and the sink ange assembly can be removed. Loosen
the 3-mount screws until the mounting ring can be moved up to the
backup ange.
Disassemble the mounting assembly from the disposal by turning
the lower mount ring until it disengages from the ramps on the
mounting ring and the sink ange assembly can be removed. Loosen
the 3-mount screws until the mounting ring can be moved up to the
backup ange.
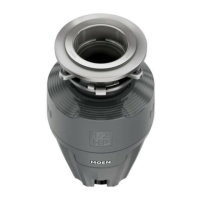
Use a at blade screwdriver under one end of the snap ring to remove
it from the sink ange. Remove the mounting ring, backup ange
and ber gasket from the sink ange. Note the sequence of these
parts as they are stacked in the correct re-assembly sequence. Keep
these parts together and set aside. Note: Mounting assembly can
accomodate sink thickness up to 1/2" extended lenght sink ange
available on MOEN.COM.
2