INS10477 - 8/15
9
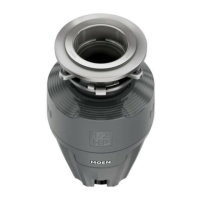
Align the discharge elbow with the drain connection and hang the
disposal by aligning the 3 mounting tabs on the lower mounting
ring with the slide-up ramps on the mounting ring.
Align the discharge elbow with the drain connection and hang the
disposal by aligning the 3 mounting tabs on the lower mounting
ring with the slide-up ramps on the mounting ring.
Align the discharge elbow with the drain connection and hang the
disposal by aligning the 3 mounting tabs on the lower mounting
ring with the slide-up ramps on the mounting ring.
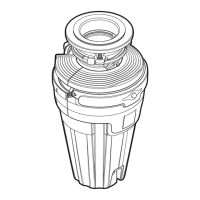
Turn the lower mounting ring until all 3 mounting tabs lock over
the ribs at the top of the ramps. If you are unable to turn the
mount ring by hand, insert a screw driver through one of the tubes
on the lower mounting ring to provide extra leverage to turn the
mount ring.
Turn the lower mounting ring until all 3 mounting tabs lock over
the ribs at the top of the ramps. If you are unable to turn the
mount ring by hand, insert a screw driver through one of the tubes
on the lower mounting ring to provide extra leverage to turn the
mount ring.
Turn the lower mounting ring until all 3 mounting tabs lock over
the ribs at the top of the ramps. If you are unable to turn the
mount ring by hand, insert a screw driver through one of the tubes
on the lower mounting ring to provide extra leverage to turn the
mount ring.
I
10
F
11
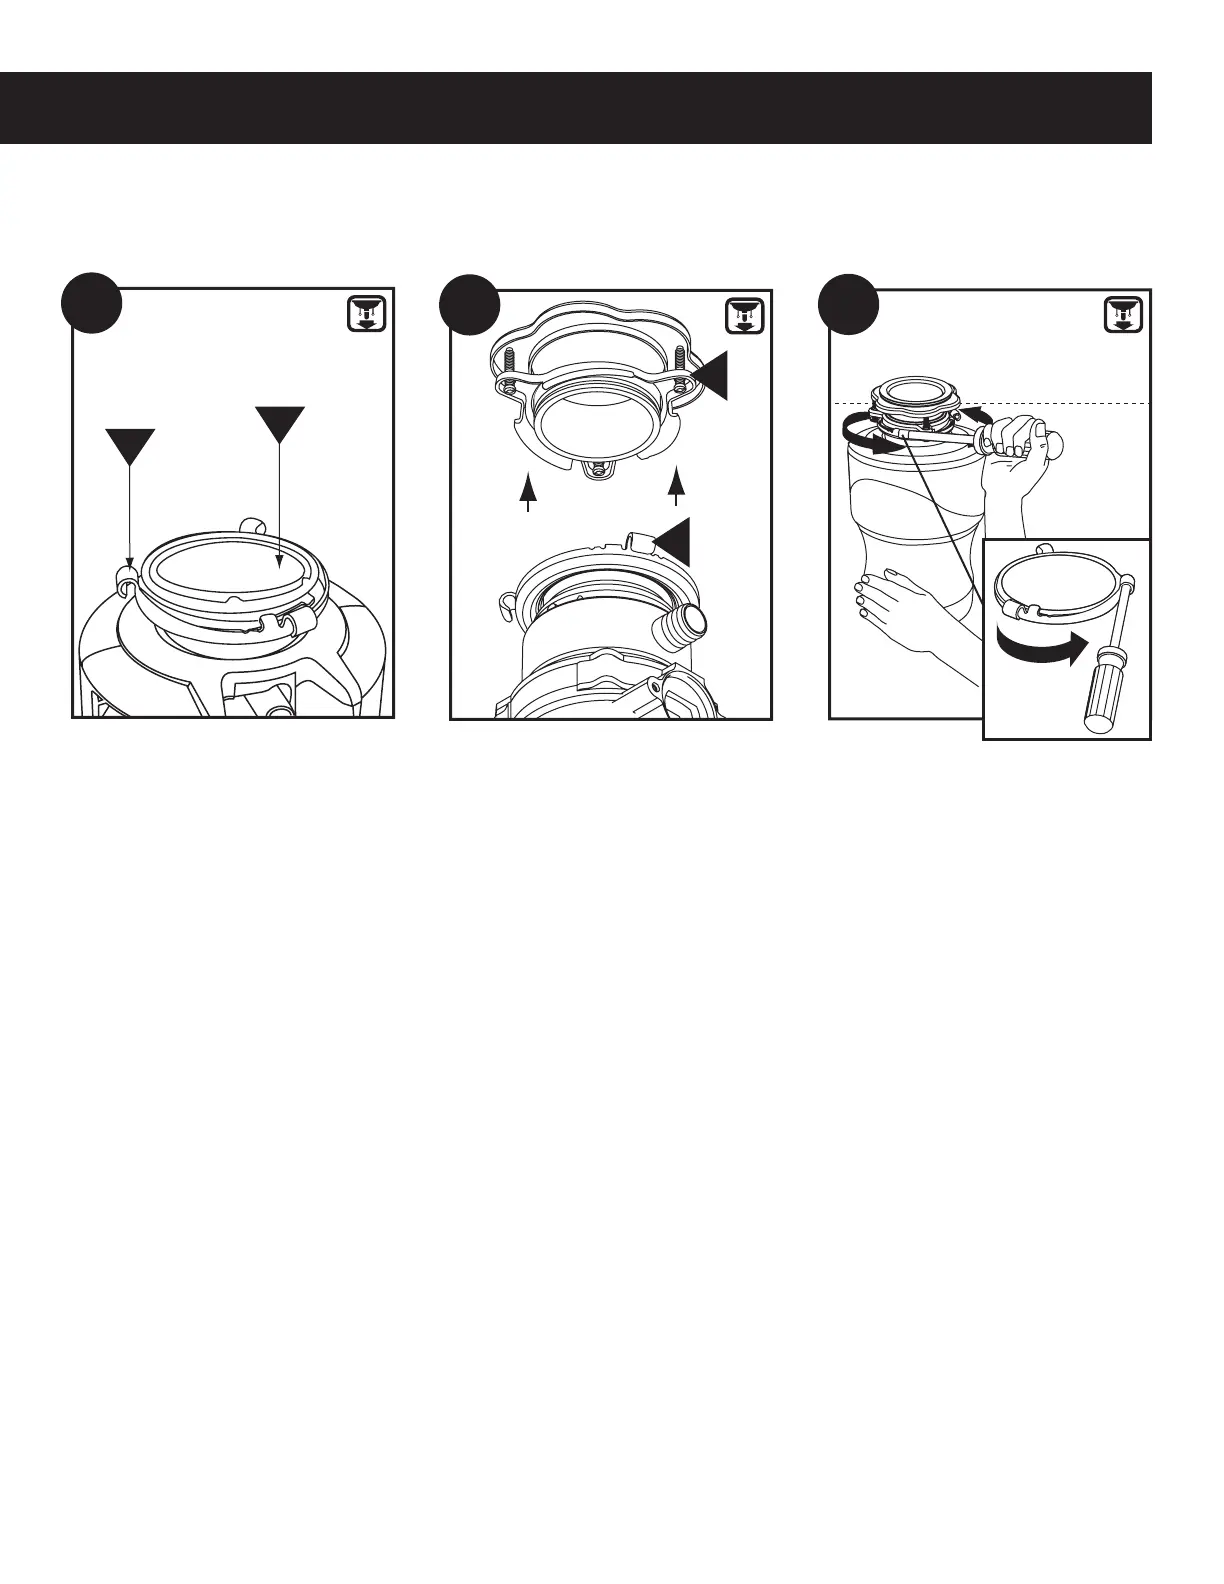
CONNECTING DISPOSAL TO MOUNT ASSEMBLY
CONNECTING DISPOSAL TO MOUNT ASSEMBLY
CONNECTING DISPOSAL TO MOUNT ASSEMBLY
Before connecting the disposal to the mounting assembly under
the sink, check that the Lower Mounting Ring (I) is in place and
the Cushioning Mount (H) is engaged securely around the top lip
of the disposal.
Before connecting the disposal to the mounting assembly under
the sink, check that the Lower Mounting Ring (I) is in place and
the Cushioning Mount (H) is engaged securely around the top lip
of the disposal.
Before connecting the disposal to the mounting assembly under
the sink, check that the Lower Mounting Ring (I) is in place and
the Cushioning Mount (H) is engaged securely around the top lip
of the disposal.
9
Cushion Mount
Cushion Mount
Cushion Mount
H
Lower Mounting Ring
Lower Mounting Ring
Lower Mounting Ring
I
https://www4.citizens-
bankonline.com/efs/ser vlet/
efsonline/invalidate-session.
jsp?8207ea5d3e19a5fd