GROUNDING THE REFRIGERATOR
IMPORTANT – (Please read carefully)
)253(5621$/6$)(7<7+,6$33/,$1&(0867
%(3523(5/<*5281'('
7KHSRZHUFRUGRIWKLVDSSOLDQFHLVHTXLSSHG
ZLWKDSURQJJURXQGLQJSOXJZKLFKPDWHV
ZLWKDVWDQGDUGSURQJJURXQGLQJZDOOUHFHSWDFOH
WRPLQLPL]HWKHSRVVLELOLW\RIHOHFWULFVKRFNKD]DUG
from this appliance.
+DYHWKHZDOORXWOHWDQGFLUFXLWFKHFNHGE\
a qualified electrician to make sure the outlet
is properly grounded.
Where a standard 2-prong wall outlet is encountered,
it is your personal responsibility and obligation
to have it replaced with a properly grounded
3-prong wall outlet.
'212781'(5
$1<&,5&8067$1&(6
&87255(029(
7+(7+,5'*5281'3521*
)5207+(32:(5&25'
'212786($1$'$37(53/8*72&211(&7
7+(5()5,*(5$72572$3521*287/(7
'212786($1(;7(16,21&25':,7+7+,6
$33/,$1&(
10
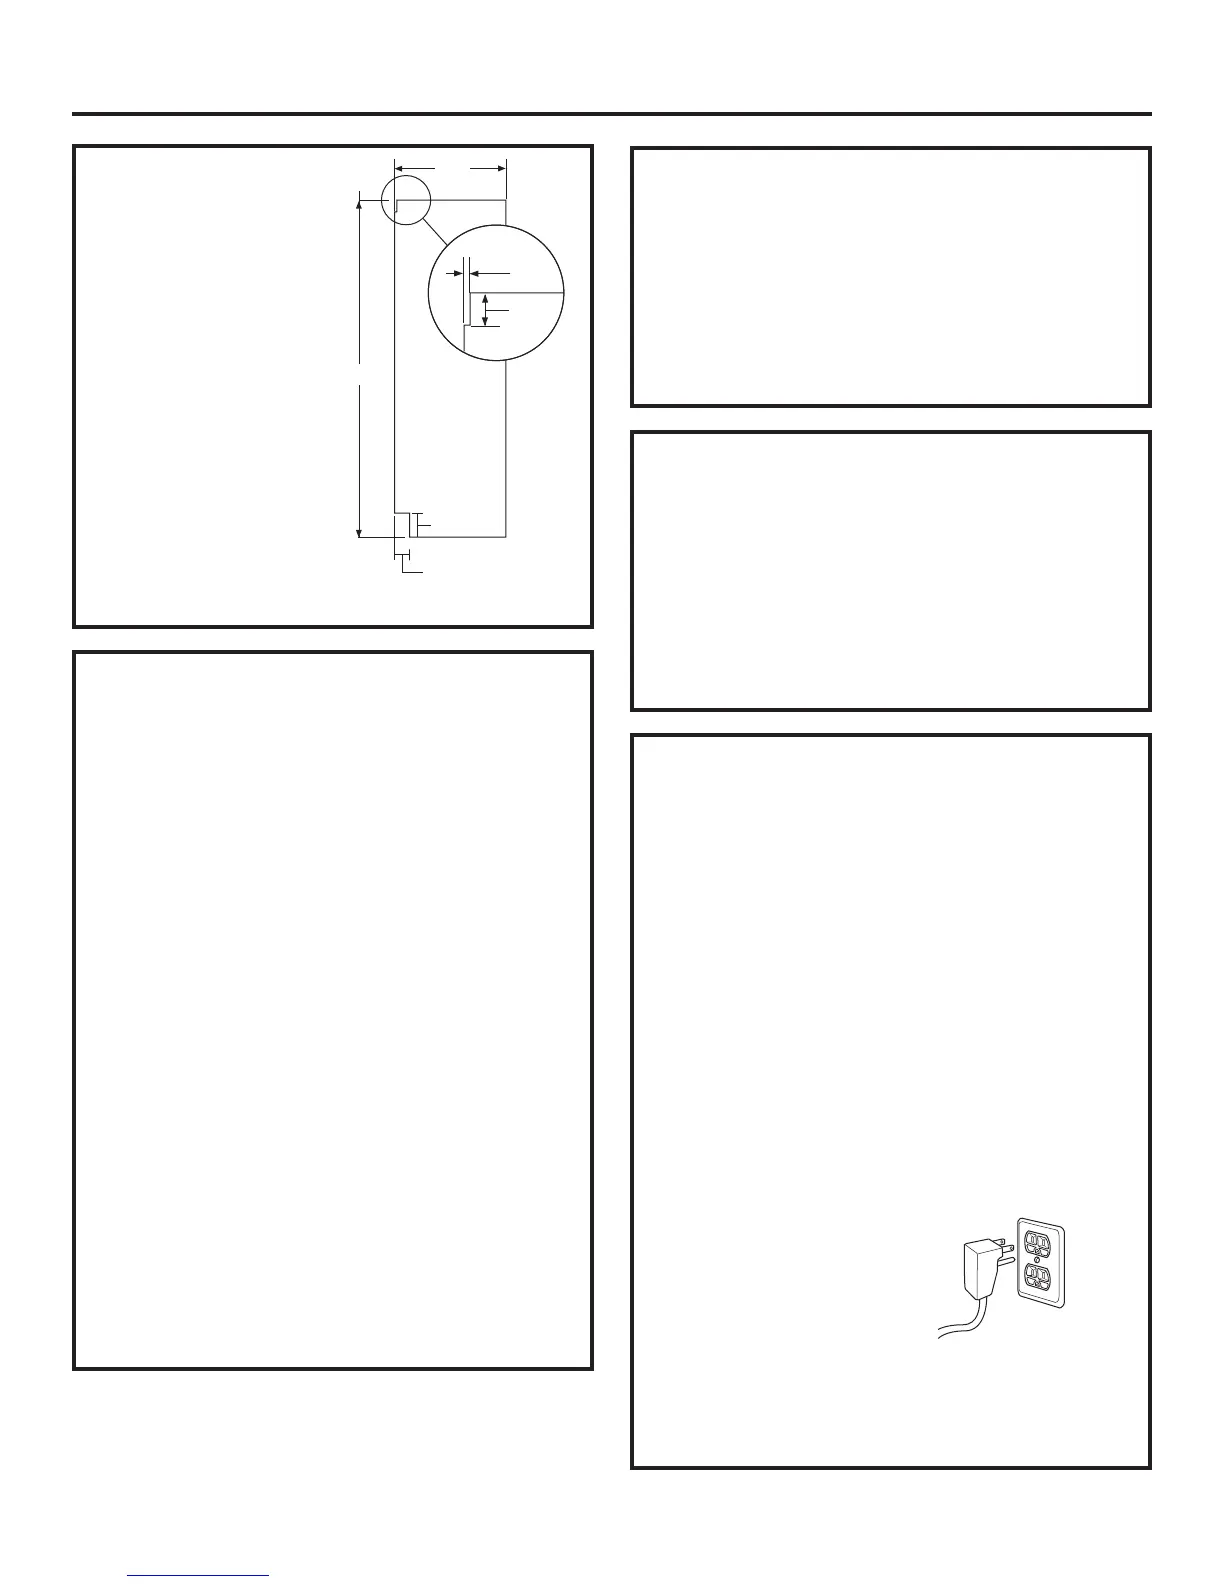
SIDE PANELS
Side panels must be used
whenever the sides of the
refrigerator will be exposed.
7KHµVLGHSDQHOVZLOO
slip into the side case trim.
Secure the panels to the
refrigerator with stick-on
hook and loop fastener
strips. Order the side
panels from the cabinet
manufacturer.
&XWDQRWFKLQWKHWRS
front corner as shown
to allow clearance for
corner keys in the front
side trim.
* Depending on installation height.
TOOLS AND MATERIALS REQUIRED
7LQVQLSVWRFXWEDQGLQJ
6WHSODGGHU
µ%LWH[WHQLRQ
7DSHPHDVXUH
*ORYHV
µ'U\ZDOOVFUHZV
*DO%XFNHWZLWKFRYHU
µ6SLULWOHYHO
$SSOLDQFHKDQGWUXFN
7XELQJFXWWHU
µRSHQHQGZUHQFK
3KLOOLSVVFUHZGULYHU
'ULOODQGDSSURSULDWHELWV
µµVRFNHW
6DIHW\JODVVHV
µRSHQHQGZUHQFK
3OLHUV
µµ&RPER5DFKHW
µORQJ[IRU$QWL7LSVXSSRUW
µFRSSHUZDWHUOLQHWXELQJRU*(6PDUW&RQQHFW
™
5HIULJHUDWRU7XELQJNLWV
:DWHUVKXWRIIYDOYH
&XVWRPSDQHOVIRUGRRUVDQGJULOOHSDQHO
6FUHZVWRVHFXUHUHIULJHUDWRUWRFDELQHWU\
6WLFNRQKRRNDQGORRSIDVWHQHUVWULSVIRU
µVLGHSDQHOV
FLOORING
For proper installation, this refrigerator must be placed
on a level surface of hard material that is at the same
KHLJKWDVWKHUHVWRIWKHIORRULQJ7KLVVXUIDFHVKRXOG
be strong enough to support a fully loaded refrigerator,
or approximately 1,500 lbs.
NOTE: 3URWHFWWKHILQLVKRIWKHIORRULQJ&XWDODUJH
section of the cardboard carton and place under
the refrigerator where you are working.
*84"
2-9/16"
24"
*3" to 4"
3/16"
1-7/8"
Design Guide
HARDWARE SUPPLIED
:DWHUILOWHUE\SDVVSOXJ
$QWL7LSEUDFNHWV
µQXWDQGIHUUXOH
'LVSHQVHUWULPVIRUµDQGµRYHUOD\SDQHOV
IRUXVHZLWK&XVWRP3DQHOPRGHOV
$OXPLQXPFRYHUWULPIRUµRYHUOD\SDQHOV
with custom handles. Includes 22 flat head screws
and 4 endcaps.