MOONEY INTERNATIONAL CORPORATION
M20V SERVICE AND MAINTENANCE
Page
Date
6
MAR 2017
Rev Date
-CAUTION-
Exercise care during this operation to avoid
scratching acrylic. Considerable effort may
be required to break the sealant bond.
1. Preparation
a. Avoid scratching the paint by applying masking
tape and butcher paper (or equivalent) around the
edges of the composite shell where the shell meets the
windshield.
b. Remove the decorative bead and break sealant
bond between acrylic and skins around the windshield
with a plexiglass scraper. (See Figure 56-2)
-CAUTION-
DO NOT USE METAL RAZOR BLADES OR
SCRAPERS TO REMOVE THE SEALANT AS
THIS MAY SCRATCH THE WINDSHIELD OR
THE COMPOSITE SHELL.
PLEXIGLASS
SCRAPER
REMOVE BEAD AND SEALANT WITH
PLEXIGLASS SCRAPER
FIGURE 56-2
c. Remove both dash panels.
2. Removal of Windshield
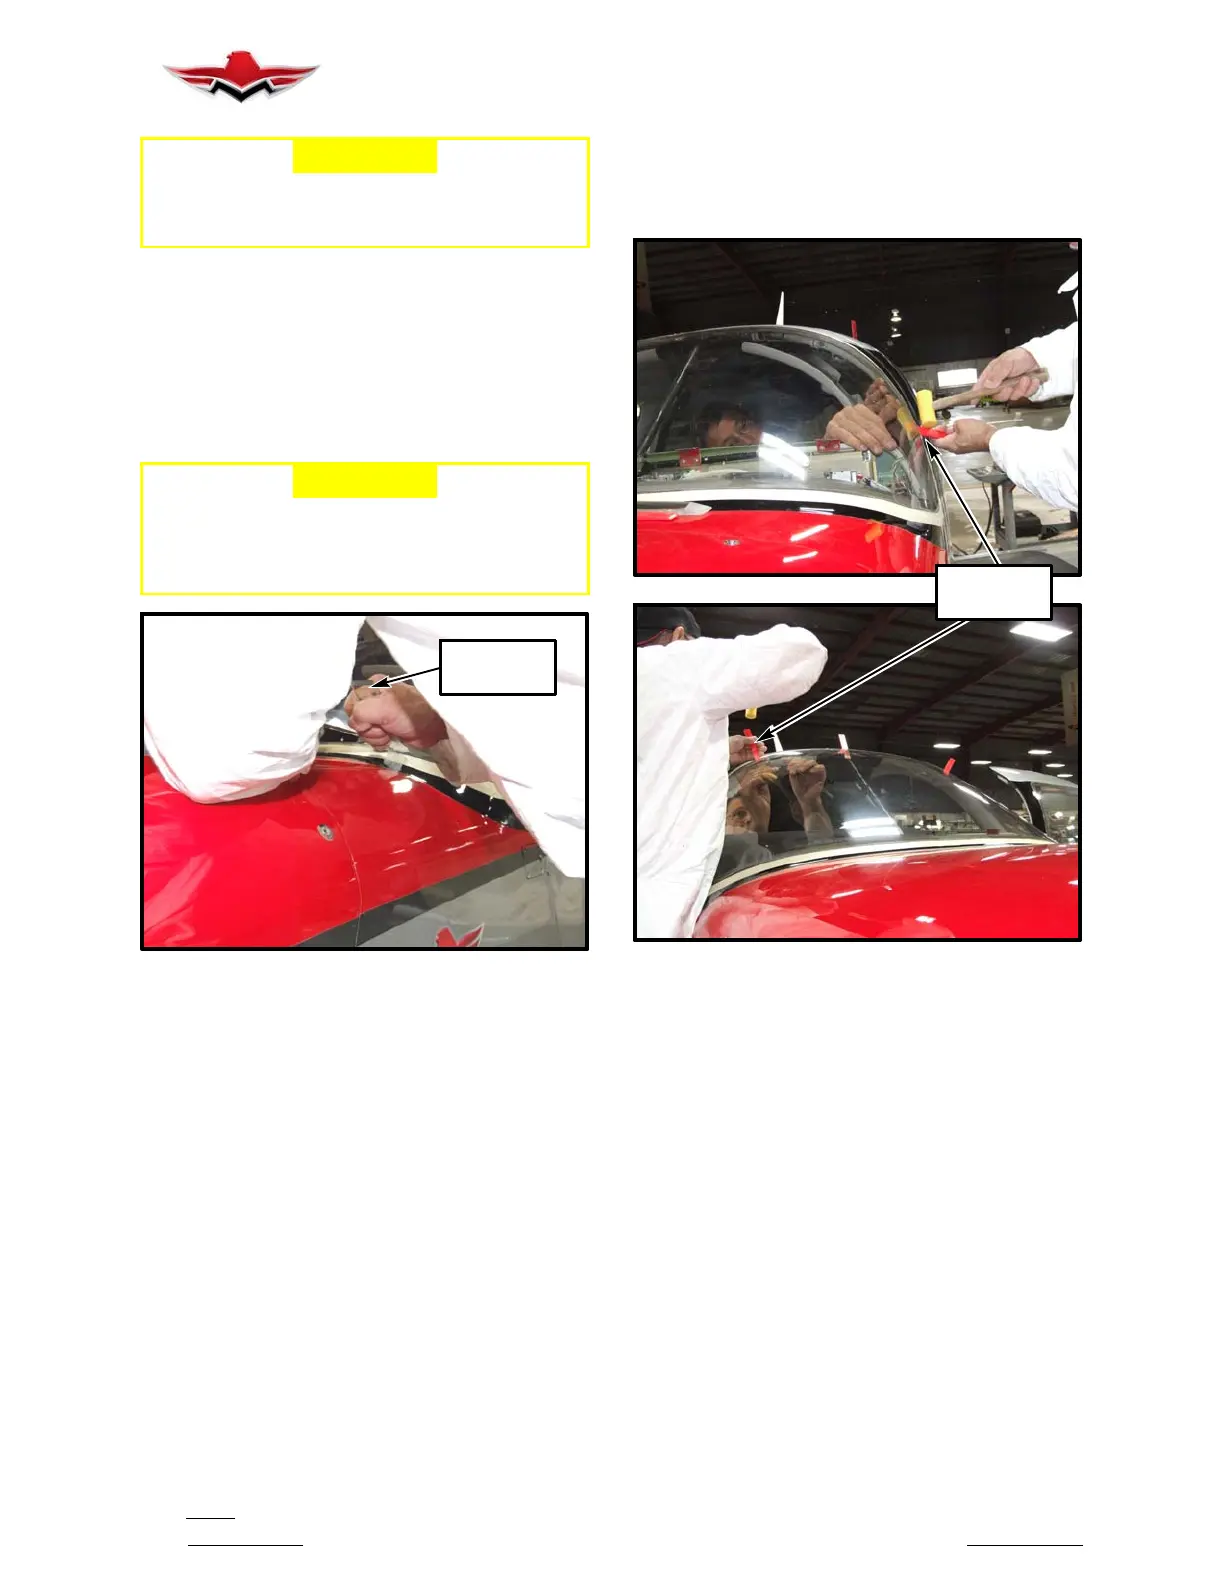
a. Have one person inside the cockpit to gently
push outward on the windshield while two other people
on the exterior of the aircraft insert plastic wedges
around the edges of the windshield. Wedges are insert-
ed along the perimeter of the windshield, in between
the windshield and the composite shell, by gently tap-
ping on the wedge with a plastic hammer. (See Figure
56-3)
GENTLY TAP
ON WEDGES
INSERT PLASTIC WEDGES
FIGURE 56-3
b. Once the windshield is sufficiently loosened and
with the person in the cockpit still pushing gently on the
windshield, the people on the exterior of the aircraft can
begin to gently pull windshield away from its location
starting at lower portion and work it loose as sealant
bond is broken around edge of acrylic. Insert additional
wedges as needed until the windshield is freed. (See
Figure 56-4)
56-21-01
 Loading...


