MOONEY INTERNATIONAL CORPORATION
M20V SERVICE AND MAINTENANCE
Page
Date
7
MAR 2017
Rev Date
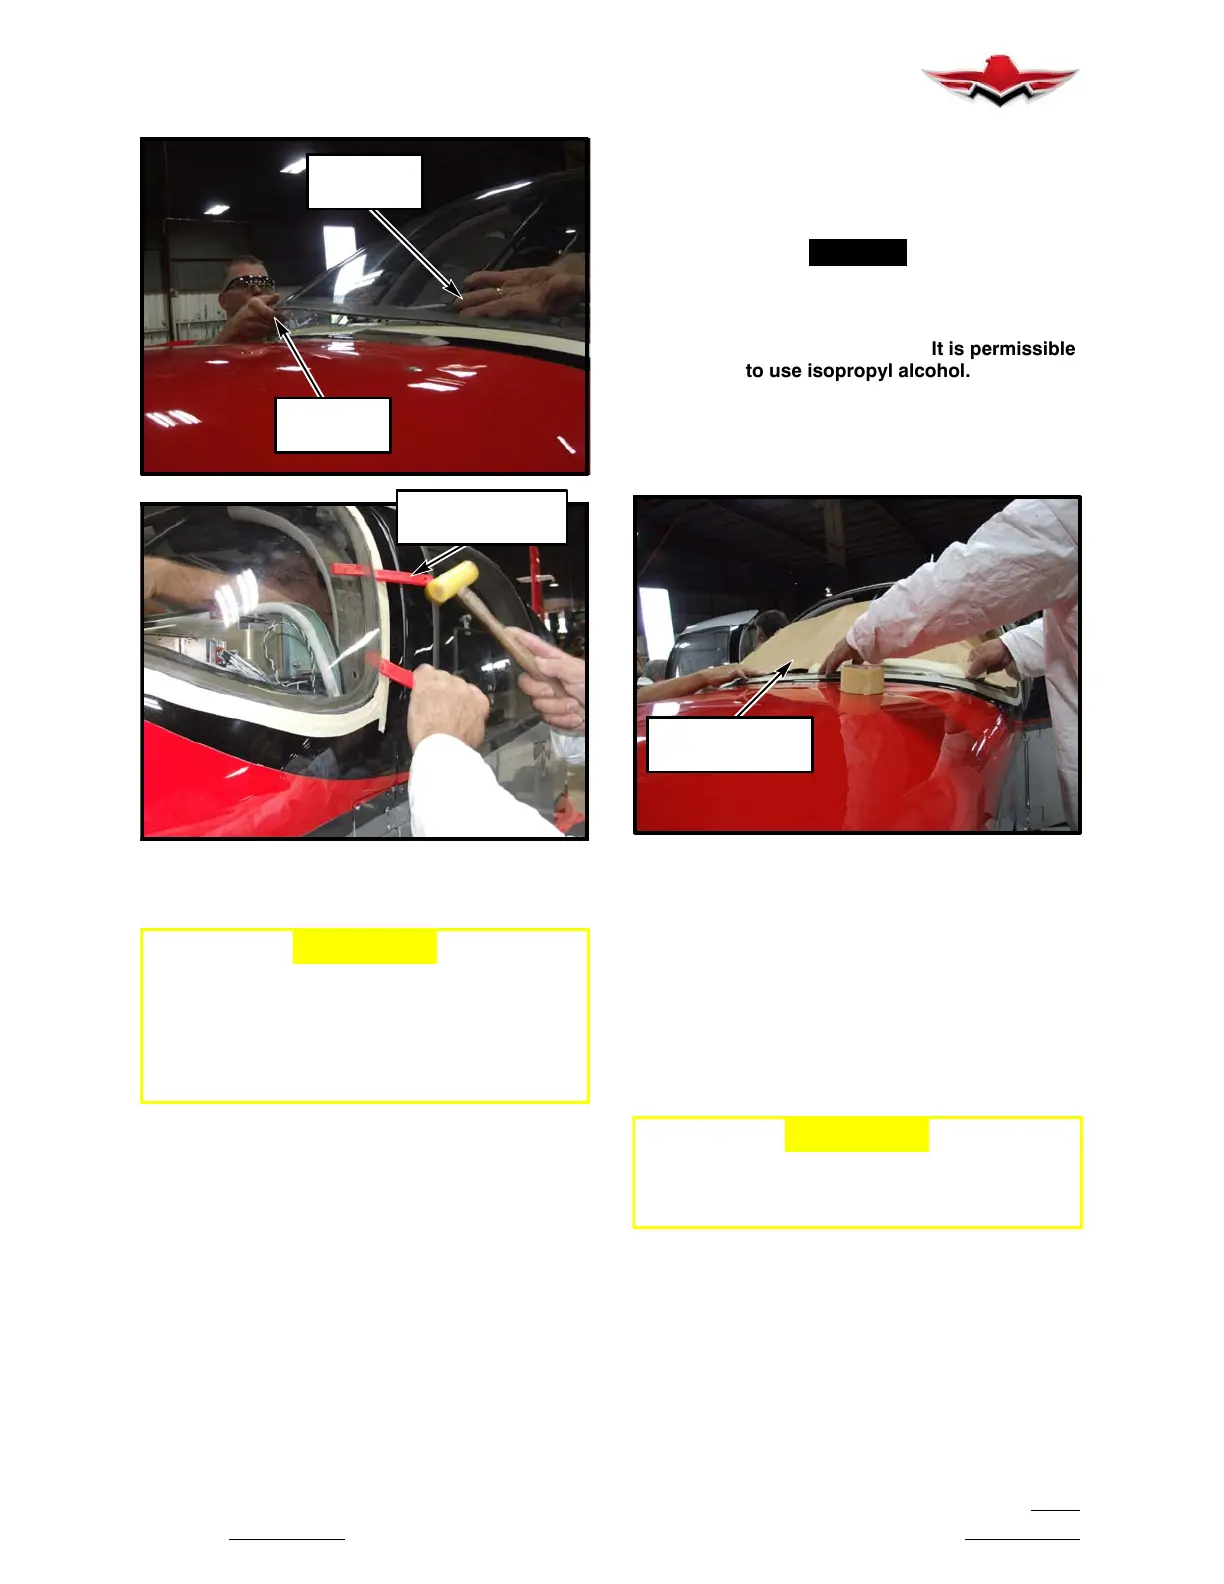
PUSH FROM
INSIDE
ADD MORE WEDGES
IF NECESSARY
PULL FROM
OUTSIDE
REMOVE WINDSHIELD
FIGURE 56-4
-CAUTION-
Exercise care to prevent removal of compos-
ite shell from fuselage when cutting and re -
moving sealant from between fuselage and
windshield. If composite shell is damaged, it
must be repaired prior to installing acrylic
glass, refer to Chapter 51 for details.
56- 21- 02 - WINDSHIELD INSTALLATION
1. Removal of Peripheral Objects
a. To keep the peripheral area of the windshield
free of sealer and damage and to better access the
windshield, remove the following items:
S Visors
S Handles along door frame
S Seat belts
S Front seats
S Side and overhead interior panels toward the front of
the aircraft
S Escutcheons along side and bottom of control panel
S Other panel hardware as required, to loosen panels
enough to access windshield (along top and front of
door frame)
2. Clean Mating Surfaces
-NOTE-
DO NOT USE CHEMICALS OR SOLVENTS. Dam-
age may result if drops of solvents come in con-
tact with either exterior paint, composite shell,
interior trim or acrylic surfaces. It is permissible
to use isopropyl alcohol.
a. Tape butcher paper over the electronics in the
deck with masking tape to prevent Foreign Object De-
bris (FOD) from falling into electronics. (See Figure
56-5)
TAPE PAPER OVER
ELECTRONICS
PROTECT ELECTRONICS
FIGURE 56-5
b. Scrape all sealant out of the channel on the com-
posite shell.
c. Scrape all sealant from the windshield (if wind-
shield is to be reinstalled).
d. Vacuum loose FOD from plane surfaces.
e. Clean all residual sealant off composite shell
and windshield with Kleanz Easy surface cleaner and a
gauze cloth. (See Figure 56- 11)
-CAUTION-
BE SURE TO REMOVE ALL SEALANT FROM
MATING SURFACES, AS NEW SEALANT WILL
NOT ADHERE TO OLD SEALANT.
f. Tape off windshield with masking tape and paper.
3. Installation of Windshield
a. Trial fit new windshield to ensure proper nesting
in windshield retaining cavity.
a. Place new carbon fiber bonding rods (0.050” di-
ameter, 0.25” length) around the channel to create a
uniform sealant gap and to allow acrylic glass to be
flush with outer shell. (See Figure 56-6)
56-21-01
 Loading...


